O U T
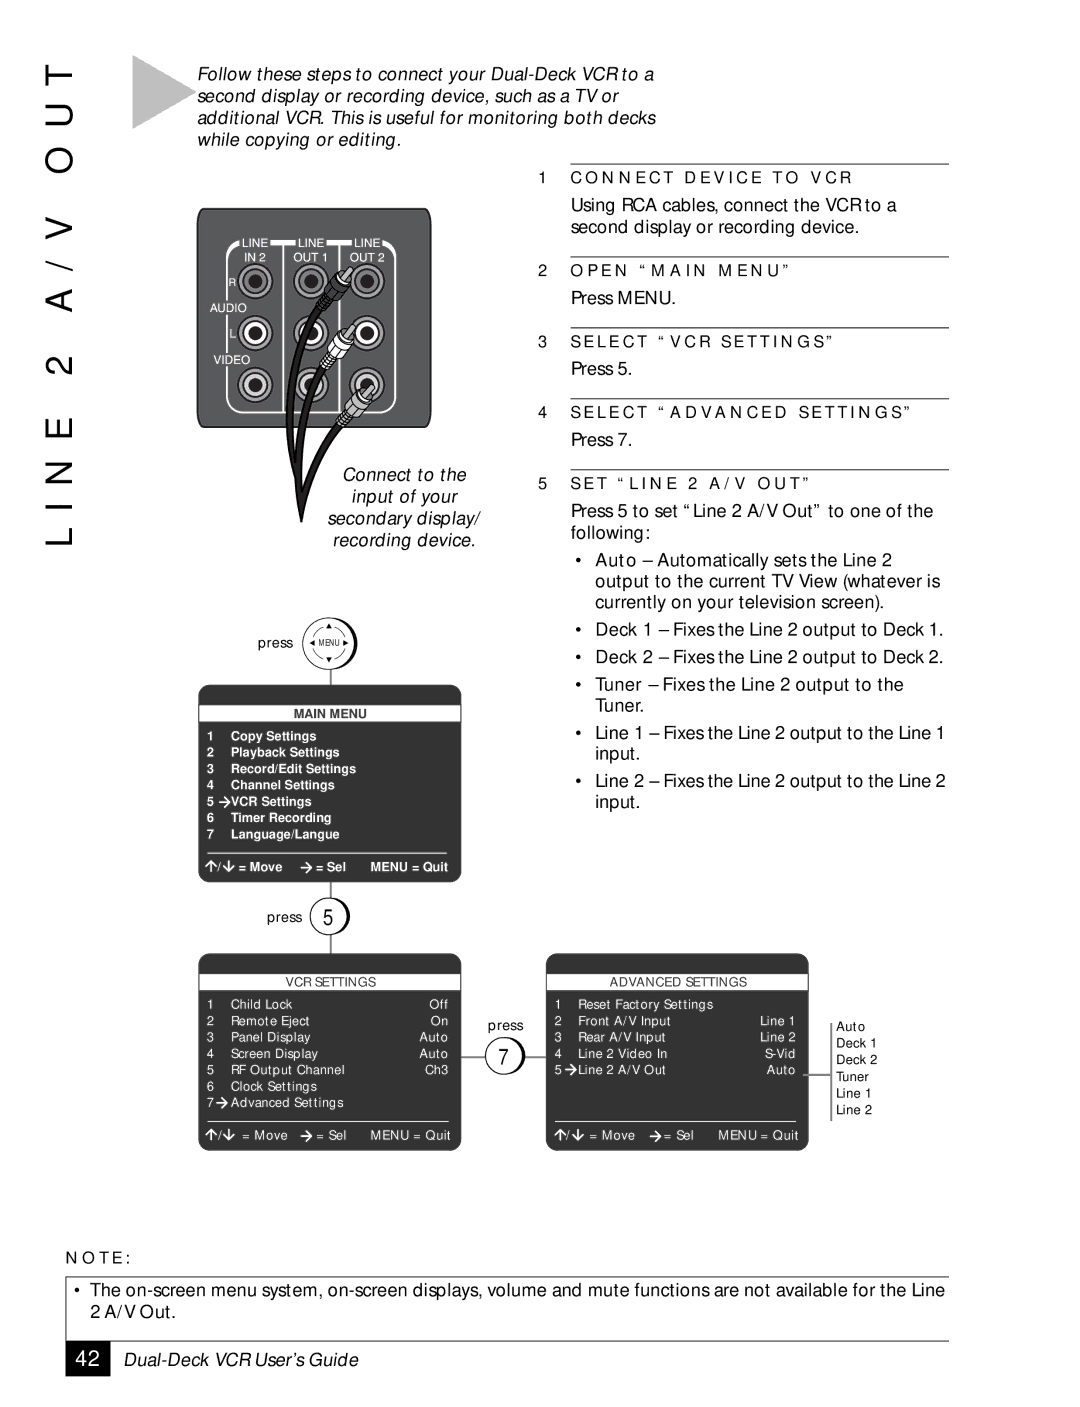
Follow these steps to connect your
L I N E 2 A / V
Connect to the
input of your
secondary display/ recording device.
press ![]() MENU
MENU ![]()
MAIN MENU
1Copy Settings
2Playback Settings
3Record/Edit Settings
4Channel Settings
5VCR Settings
6Timer Recording
7Language/Langue
1C O N N E C T D E V I C E T O V C R
Using RCA cables, connect the VCR to a second display or recording device.
2O P E N “ M A I N M E N U ”
Press MENU.
3S E L E C T “ V C R S E T T I N G S ”
Press 5.
4S E L E C T “ A D V A N C E D S E T T I N G S ”
Press 7.
5S E T “ L I N E 2 A / V O U T ”
Press 5 to set “Line 2 A/V Out” to one of the following:
•Auto – Automatically sets the Line 2 output to the current TV View (whatever is currently on your television screen).
•Deck 1 – Fixes the Line 2 output to Deck 1.
•Deck 2 – Fixes the Line 2 output to Deck 2.
•Tuner – Fixes the Line 2 output to the Tuner.
•Line 1 – Fixes the Line 2 output to the Line 1 input.
•Line 2 – Fixes the Line 2 output to the Line 2 input.
/ = Move | = Sel MENU = Quit |
press | 5 |
| VCR SETTINGS |
|
|
| ADVANCED SETTINGS |
| |
1 | Child Lock |
| Off |
| 1 | Reset Factory Settings |
|
2 | Remote Eject |
| On | press | 2 | Front A/V Input | Line 1 |
3 | Panel Display |
| Auto | 7 | 3 | Rear A/V Input | Line 2 |
4 | Screen Display |
| Auto | 4 | Line 2 Video In | ||
5 | RF Output Channel | Ch3 |
| 5 | Line 2 A/V Out | Auto | |
6Clock Settings
7Advanced Settings
/ = Move = Sel MENU = Quit | / = Move = Sel MENU = Quit |
Auto
Deck 1
Deck 2
Tuner
Line 1
Line 2
N O T E :
•The
42