I N G S
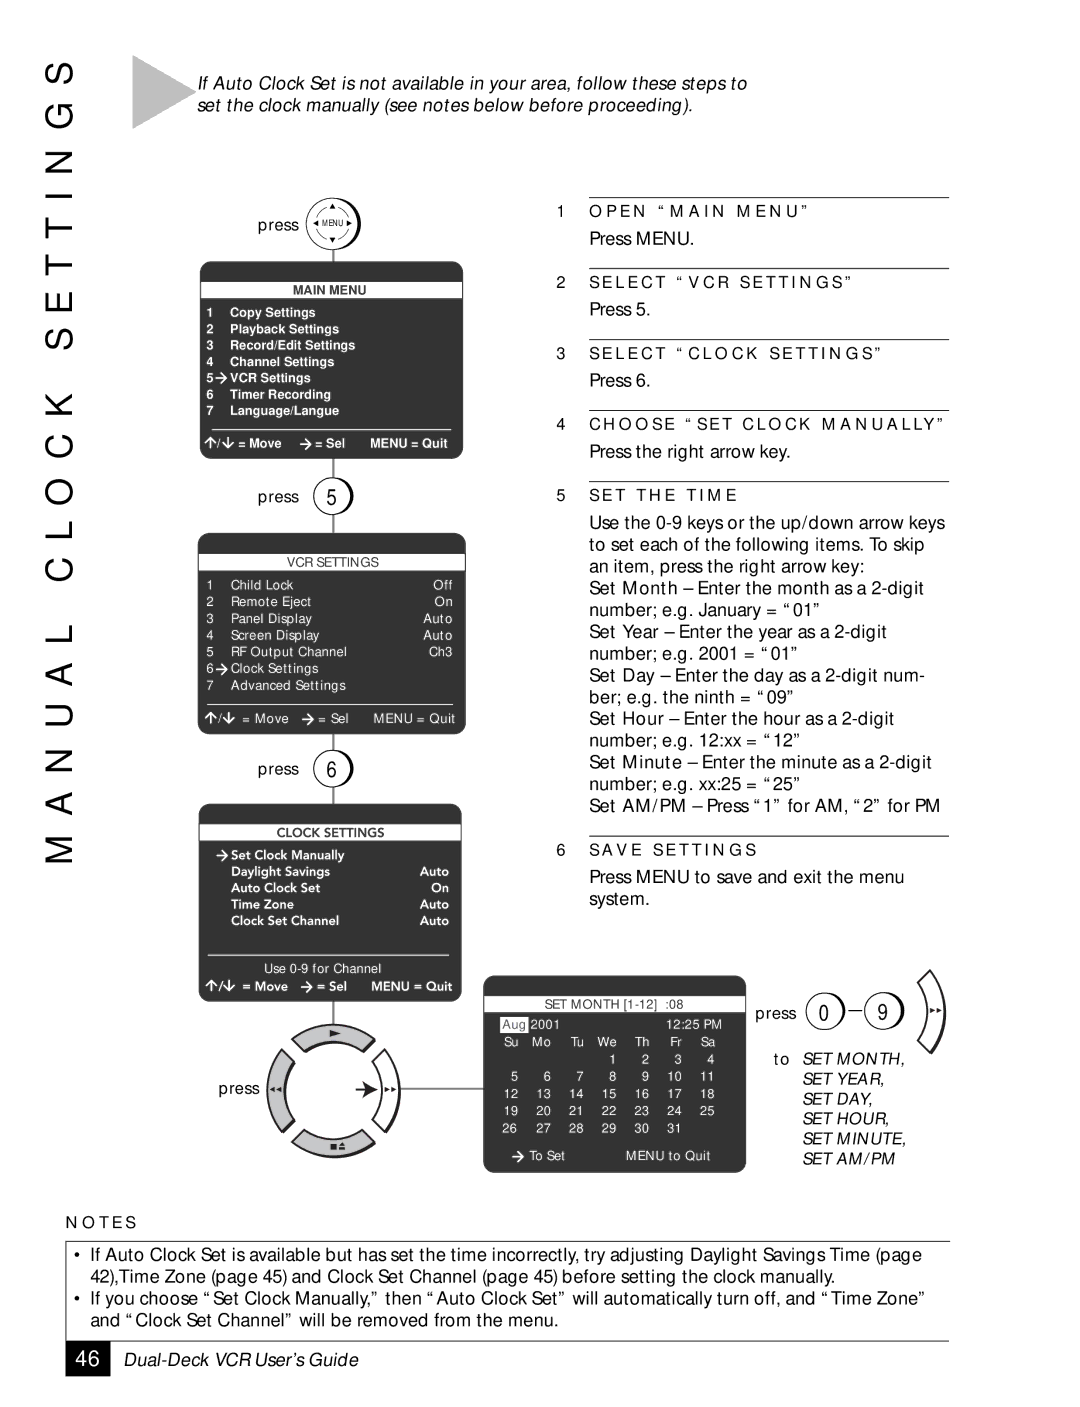
If Auto Clock Set is not available in your area, follow these steps to set the clock manually (see notes below before proceeding).
M A N U A L C L O C K S E T T
press ![]() MENU
MENU ![]()
MAIN MENU
1 | Copy Settings |
| |
2 | Playback Settings |
| |
3 | Record/Edit Settings |
| |
4 | Channel Settings |
| |
5 | VCR Settings |
|
|
6 | Timer Recording |
| |
7 | Language/Langue |
| |
/ | = Move | = Sel | MENU = Quit |
| press | 5 |
|
VCR SETTINGS
1 | Child Lock |
| Off |
2 | Remote Eject |
| On |
3 | Panel Display |
| Auto |
4 | Screen Display | Auto | |
5 | RF Output Channel | Ch3 | |
6 | Clock Settings |
|
|
7 | Advanced Settings |
| |
/ | = Move | = Sel | MENU = Quit |
| press | 6 |
|
1O P E N “ M A I N M E N U ”
Press MENU.
2S E L E C T “ V C R S E T T I N G S ”
Press 5.
3S E L E C T “ C L O C K S E T T I N G S ”
Press 6.
4C H O O S E “ S E T C L O C K M A N U A L LY ”
Press the right arrow key.
5S E T T H E T I M E
Use the
Set Month – Enter the month as a
Set Year – Enter the year as a
Set Day – Enter the day as a
Set Hour – Enter the hour as a
Set Minute – Enter the minute as a
Set AM/PM – Press “1” for AM, “2” for PM
6S AV E S E T T I N G S
N O T E S
|
|
|
| Press MENU to save and exit the menu | ||||||
|
|
|
| system. |
|
|
|
|
| |
| Use |
|
|
|
|
|
|
|
|
|
|
| SET MONTH |
| press | 0 | 9 | ||||
| Aug 2001 |
|
|
| 12:25 PM | |||||
|
|
|
|
|
|
| ||||
| Su | Mo | Tu | We | Th | Fr | Sa |
| SET MONTH, | |
|
|
|
| 1 | 2 | 3 | 4 | to | ||
press | 5 | 6 | 7 | 8 | 9 | 10 | 11 |
| SET YEAR, | |
12 | 13 | 14 | 15 | 16 | 17 | 18 |
| SET DAY, |
| |
|
|
| ||||||||
| 19 | 20 | 21 | 22 | 23 | 24 | 25 |
| SET HOUR, | |
| 26 | 27 | 28 | 29 | 30 | 31 |
|
| ||
|
|
| SET MINUTE, | |||||||
|
|
|
|
|
|
|
|
| ||
|
| To Set |
|
| MENU to Quit |
| SET AM/PM | |||
•If Auto Clock Set is available but has set the time incorrectly, try adjusting Daylight Savings Time (page 42),Time Zone (page 45) and Clock Set Channel (page 45) before setting the clock manually.
•If you choose “Set Clock Manually,” then “Auto Clock Set” will automatically turn off, and “Time Zone” and “Clock Set Channel” will be removed from the menu.
46