Follow these steps to activate Cable Box Control, which uses the supplied “Cable Mouse” to automatically select channels on your cable box when programming VCR Plus+ or standard Timer Recordings.
C A B
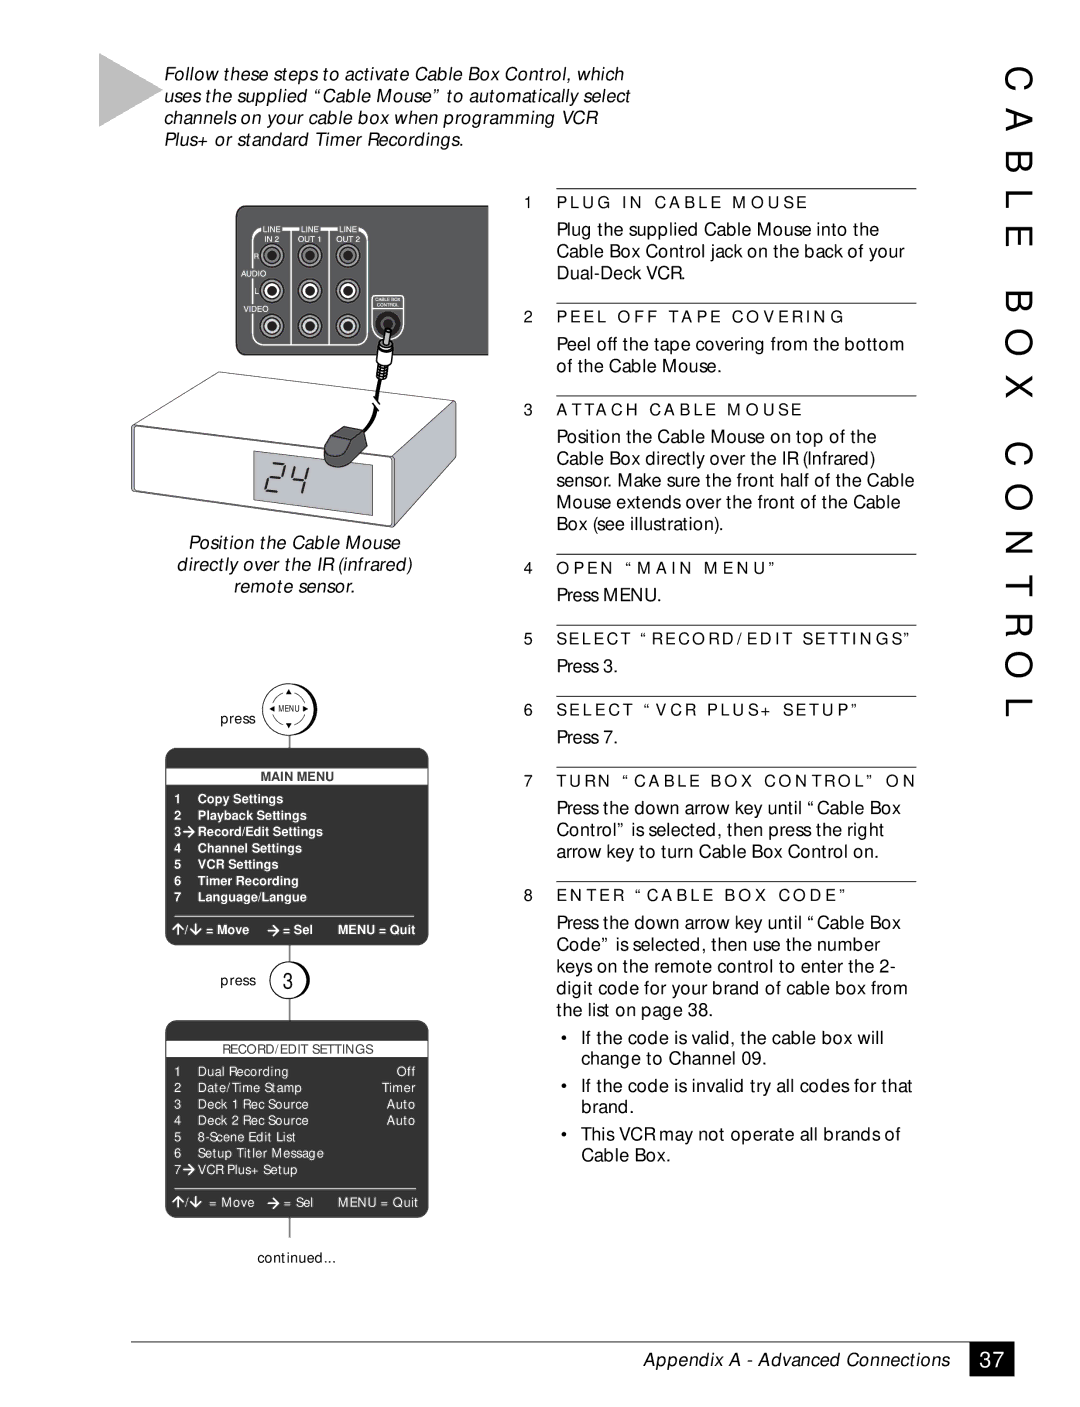
Position the Cable Mouse directly over the IR (infrared) remote sensor.
1 | P L U G I N C A B L E M O U S E |
| Plug the supplied Cable Mouse into the |
| Cable Box Control jack on the back of your |
| |
|
|
2 | P E E L O F F T A P E C O V E R I N G |
| Peel off the tape covering from the bottom |
| of the Cable Mouse. |
|
|
3 | A T TA C H C A B L E M O U S E |
| Position the Cable Mouse on top of the |
| Cable Box directly over the IR (Infrared) |
| sensor. Make sure the front half of the Cable |
| Mouse extends over the front of the Cable |
| Box (see illustration). |
|
|
4 | O P E N “ M A I N M E N U ” |
| Press MENU. |
|
|
5 | S E L E C T “ R E C O R D / E D I T S E T T I N G S ” |
| Press 3. |
L E B O X C O N T R O
press
![]() MENU
MENU ![]()
6 S E L E C T “ V C R P L U S + S E T U P ” |
Press 7. |
L
MAIN MENU
1Copy Settings
2Playback Settings
3Record/Edit Settings
4Channel Settings
5VCR Settings
6Timer Recording
7Language/Langue
/ | = Move | = Sel | MENU = Quit |
| press | 3 |
|
|
| ||
| RECORD/EDIT SETTINGS | ||
1 | Dual Recording | Off | |
2 | Date/Time Stamp | Timer | |
3 | Deck 1 Rec Source | Auto | |
4 | Deck 2 Rec Source | Auto | |
5
6Setup Titler Message
7VCR Plus+ Setup
7 T U R N “ C A B L E B O X C O N T R O L ” O N | ||
| Press the down arrow key until “Cable Box | |
| Control” is selected, then press the right | |
| arrow key to turn Cable Box Control on. | |
|
| |
8 E N T E R “ C A B L E B O X C O D E ” | ||
| Press the down arrow key until “Cable Box | |
| Code” is selected, then use the number | |
| keys on the remote control to enter the 2- | |
| digit code for your brand of cable box from | |
| the list on page 38. | |
| • | If the code is valid, the cable box will |
|
| change to Channel 09. |
| • | If the code is invalid try all codes for that |
|
| brand. |
| • | This VCR may not operate all brands of |
|
| Cable Box. |
/ = Move = Sel MENU = Quit
continued...
Appendix A - Advanced Connections
37