•The time can be set using either the
•If an attempt is made to store an invalid time, you cannot move the cursor to the next entering. Enter the correct time and follow the next procedure.
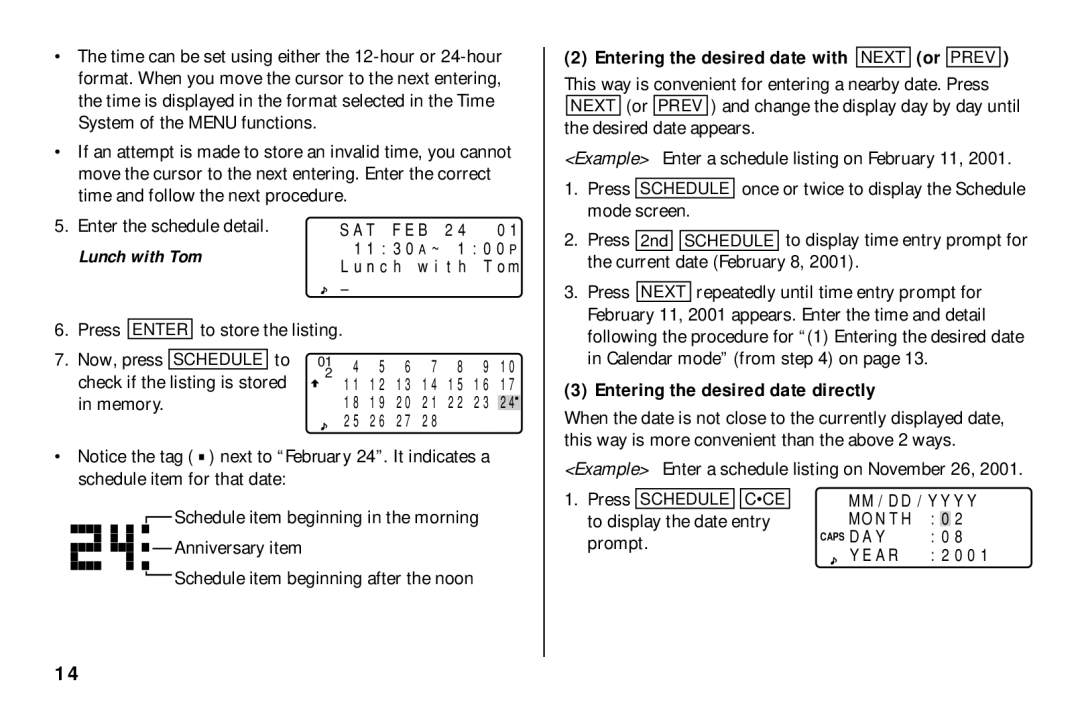
5. | Enter the schedule detail. | SAT FEB 24 '01 | ||||||
| Lunch with Tom | 11:30A~ 1:00P | ||||||
| Lunch with Tom | |||||||
|
|
|
|
|
| |||
|
|
|
|
|
| – |
|
|
6. | Press |
|
| to store the listing. |
|
| ||
ENTER |
|
| ||||||
7. | Now, press |
| to |
|
| |||
SCHEDULE | 012 4 5 6 7 | 8 9 10 | ||||||
| check if the listing is stored | 11 12 13 14 | 15 16 17 | |||||
| in memory. | 18 19 20 21 | 22 23 | 24 | ||||
|
|
|
|
|
| 25 26 27 28 |
|
|
•Notice the tag ( ![]() ) next to “February 24”. It indicates a schedule item for that date:
) next to “February 24”. It indicates a schedule item for that date:
(2) Entering the desired date with NEXT (or PREV )
This way is convenient for entering a nearby date. Press NEXT (or PREV ) and change the display day by day until the desired date appears.
<Example> Enter a schedule listing on February 11, 2001.
1.Press SCHEDULE once or twice to display the Schedule mode screen.
2.Press 2nd ![]()
![]() SCHEDULE to display time entry prompt for the current date (February 8, 2001).
SCHEDULE to display time entry prompt for the current date (February 8, 2001).
3.Press NEXT repeatedly until time entry prompt for February 11, 2001 appears. Enter the time and detail following the procedure for “(1) Entering the desired date in Calendar mode” (from step 4) on page 13.
(3) Entering the desired date directly
When the date is not close to the currently displayed date, this way is more convenient than the above 2 ways.
<Example> Enter a schedule listing on November 26, 2001.
![]() Schedule item beginning in the morning
Schedule item beginning in the morning
![]()
![]()
![]()
![]()
![]() Anniversary item
Anniversary item
![]() Schedule item beginning after the noon
Schedule item beginning after the noon
1.Press SCHEDULE ![]()
![]() C•CE to display the date entry prompt.
C•CE to display the date entry prompt.
MM/DD/YYYY
MONTH :02 CAPS DAY :08
YEAR :2001
14
