Settings when using external devices
Labelling input sources
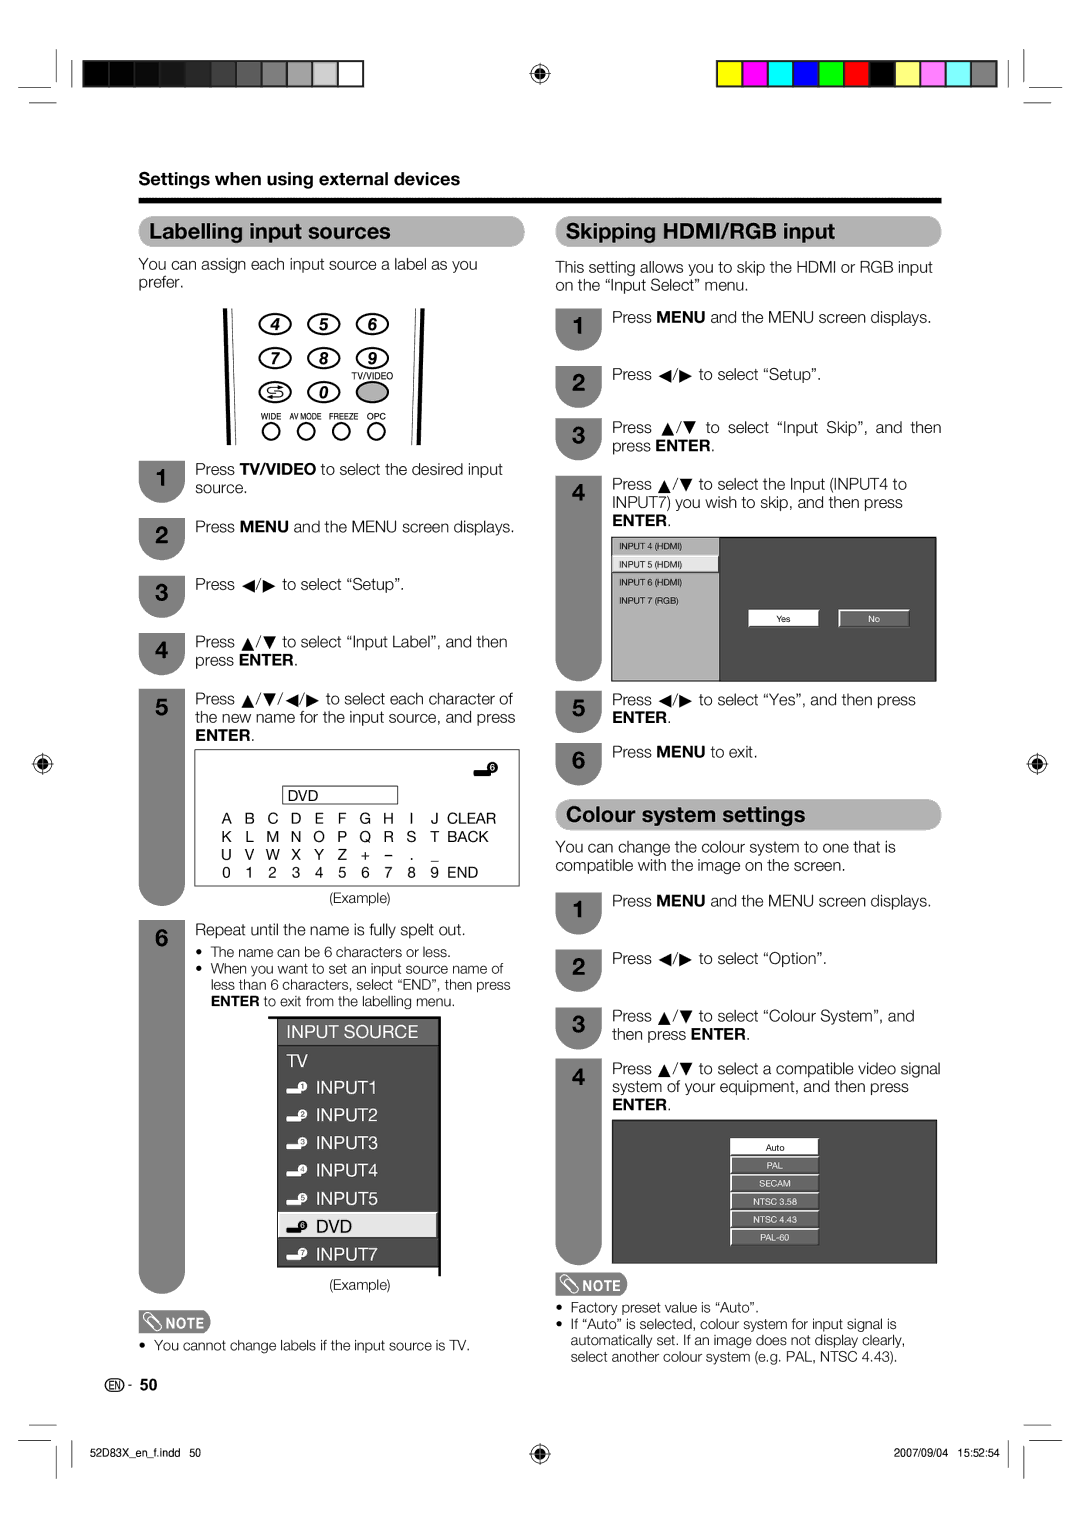
You can assign each input source a label as you prefer.
1Press TV/VIDEO to select the desired input source.
2Press MENU and the MENU screen displays.
3Press c/d to select “Setup”.
4Press a/b to select “Input Label”, and then press ENTER.
5Press a/b/c/d to select each character of the new name for the input source, and press
ENTER.
|
|
| DVD |
|
|
|
|
|
| |
A B C D E | F | G | H | I | J CLEAR | |||||
K | L | M N O | P | Q | R | S | T BACK | |||
U | V W | X | Y | Z | + | _ |
| |||
0 | 1 | 2 | 3 | 4 | 5 | 6 | 7 | 8 | 9 | END |
(Example)
6Repeat until the name is fully spelt out.
•The name can be 6 characters or less.
•When you want to set an input source name of less than 6 characters, select “END”, then press ENTER to exit from the labelling menu.
INPUT SOURCE
TV
![]() INPUT1
INPUT1
![]() INPUT2
INPUT2
![]() INPUT3
INPUT3
![]() INPUT4
INPUT4
![]() INPUT5
INPUT5
![]() DVD
DVD
![]() INPUT7
INPUT7
(Example)
![]() NOTE
NOTE
• You cannot change labels if the input source is TV.
Skipping HDMI/RGB input
This setting allows you to skip the HDMI or RGB input on the “Input Select” menu.
1Press MENU and the MENU screen displays.
2Press c/d to select “Setup”.
3Press a/b to select “Input Skip”, and then press ENTER.
4Press a/b to select the Input (INPUT4 to INPUT7) you wish to skip, and then press
ENTER.
INPUT 4 (HDMI)
INPUT 5 (HDMI)
INPUT 6 (HDMI)
INPUT 7 (RGB)
Yes | No |
5Press c/d to select “Yes”, and then press
ENTER.
6Press MENU to exit.
Colour system settings
You can change the colour system to one that is compatible with the image on the screen.
1Press MENU and the MENU screen displays.
2Press c/d to select “Option”.
3Press a/b to select “Colour System”, and then press ENTER.
4Press a/b to select a compatible video signal system of your equipment, and then press
ENTER.
Auto
PAL
SECAM
NTSC 3.58
NTSC 4.43
![]() NOTE
NOTE
•Factory preset value is “Auto”.
•If “Auto” is selected, colour system for input signal is automatically set. If an image does not display clearly, select another colour system (e.g. PAL, NTSC 4.43).
![]()
![]() 50
50
52D83X_en_f.indd 50
2007/09/04 15:52:54