Setting up the Projector Network Environment
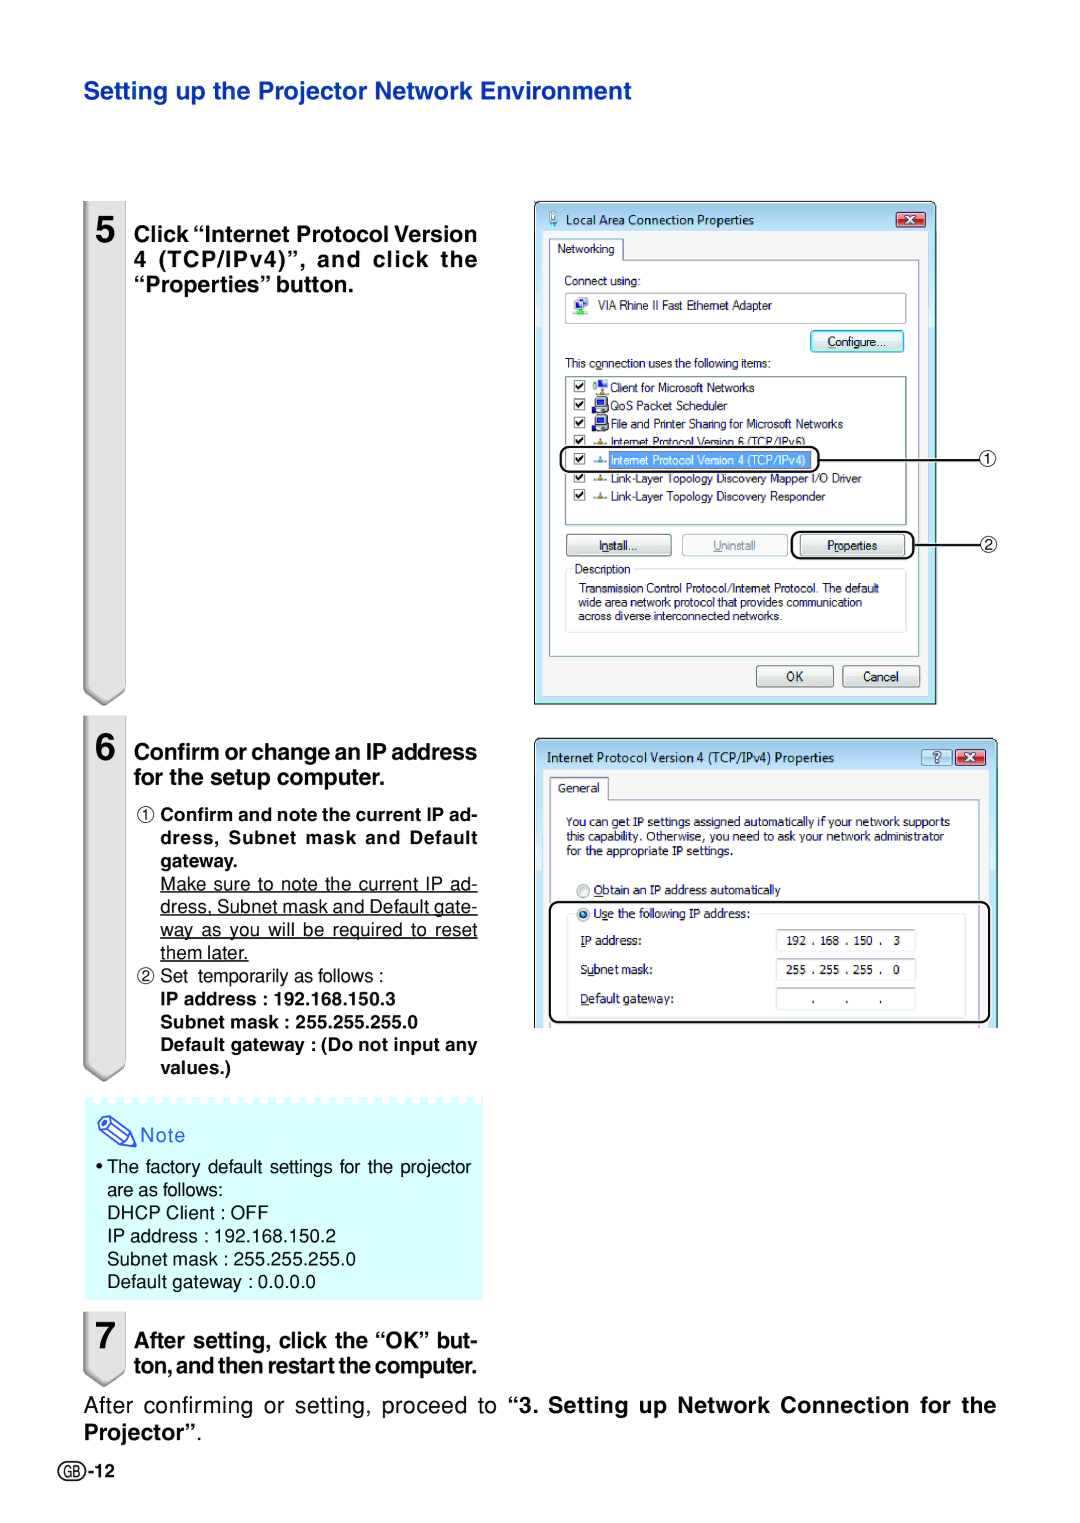
5 Click “Internet Protocol Version
4 (TCP/IPv4)”, and click the “Properties” button.
1
2
6 Confirm or change an IP address for the setup computer.
1Confirm and note the current IP ad- dress, Subnet mask and Default gateway.
Make sure to note the current IP ad- dress, Subnet mask and Default gate-
way as you will be required to reset them later.
2Set temporarily as follows :
IP address : 192.168.150.3
Subnet mask : 255.255.255.0
Default gateway : (Do not input any values.)
![]() Note
Note
•The factory default settings for the projector are as follows:
DHCP Client : OFF
IP address : 192.168.150.2
Subnet mask : 255.255.255.0
Default gateway : 0.0.0.0
7 After setting, click the “OK” but- ton, and then restart the computer.
After confirming or setting, proceed to “3. Setting up Network Connection for the Projector”.
![]() -12
-12