Controlling the Projector via LAN
Setting and Adjusting the
Projector (Settings & Adjustments)
Example:“Picture” screen display for COMPUTER1
On these screens, you can make projector settings or adjustments.You can set or adjust the following items :
•Picture Mode
•CLR Temp
•Progressive (Video)
•Signal Type (Computer, DVI)
•Dynamic Range (DVI)
•Video System (Video)
•Resolution Setting
•Auto Sync
•Resize
•Auto Keystone
•OSD Display
•Background
•Eco+Quiet Mode
•Auto Power Off
•System Sound
•Menu Position
•Auto Restart
•Password
•Internal Speaker
•Audio Out
•Projection Mode
•Fan Mode
•Monitor Out
•
•All Reset
•Language
![]() Note
Note
•If you click the “Refresh” button before the screen is displayed completely, an error mes- sage (“Server Busy Error”) will be displayed. Wait for a moment and then operate again.
•You cannot operate this page while the pro- jector is warming up.
•For details about each item, refer to the projector’s operation manual.
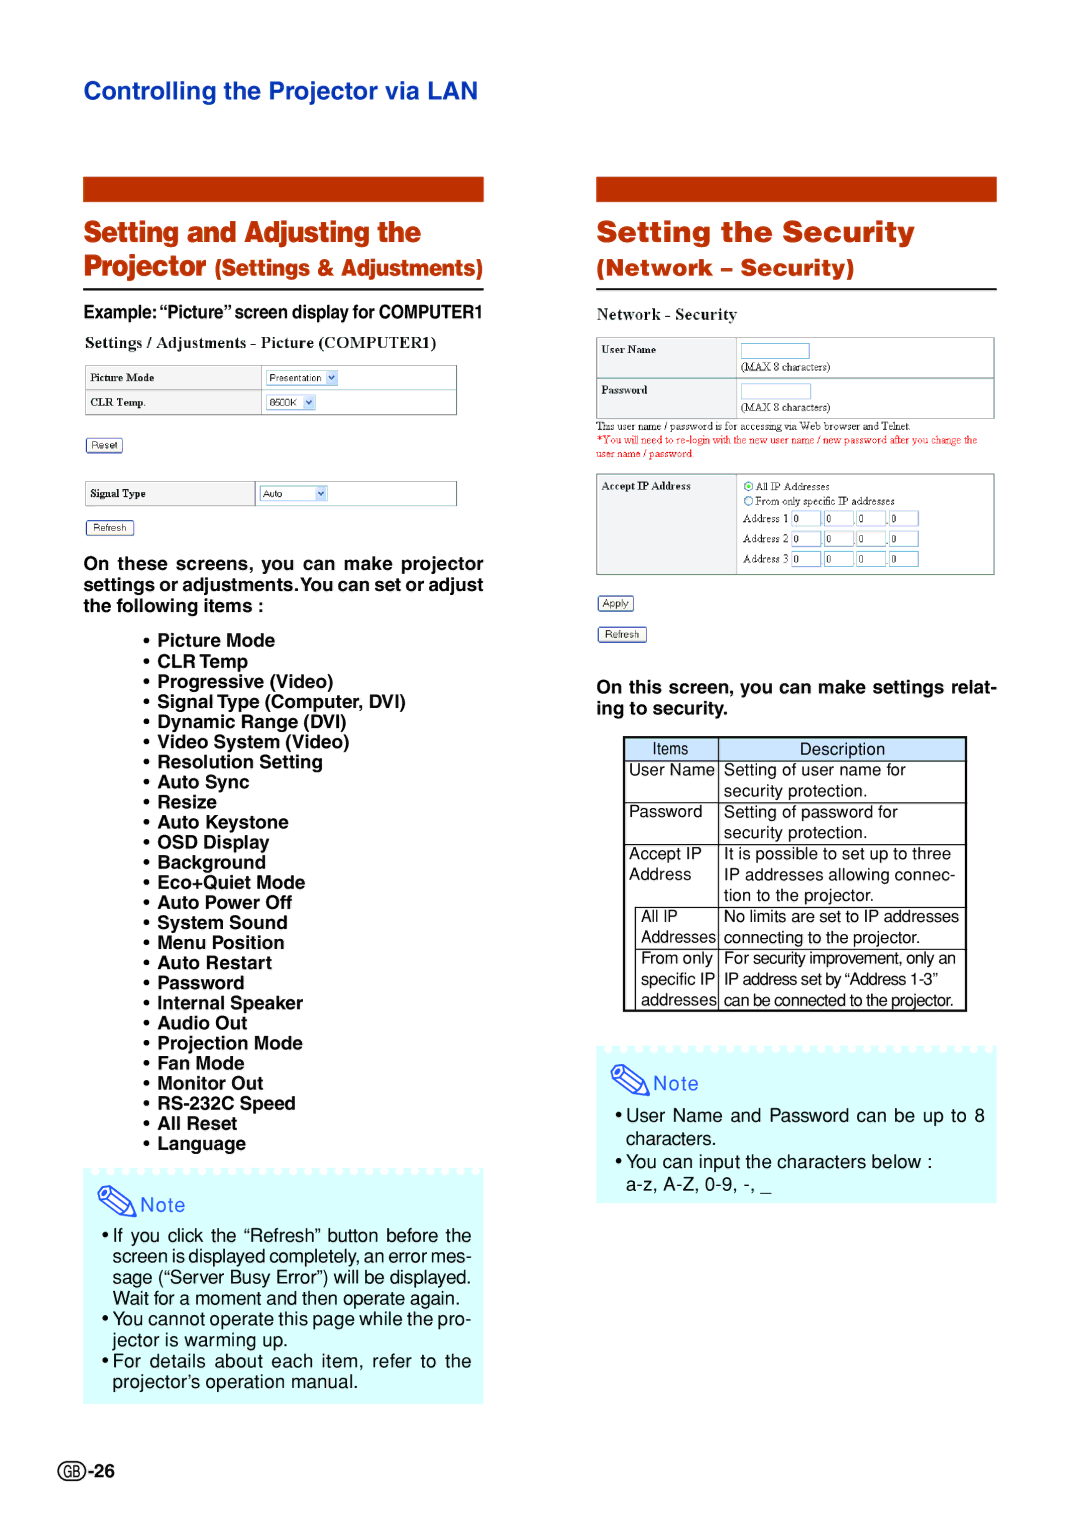
Setting the Security
(Network – Security)
On this screen, you can make settings relat- ing to security.
| Items | Description |
User Name | Setting of user name for | |
|
| security protection. |
|
|
|
Password | Setting of password for | |
|
| security protection. |
Accept IP | It is possible to set up to three | |
Address | IP addresses allowing connec- | |
|
| tion to the projector. |
| All IP | No limits are set to IP addresses |
| Addresses | connecting to the projector. |
| From only | For security improvement, only an |
| specific IP | IP address set by “Address |
| addresses | can be connected to the projector. |
![]() Note
Note
•User Name and Password can be up to 8 characters.
•You can input the characters below :
![]() -26
-26