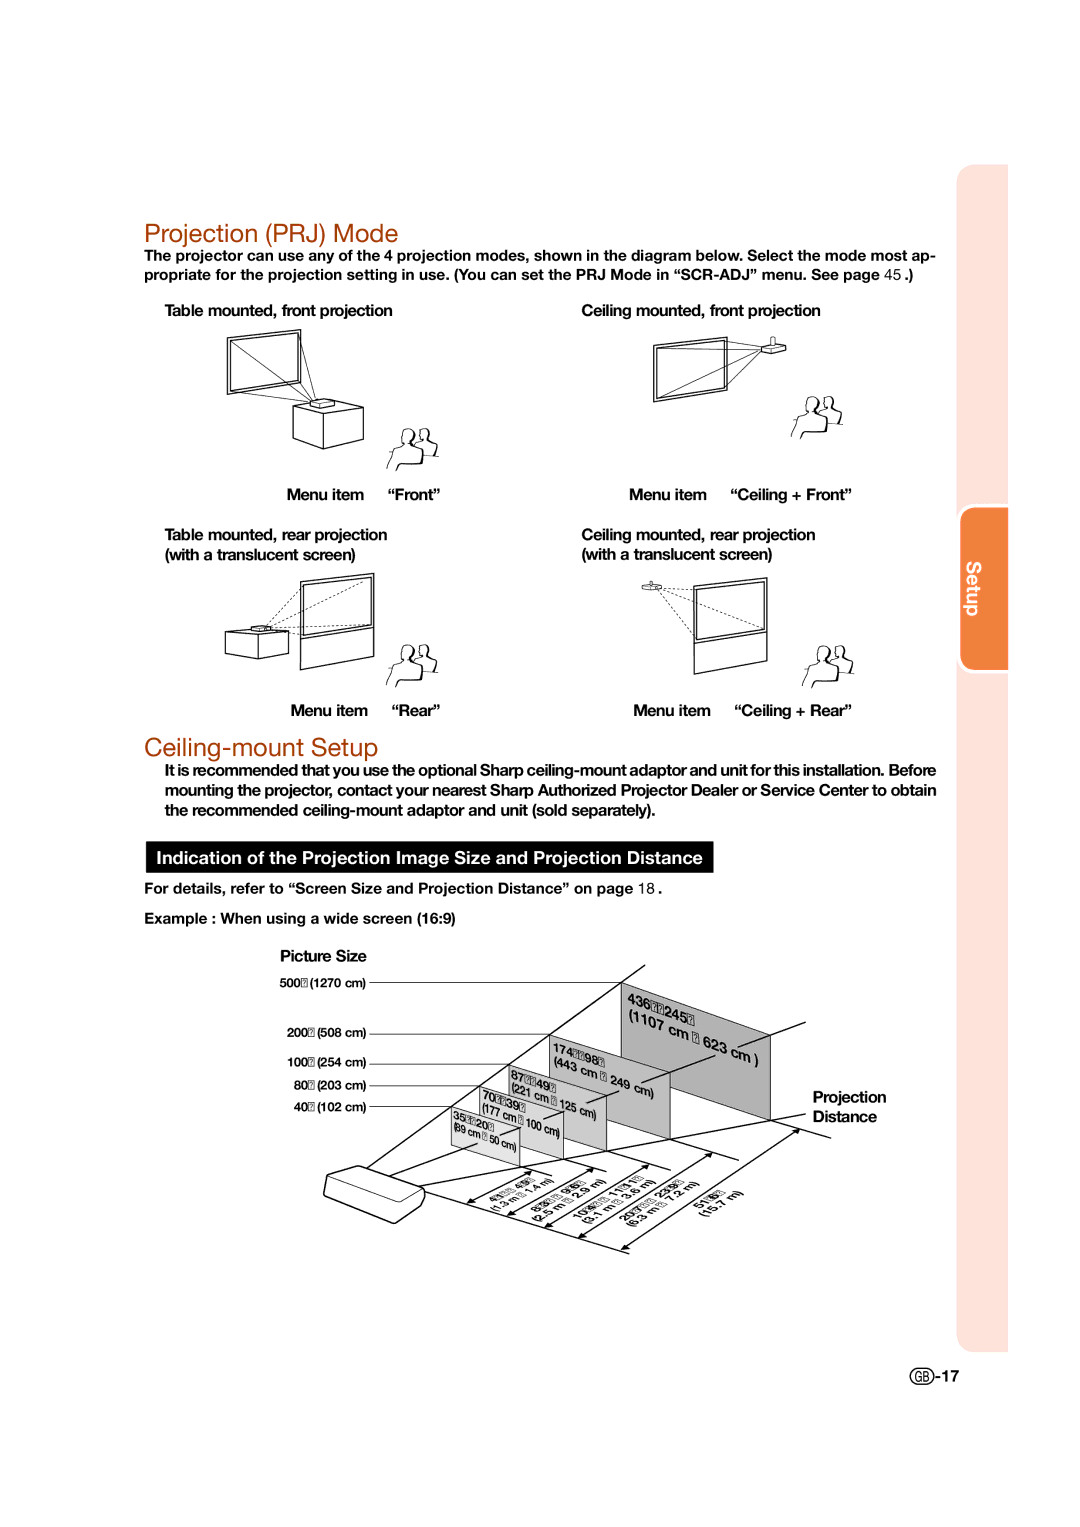
Projection (PRJ) Mode
The projector can use any of the 4 projection modes, shown in the diagram below. Select the mode most ap- propriate for the projection setting in use. (You can set the PRJ Mode in
Table mounted, front projection | Ceiling mounted, front projection |
Menu item “Front” | Menu item “Ceiling + Front” |
Table mounted, rear projection (with a translucent screen)
Ceiling mounted, rear projection (with a translucent screen)
Setup
Menu item “Rear” | Menu item “Ceiling + Rear” |
Ceiling-mount Setup
It is recommended that you use the optional Sharp
Indication of the Projection Image Size and Projection Distance
For details, refer to “Screen Size and Projection Distance” on page 18.
Example : When using a wide screen (16:9)
Picture Size
500" (1270 cm)
200" (508 cm)
100" (254 cm) 80" (203 cm) 40" (102 cm)
|
|
|
|
|
|
|
|
|
|
| 174" |
|
| ||
|
|
|
|
|
|
|
|
|
|
|
|
|
| × |
|
|
|
|
|
|
|
|
|
|
|
| (443 | 98" | |||
|
|
|
|
|
|
|
|
|
|
| |||||
|
|
|
|
|
| 87" |
|
|
|
|
| cm | |||
|
|
|
|
|
|
|
|
|
|
| × | ||||
|
|
|
|
|
|
|
| × |
|
|
|
|
|
| |
|
|
|
| 70" |
| (221 | 49" |
|
|
|
| ||||
|
|
|
|
| cm | × |
|
|
|
| |||||
|
|
|
| × |
|
|
|
|
|
|
|
|
| ||
|
|
|
| (177 | 39" |
|
|
|
| 1 | 25 | c | m) | ||
35" |
|
| cm | × |
|
|
|
|
|
|
| ||||
(89 | × | 20" |
|
| 100 | cm) |
|
| |||||||
m |
|
|
|
|
|
|
|
| |||||||
|
| c |
| × |
|
|
|
|
|
|
|
|
|
|
|
|
|
|
| 50 | cm) |
|
|
|
|
|
|
|
|
| |
|
|
|
|
|
|
|
|
|
|
|
|
|
| ||
436 | × |
|
|
|
|
| |||
|
| " |
|
|
|
|
| ||
|
|
|
| 245 |
|
|
|
| |
(1107 | " |
|
|
|
| ||||
|
|
|
|
| cm |
|
|
|
|
|
|
|
|
| × | 3 |
|
| |
|
|
|
|
|
| 62 | c | m ) | |
2 | 49 | c | m) |
|
|
|
| ||
|
|
|
|
|
| ||||
|
|
|
|
|
|
|
| ||
|
|
|
|
|
|
|
|
| |
Projection Distance
~ |
|
| 9'6".9 |
| 11'11".6 |
|
| . |
|
|
| |||||
4'9".4 |
|
|
| m) |
|
| m) |
|
|
|
|
| ||||
~ 1 | m) | ~ |
| 2 |
|
|
|
| 3 |
| 23'9" |
|
|
| ||
(1 | 8'3"m |
|
| m |
| ~ | ~ |
| 51'6". | m) | ||||||
4'1"m |
|
|
| ~ |
| ~ | ~ | 7 |
|
| ||||||
.3 |
|
|
|
| 10'4". |
|
|
|
|
| 7 | |||||
| (2 |
|
|
|
| 20'7".3 |
|
|
| (15 |
| |||||
|
| . |
|
|
|
|
|
|
|
| m |
|
|
| ||
|
| 5 |
|
| (3 |
|
|
| (6 |
|
|
|
| |||
|
|
|
|
|
|
|
|
|
|
|
|
|
|
| ||
|
|
|
|
|
|
|
|
|
|
|
|
|
|
|
| |
![]() -17
-17