Switching the Input Mode
Select the appropriate input mode for the connected equipment.
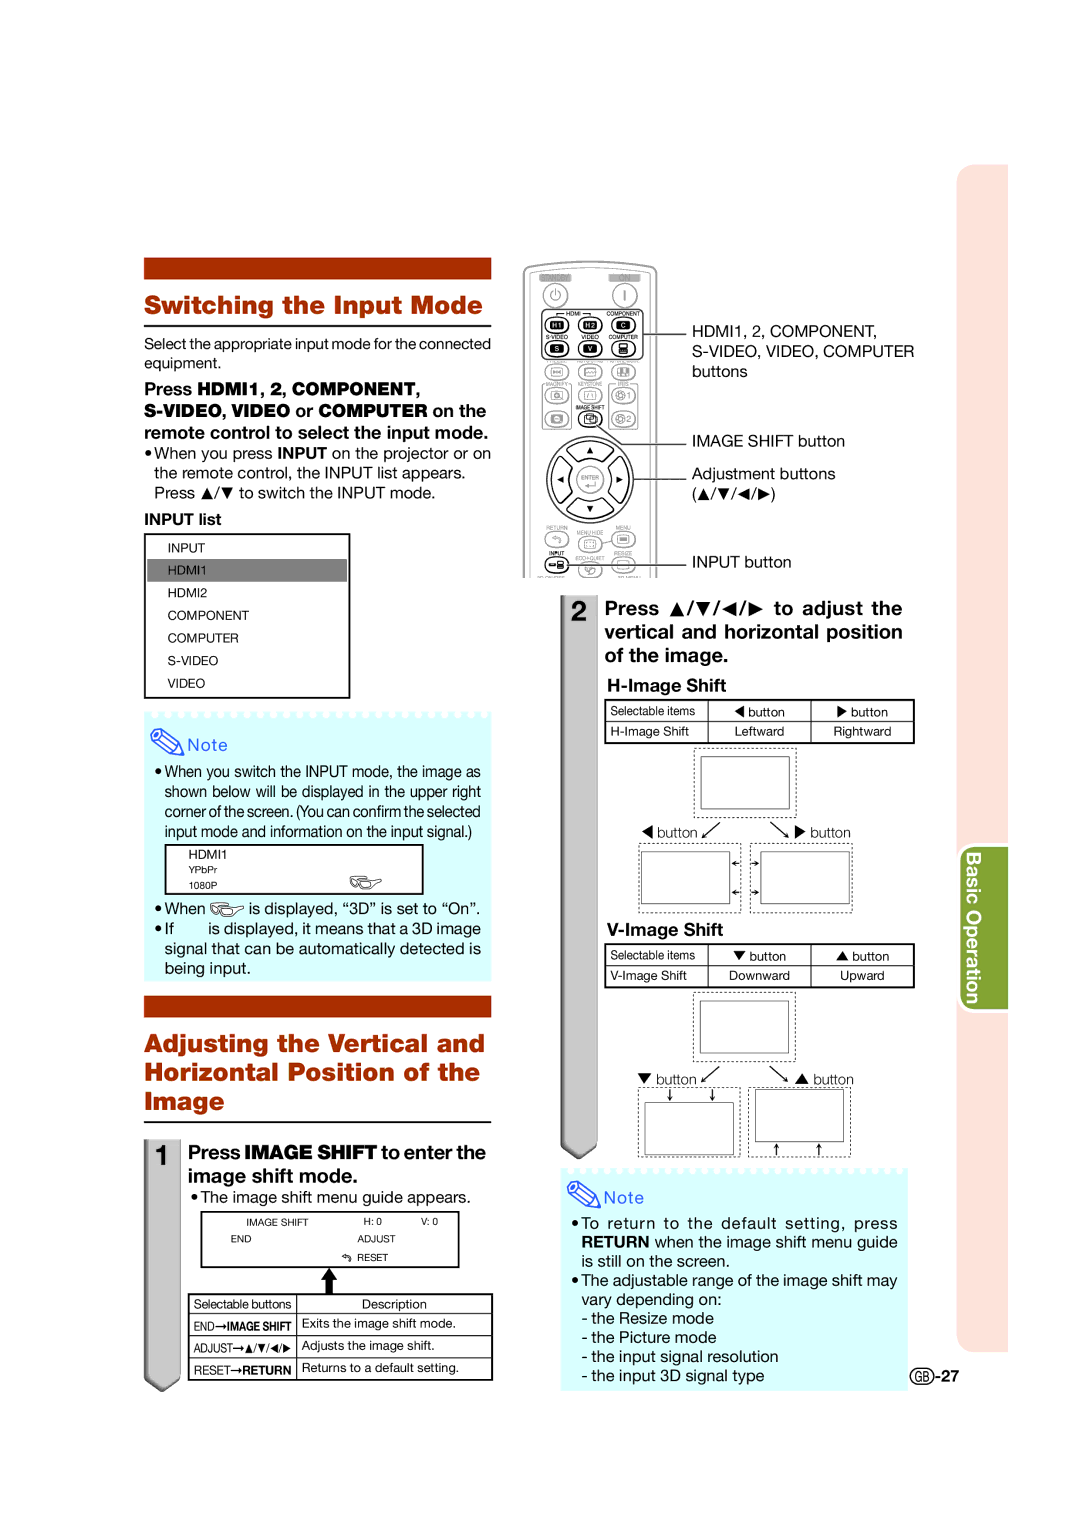
Press HDMI1, 2, COMPONENT,
•When you press INPUT on the projector or on
the remote control, the INPUT list appears. Press P/R to switch the INPUT mode.
INPUT list
INPUT
 HDMI1
HDMI1
 HDMI2
HDMI2
 COMPONENT
 COMPUTER

S-VIDEO
![]() VIDEO
VIDEO
![]() Note
Note
•When you switch the INPUT mode, the image as shown below will be displayed in the upper right corner of the screen. (You can confirm the selected input mode and information on the input signal.)
![]() HDMI1
HDMI1
YPbPr
1080P
•When ![]() is displayed, “3D” is set to “On”.
is displayed, “3D” is set to “On”.
•If ![]() is displayed, it means that a 3D image signal that can be automatically detected is being input.
is displayed, it means that a 3D image signal that can be automatically detected is being input.
Adjusting the Vertical and
Horizontal Position of the
Image
1
 Press IMAGE SHIFT to enter the image shift mode.
• The image shift menu guide appears.
|
| IMAGE SHIFT | H: 0 | V: 0 |
|
| END | ADJUST |
|
|
|
| RESET |
|
|
|
|
| |
|
|
|
|
|
|
|
|
|
Selectable buttons |
|
| Description |
ENDIMAGE SHIFT | Exits the image shift mode. | ||
|
|
|
|
ADJUSTP/R/O/Q | Adjusts the image shift. | ||
|
|
|
|
RESETRETURN | Returns to a default setting. | ||
![]()
![]()
![]()
![]()
![]()
![]()
![]() HDMI1, 2, COMPONENT,
HDMI1, 2, COMPONENT,
![]() IMAGE SHIFT button
IMAGE SHIFT button
Adjustment buttons (P/R/O/Q)
INPUT button
2![]()
![]() Press P/R/O/Q to adjust the vertical and horizontal position of the image.
Press P/R/O/Q to adjust the vertical and horizontal position of the image.
H-Image Shift
Selectable items | \ button | button | ||
Leftward | Rightward | |||
|
|
|
|
|
|
|
|
|
|
|
|
|
|
|
\ button ![]()
![]() button
button
|
|
|
|
|
|
|
|
|
|
|
| Basic |
|
|
|
|
|
|
|
|
| Operation | |||
|
|
|
|
|
|
|
|
| ||||
|
|
|
|
|
|
|
|
|
|
| ||
Selectable items |
| " button |
| ' button |
| |||||||
| Downward |
| Upward |
| ||||||||
|
|
|
|
|
|
|
|
|
|
|
| |
|
|
|
|
|
|
|
|
|
| |||
|
|
|
|
|
|
|
|
|
|
|
|
|
" button |
|
|
|
| ' button |
| ||||||
|
|
|
|
|
|
|
|
|
|
|
|
|
|
|
|
|
|
|
|
|
|
|
|
|
|
|
|
|
|
|
|
|
|
|
|
|
|
|
![]() Note
Note
•To return to the default setting, press RETURN when the image shift menu guide is still on the screen.
•The adjustable range of the image shift may vary depending on:
-the Resize mode
-the Picture mode
-the input signal resolution
- the input 3D signal type |