Picture
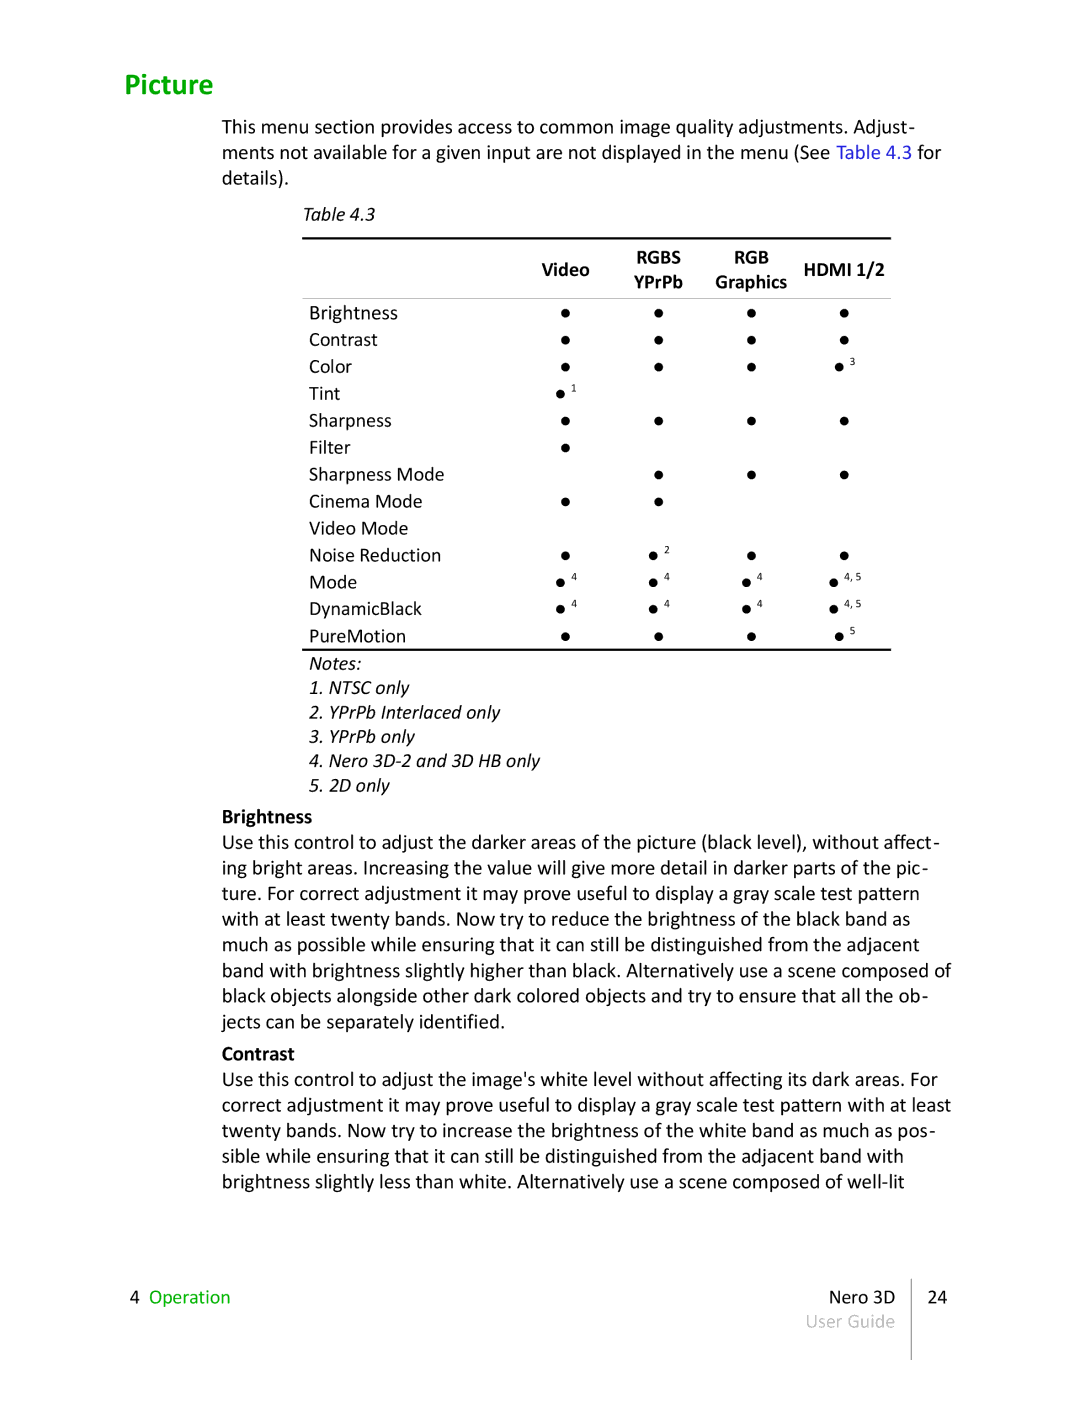
This menu section provides access to common image quality adjustments. Adjust- ments not available for a given input are not displayed in the menu (See Table 4.3 for details).
Table 4.3
| Video | RGBS | RGB | HDMI 1/2 |
| YPrPb | Graphics | ||
|
|
|
|
|
Brightness | ● | ● | ● | ● |
Contrast | ● | ● | ● | ● |
Color | ● | ● | ● | ● 3 |
Tint | ● 1 |
|
|
|
Sharpness | ● | ● | ● | ● |
Filter | ● |
|
|
|
Sharpness Mode |
| ● | ● | ● |
Cinema Mode | ● | ● |
|
|
Video Mode |
|
|
|
|
Noise Reduction | ● | ● 2 | ● | ● |
Mode | ● 4 | ● 4 | ● 4 | ● 4, 5 |
DynamicBlack | ● 4 | ● 4 | ● 4 | ● 4, 5 |
PureMotion | ● | ● | ● | ● 5 |
Notes:
1.NTSC only
2.YPrPb Interlaced only
3.YPrPb only
4.Nero
5.2D only
Brightness
Use this control to adjust the darker areas of the picture (black level), without affect- ing bright areas. Increasing the value will give more detail in darker parts of the pic- ture. For correct adjustment it may prove useful to display a gray scale test pattern with at least twenty bands. Now try to reduce the brightness of the black band as much as possible while ensuring that it can still be distinguished from the adjacent band with brightness slightly higher than black. Alternatively use a scene composed of black objects alongside other dark colored objects and try to ensure that all the ob- jects can be separately identified.
Contrast
Use this control to adjust the image's white level without affecting its dark areas. For correct adjustment it may prove useful to display a gray scale test pattern with at least twenty bands. Now try to increase the brightness of the white band as much as pos- sible while ensuring that it can still be distinguished from the adjacent band with brightness slightly less than white. Alternatively use a scene composed of
4 Operation | Nero 3D |
| User Guide |
24