STRAIGHT STITCHING
Straight stitch is most frequently used for every aspect of sewing. Let’s learn how to sew following the steps below.
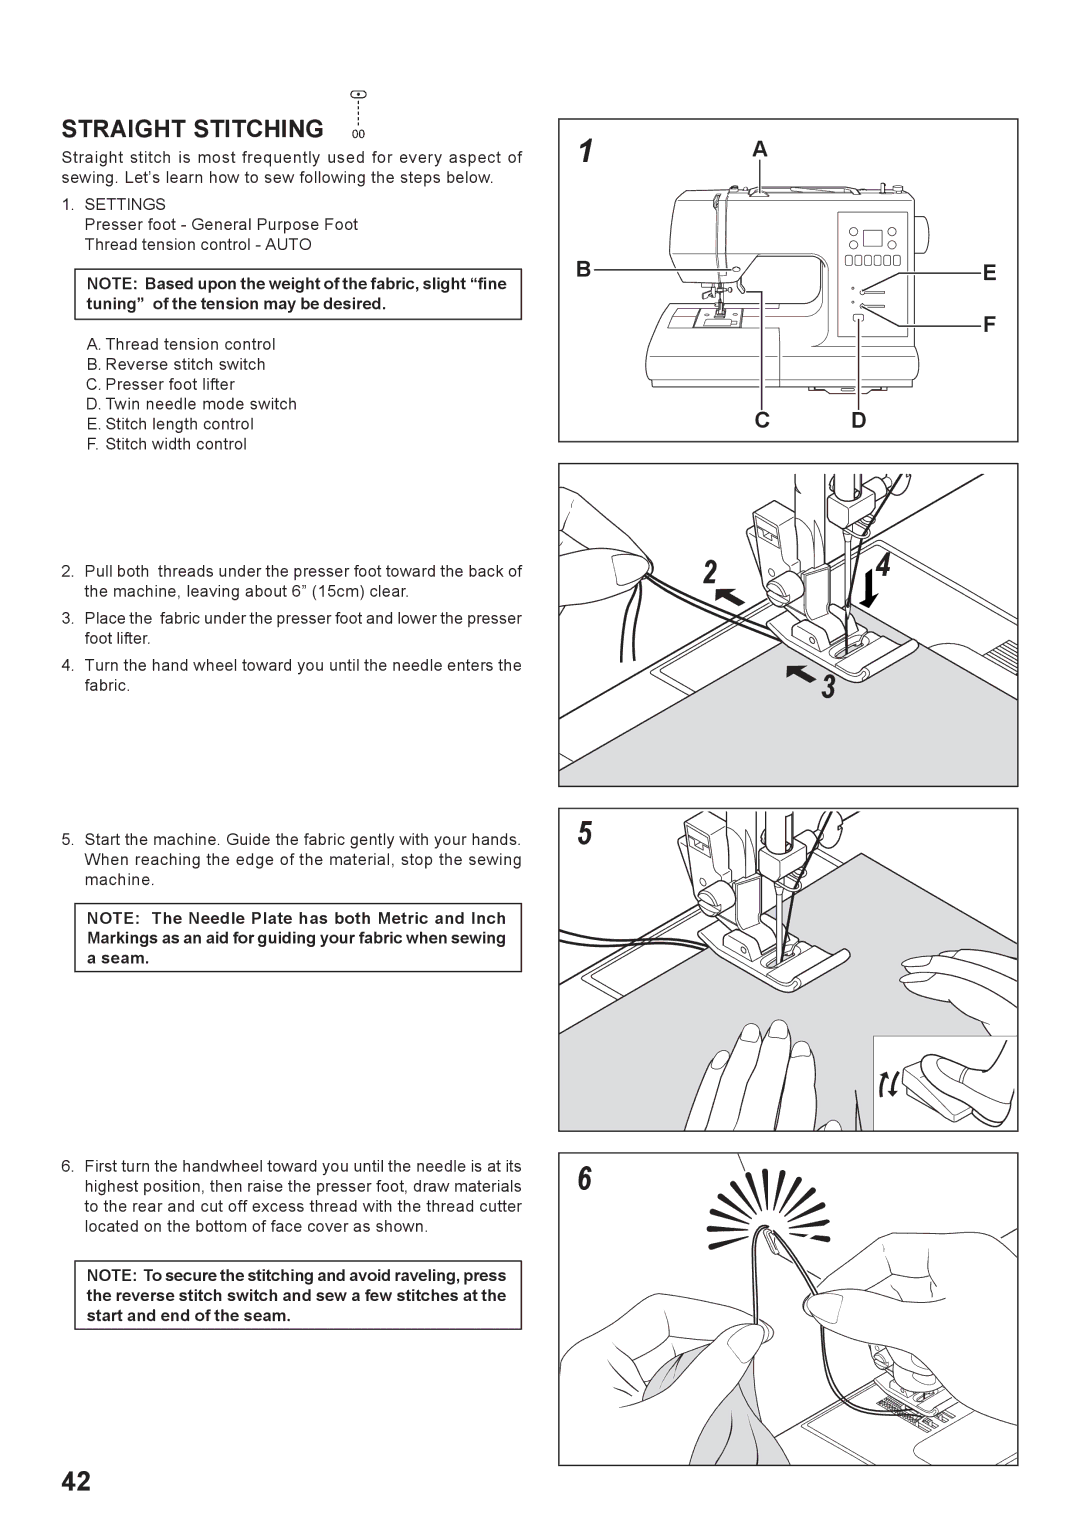
1.SETTINGS
Presser foot - General Purpose Foot Thread tension control - AUTO
NOTE: Based upon the weight of the fabric, slight “fine tuning” of the tension may be desired.
A. Thread tension control
B. Reverse stitch switch
C. Presser foot lifter
D. Twin needle mode switch
E. Stitch length control
F. Stitch width control
2.Pull both threads under the presser foot toward the back of the machine, leaving about 6” (15cm) clear.
3.Place the fabric under the presser foot and lower the presser foot lifter.
4.Turn the hand wheel toward you until the needle enters the fabric.
5.Start the machine. Guide the fabric gently with your hands. When reaching the edge of the material, stop the sewing machine.
NOTE: The Needle Plate has both Metric and Inch Markings as an aid for guiding your fabric when sewing a seam.
6.First turn the handwheel toward you until the needle is at its highest position, then raise the presser foot, draw materials to the rear and cut off excess thread with the thread cutter located on the bottom of face cover as shown.
NOTE: To secure the stitching and avoid raveling, press the reverse stitch switch and sew a few stitches at the start and end of the seam.
42
1 | A |
|
B |
| E |
|
| F |
| C | D |
2 | 4 |
| 3 |
5 |
6 |