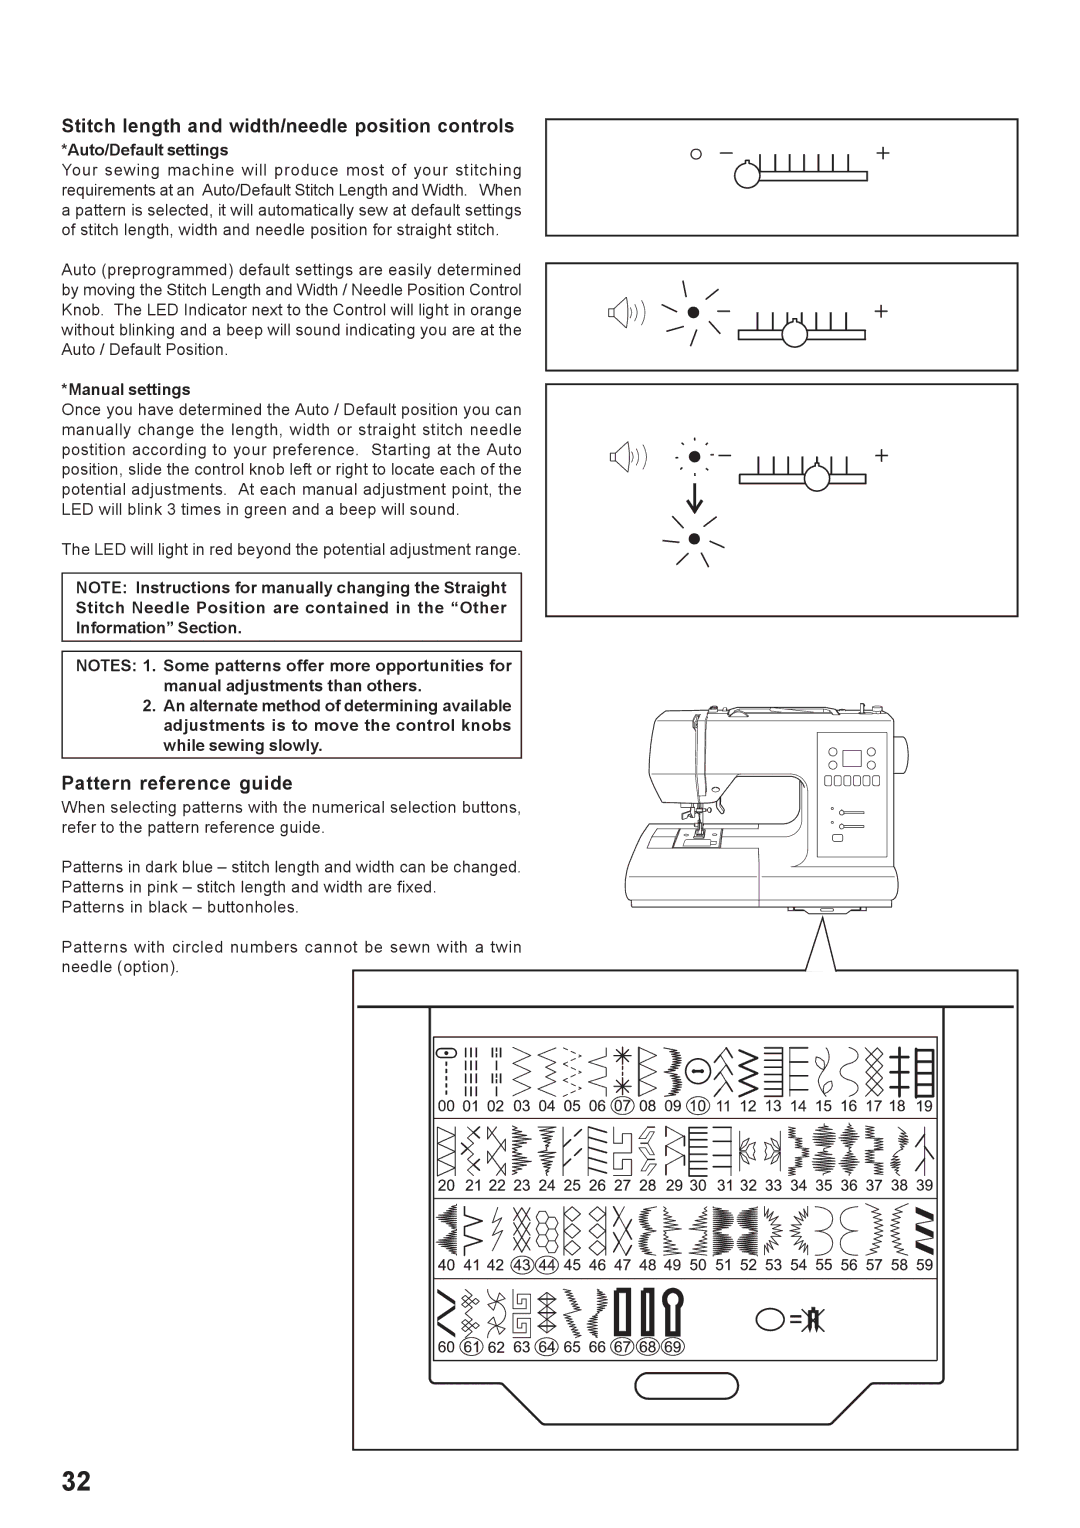
Stitch length and width/needle position controls
*Auto/Default settings
Your sewing machine will produce most of your stitching requirements at an Auto/Default Stitch Length and Width. When a pattern is selected, it will automatically sew at default settings of stitch length, width and needle position for straight stitch.
Auto (preprogrammed) default settings are easily determined by moving the Stitch Length and Width / Needle Position Control Knob. The LED Indicator next to the Control will light in orange without blinking and a beep will sound indicating you are at the Auto / Default Position.
*Manual settings
Once you have determined the Auto / Default position you can manually change the length, width or straight stitch needle postition according to your preference. Starting at the Auto position, slide the control knob left or right to locate each of the potential adjustments. At each manual adjustment point, the LED will blink 3 times in green and a beep will sound.
The LED will light in red beyond the potential adjustment range.
NOTE: Instructions for manually changing the Straight Stitch Needle Position are contained in the “Other Information” Section.
NOTES: 1. Some patterns offer more opportunities for
manual adjustments than others.
2.An alternate method of determining available adjustments is to move the control knobs while sewing slowly.
Pattern reference guide
When selecting patterns with the numerical selection buttons, refer to the pattern reference guide.
Patterns in dark blue – stitch length and width can be changed. Patterns in pink – stitch length and width are fixed.
Patterns in black – buttonholes.
Patterns with circled numbers cannot be sewn with a twin needle (option).
32