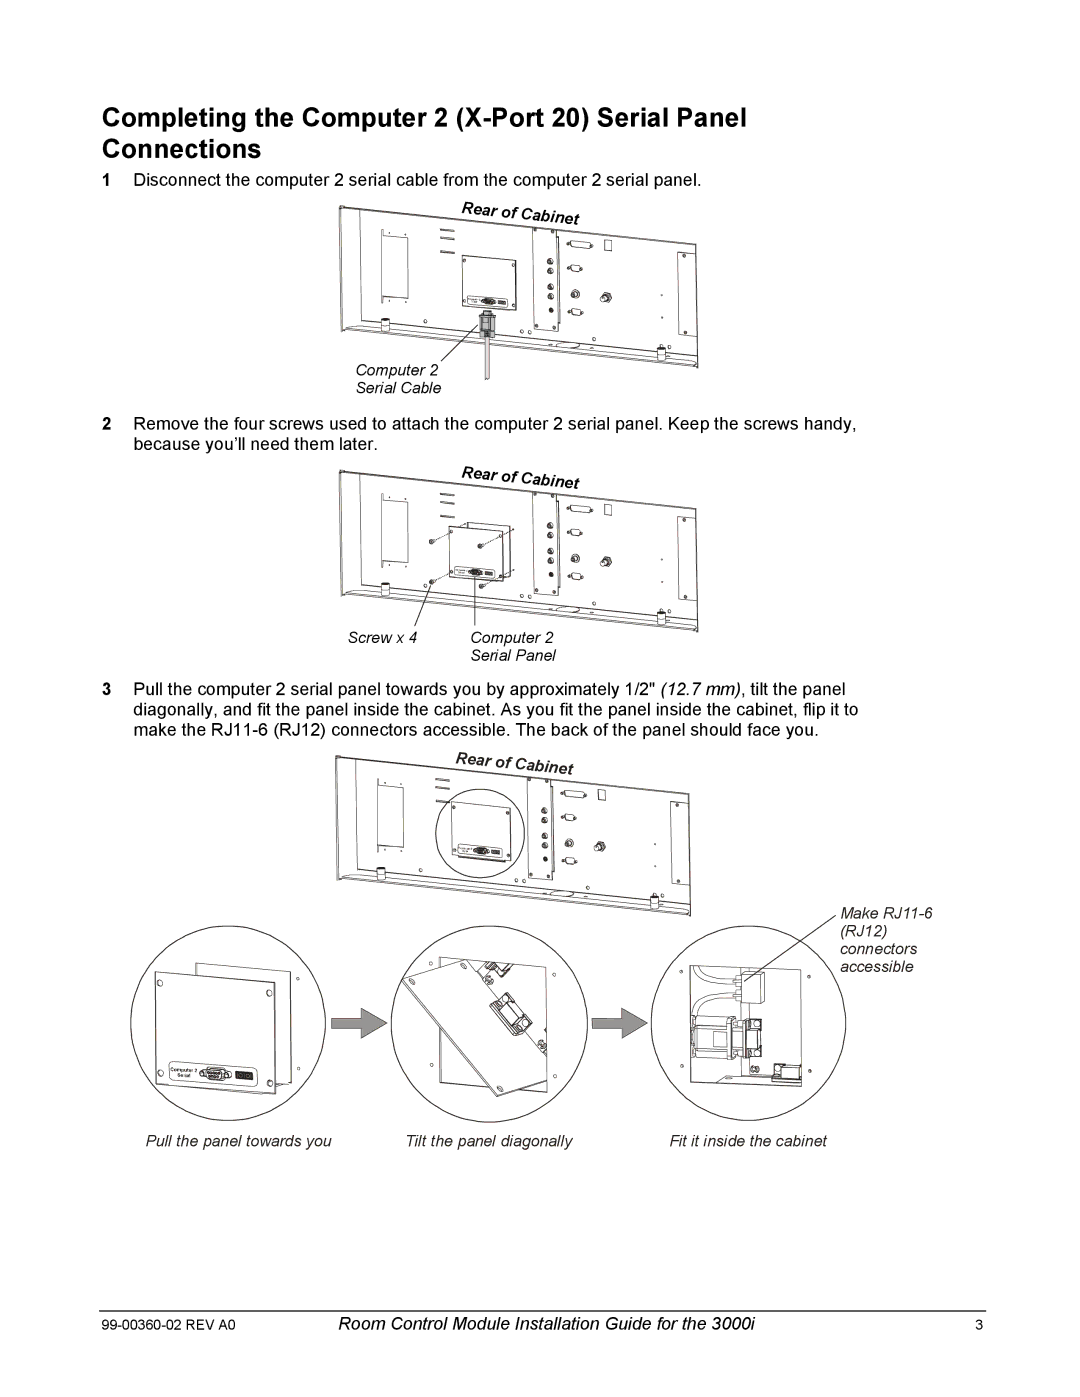
Completing the Computer 2 (X-Port 20) Serial Panel Connections
1Disconnect the computer 2 serial cable from the computer 2 serial panel.
Rear of Cabinet
Computer 2
Serial Cable
2Remove the four screws used to attach the computer 2 serial panel. Keep the screws handy, because you’ll need them later.
Rear of Cabinet
Screw x 4 | Computer 2 |
| Serial Panel |
3Pull the computer 2 serial panel towards you by approximately 1/2" (12.7 mm), tilt the panel diagonally, and fit the panel inside the cabinet. As you fit the panel inside the cabinet, flip it to make the
Rear of Cabinet
Make
Pull the panel towards you | Tilt the panel diagonally | Fit it inside the cabinet |
Room Control Module Installation Guide for the 3000i | 3 |