CHAPTER 3 Installing the Mini Router
Router Mode Connections
ROUTER MODE CONNECTIONS
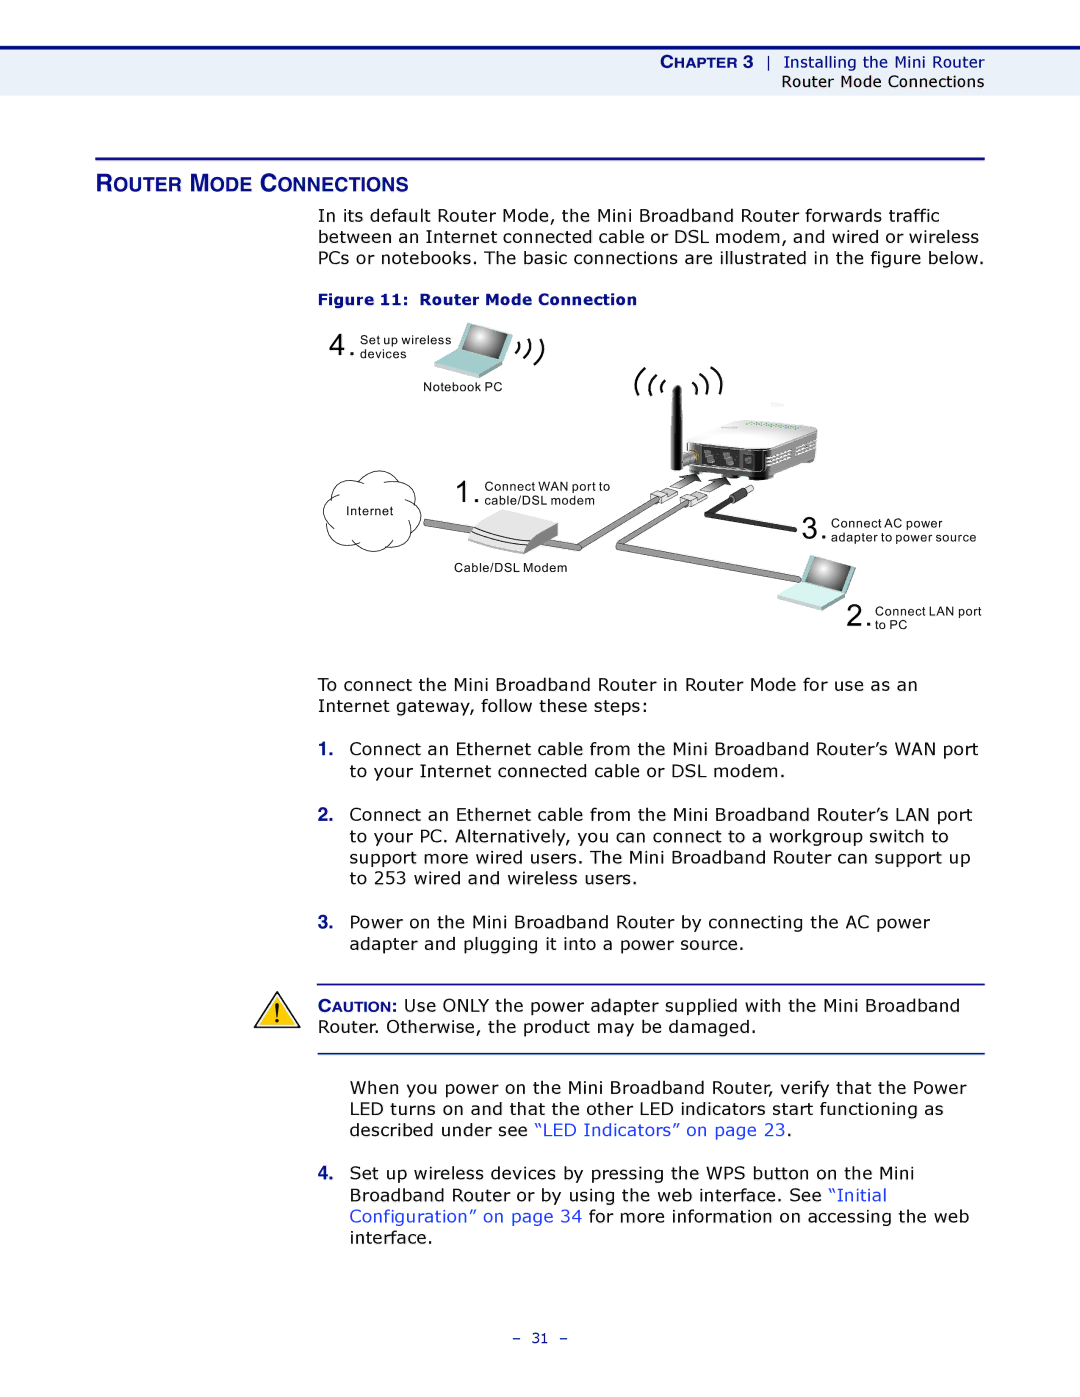
In its default Router Mode, the Mini Broadband Router forwards traffic between an Internet connected cable or DSL modem, and wired or wireless PCs or notebooks. The basic connections are illustrated in the figure below.
Figure 11: Router Mode Connection
4. Set up wireless devices
Notebook PC
1. Connect WAN port to cable/DSL modem
Internet
3.Connect AC power adapter to power source
Cable/DSL Modem
![]() 2.Connectto PC LAN port
2.Connectto PC LAN port
To connect the Mini Broadband Router in Router Mode for use as an
Internet gateway, follow these steps:
1.Connect an Ethernet cable from the Mini Broadband Router’s WAN port to your Internet connected cable or DSL modem.
2.Connect an Ethernet cable from the Mini Broadband Router’s LAN port to your PC. Alternatively, you can connect to a workgroup switch to support more wired users. The Mini Broadband Router can support up to 253 wired and wireless users.
3.Power on the Mini Broadband Router by connecting the AC power adapter and plugging it into a power source.
CAUTION: Use ONLY the power adapter supplied with the Mini Broadband
Router. Otherwise, the product may be damaged.
When you power on the Mini Broadband Router, verify that the Power LED turns on and that the other LED indicators start functioning as described under see “LED Indicators” on page 23.
4.Set up wireless devices by pressing the WPS button on the Mini Broadband Router or by using the web interface. See “Initial Configuration” on page 34 for more information on accessing the web interface.
– 31 –