Scenario B: Connecting the SonicWALL SSLVPN 4000
To connect the SonicWALL SSL VPN 4000 using Scenario B, perform the following steps:
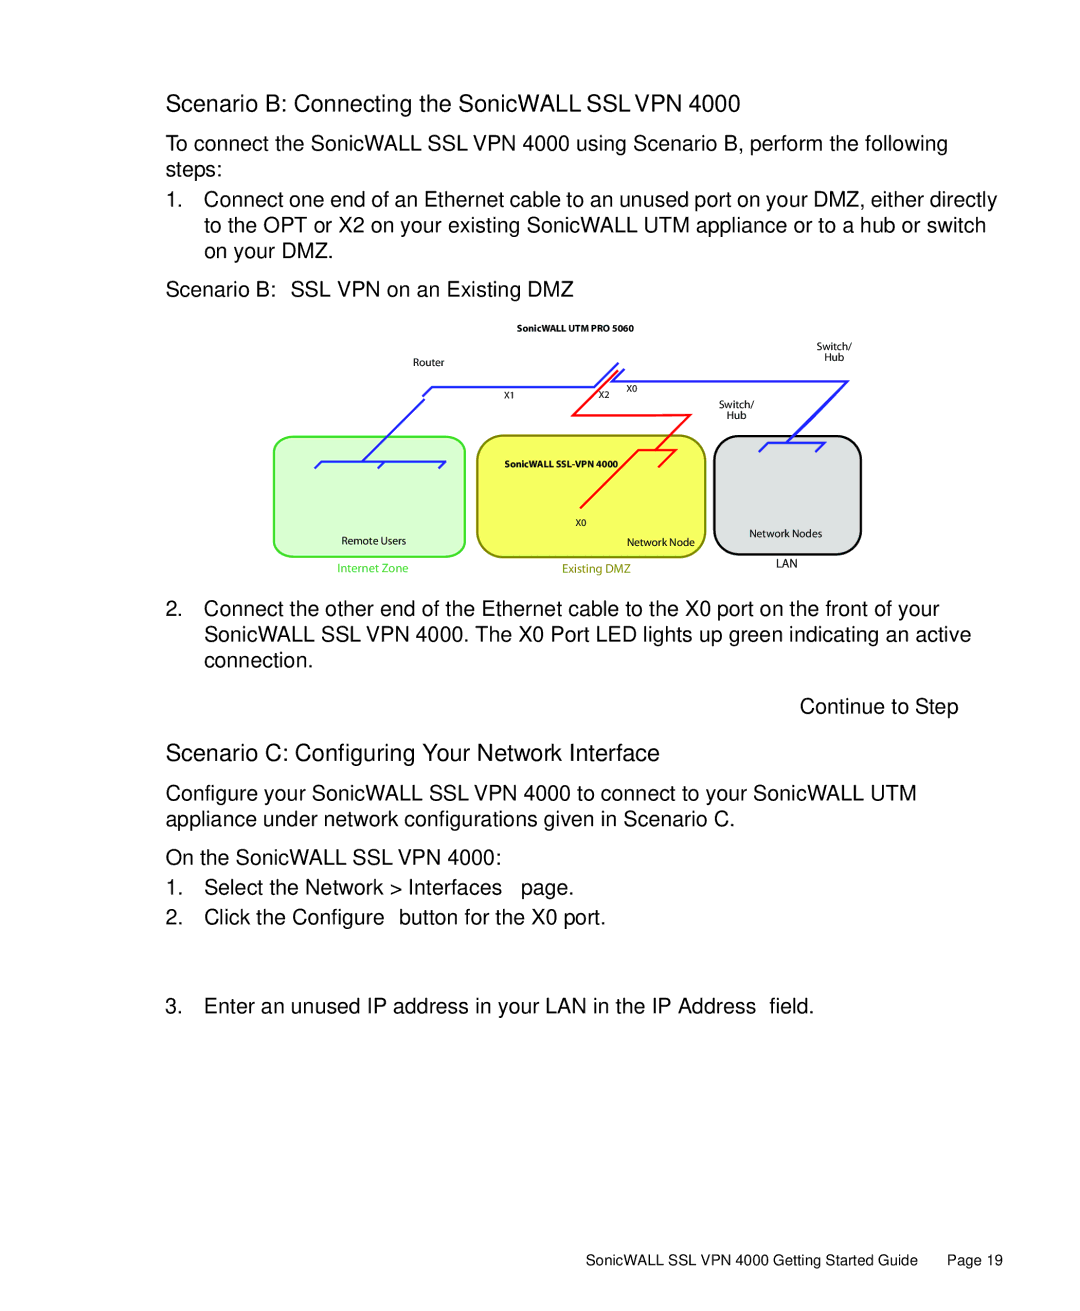
1.Connect one end of an Ethernet cable to an unused port on your DMZ, either directly to the OPT or X2 on your existing SonicWALL UTM appliance or to a hub or switch on your DMZ.
Scenario B: SSL VPN on an Existing DMZ
| SonicWALL UTM PRO 5060 |
| |
|
| Switch/ | |
Router |
| Hub | |
|
| ||
X1 | X0 |
| |
X2 | Switch/ | ||
|
| ||
|
| Hub | |
SonicWALL |
| ||
| X0 | Network Nodes | |
Remote Users | Network Node | ||
| |||
Internet Zone | Existing DMZ | LAN | |
| |||
2.Connect the other end of the Ethernet cable to the X0 port on the front of your SonicWALL SSL VPN 4000. The X0 Port LED lights up green indicating an active connection.
Continue to Step
Scenario C: Configuring Your Network Interface
Configure your SonicWALL SSL VPN 4000 to connect to your SonicWALL UTM appliance under network configurations given in Scenario C.
On the SonicWALL SSL VPN 4000:
1.Select the Network > Interfaces page.
2.Click the Configure button for the X0 port.
3.Enter an unused IP address in your LAN in the IP Address field.
SonicWALL SSL VPN 4000 Getting Started Guide | Page 19 |