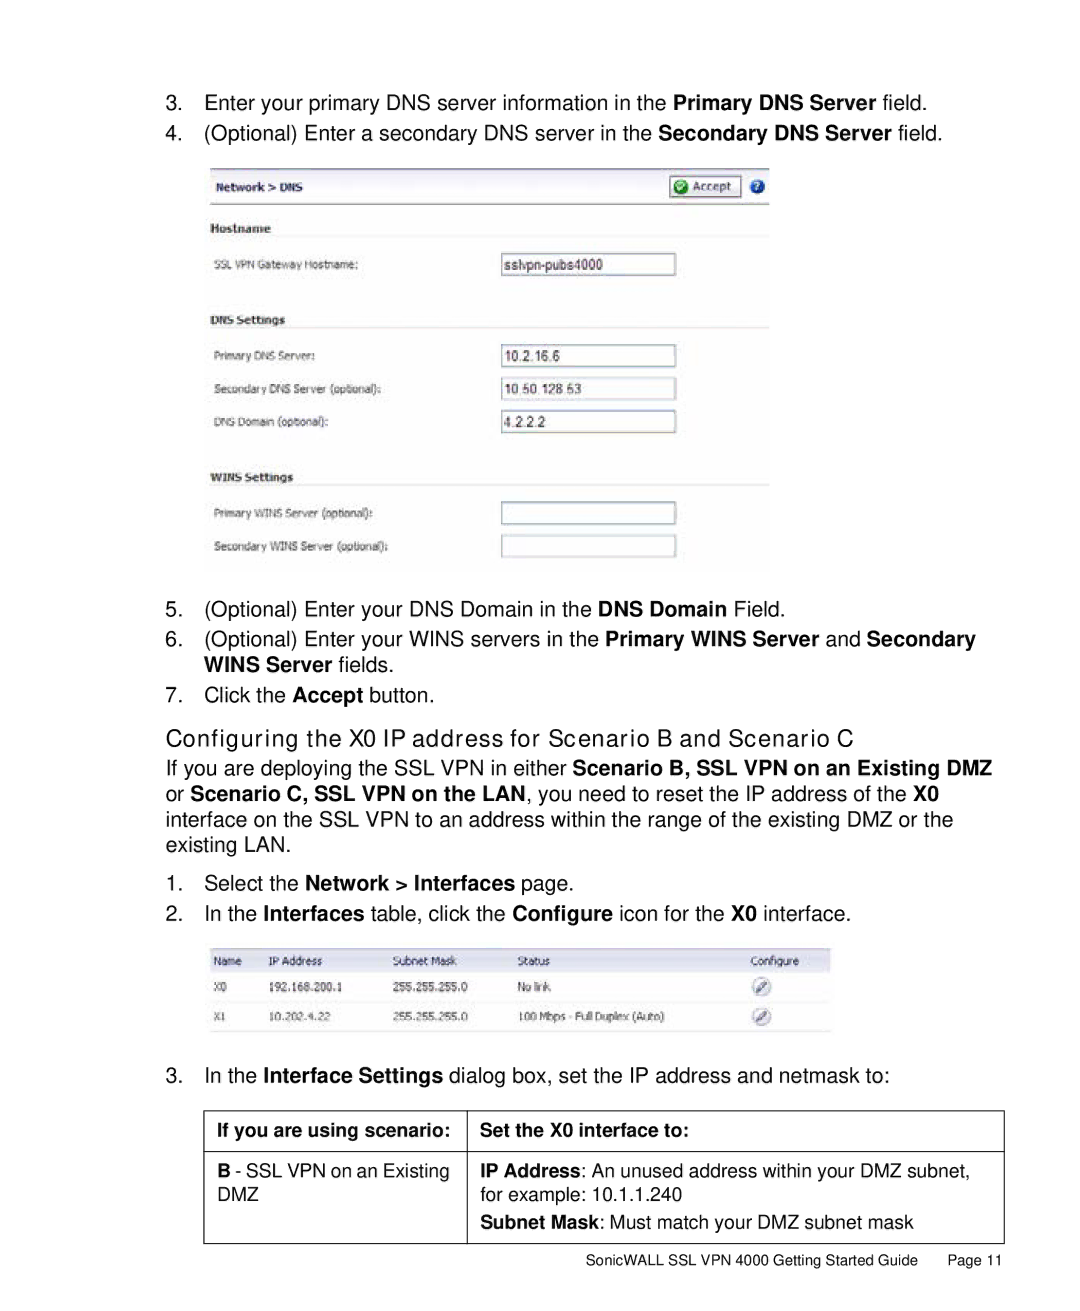
3.Enter your primary DNS server information in the Primary DNS Server field.
4.(Optional) Enter a secondary DNS server in the Secondary DNS Server field.
5.(Optional) Enter your DNS Domain in the DNS Domain Field.
6.(Optional) Enter your WINS servers in the Primary WINS Server and Secondary WINS Server fields.
7.Click the Accept button.
Configuring the X0 IP address for Scenario B and Scenario C
If you are deploying the SSL VPN in either Scenario B, SSL VPN on an Existing DMZ or Scenario C, SSL VPN on the LAN, you need to reset the IP address of the X0 interface on the SSL VPN to an address within the range of the existing DMZ or the existing LAN.
1.Select the Network > Interfaces page.
2.In the Interfaces table, click the Configure icon for the X0 interface.
3.In the Interface Settings dialog box, set the IP address and netmask to:
If you are using scenario: | Set the X0 interface to: |
|
|
B - SSL VPN on an Existing | IP Address: An unused address within your DMZ subnet, |
DMZ | for example: 10.1.1.240 |
| Subnet Mask: Must match your DMZ subnet mask |
|
|
SonicWALL SSL VPN 4000 Getting Started Guide | Page 11 |