Scenario A: Adding a New SSL VPN Custom Zone in SonicOS Enhanced
1.Select the Network > Interfaces page.
2.Click Configure button for the X2 interface (or any other available interface).
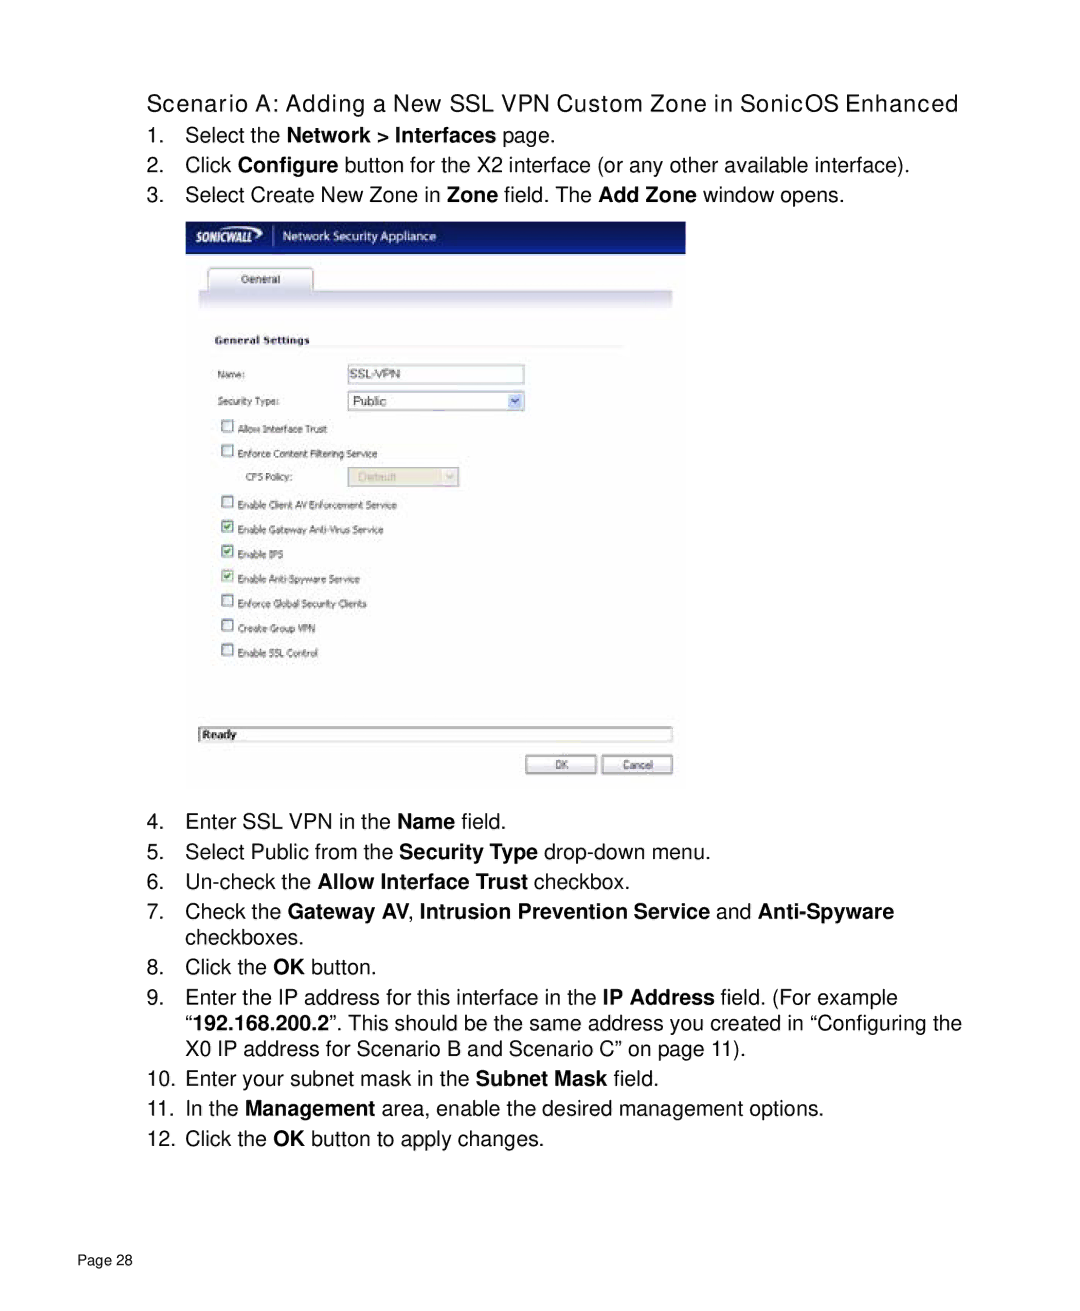
3.Select Create New Zone in Zone field. The Add Zone window opens.
4.Enter SSL VPN in the Name field.
5.Select Public from the Security Type
6.
7.Check the Gateway AV, Intrusion Prevention Service and
8.Click the OK button.
9.Enter the IP address for this interface in the IP Address field. (For example
“192.168.200.2”. This should be the same address you created in “Configuring the X0 IP address for Scenario B and Scenario C” on page 11).
10.Enter your subnet mask in the Subnet Mask field.
11.In the Management area, enable the desired management options.
12.Click the OK button to apply changes.
Page 28