Scenario C: Setting Public Server Access in SonicOS Standard
1.Select Wizards in the left navigation bar.
2.Click the Network Access Rules Wizard option and press the Next button.
3.Select Public Server Rule.
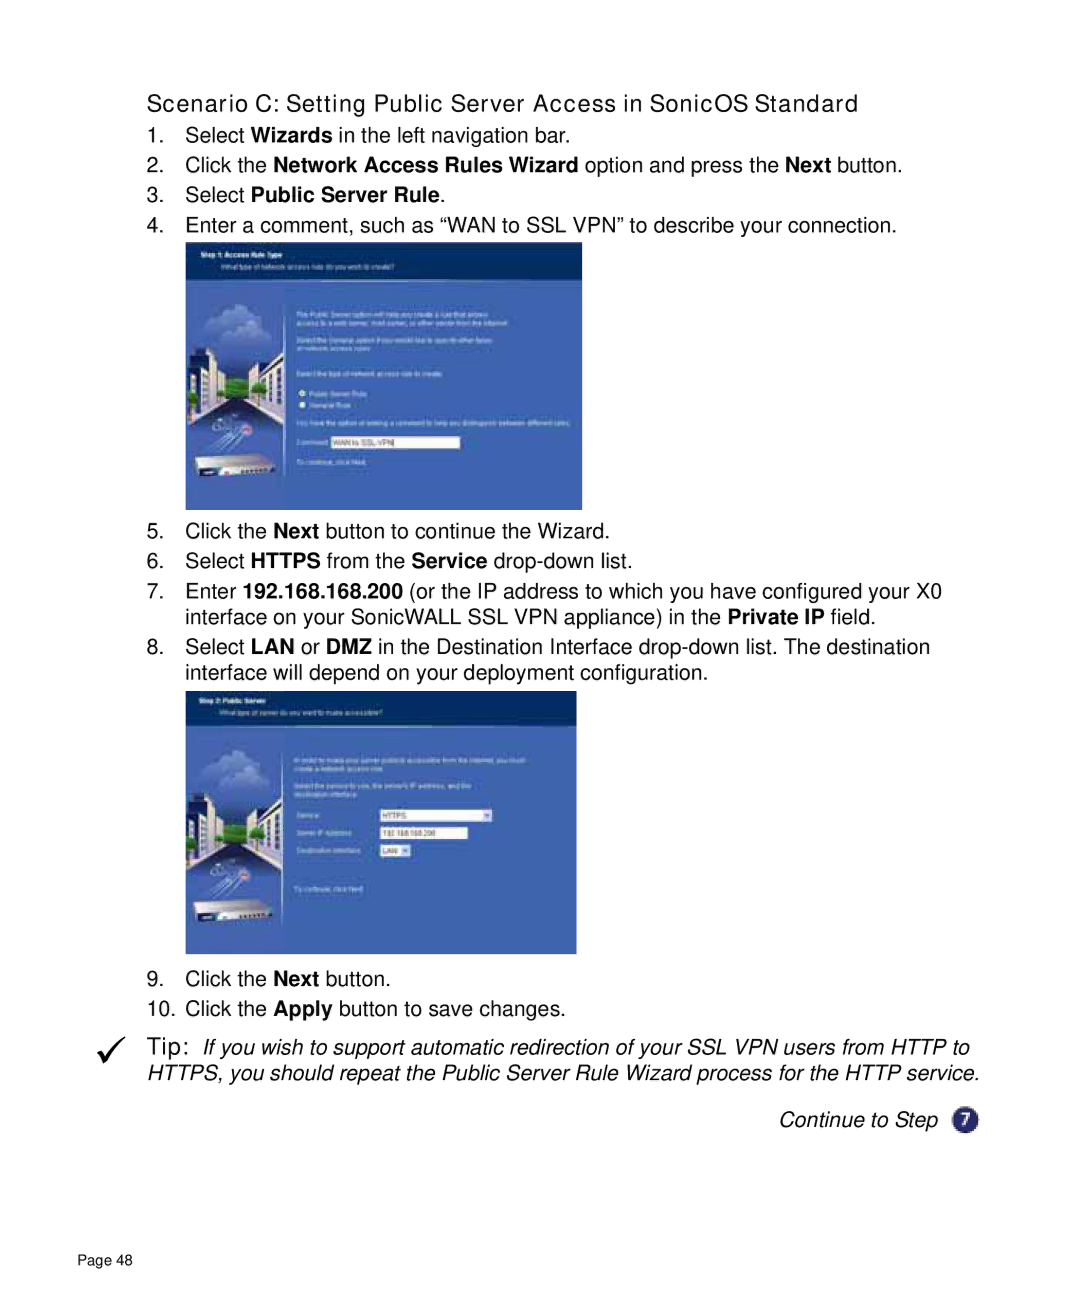
4.Enter a comment, such as “WAN to SSL VPN” to describe your connection.
5.Click the Next button to continue the Wizard.
6.Select HTTPS from the Service
7.Enter 192.168.168.200 (or the IP address to which you have configured your X0 interface on your SonicWALL SSL VPN appliance) in the Private IP field.
8.Select LAN or DMZ in the Destination Interface
9.Click the Next button.
10.Click the Apply button to save changes.
9Tip: If you wish to support automatic redirection of your SSL VPN users from HTTP to HTTPS, you should repeat the Public Server Rule Wizard process for the HTTP service.
Continue to Step
Page 48