2
2  Applying Power to the SonicWALL SSLVPN 4000
1.Plug the power cord into the SonicWALL SSL VPN 4000 and into an appropriate power outlet.
2.Turn on the power switch on the rear of the appliance next to the power cord.
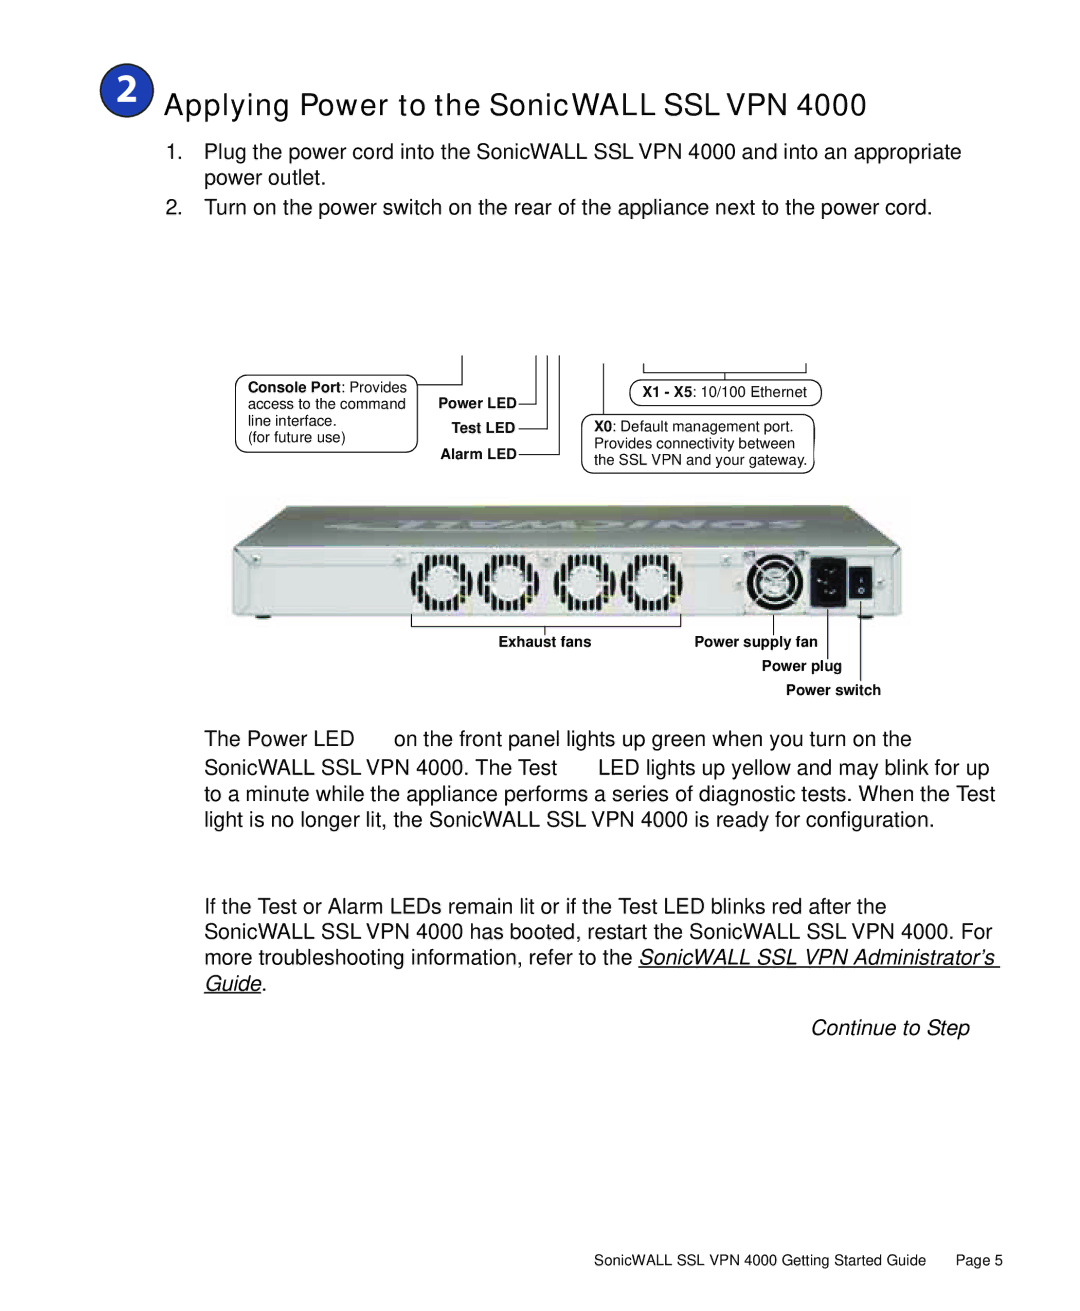
Console Port: Provides access to the command line interface.
(for future use)
Power LED
Test LED
Alarm LED
X1 - X5: 10/100 Ethernet
X0: Default management port. Provides connectivity between the SSL VPN and your gateway.
|
|
|
|
|
|
|
|
|
|
|
|
|
|
Exhaust |
| fans |
|
|
|
|
| Power supply fan |
|
| |||
|
|
| Power plug |
| ||
|
|
|
| Power switch | ||
The Power LED ![]() on the front panel lights up green when you turn on the SonicWALL SSL VPN 4000. The Test
on the front panel lights up green when you turn on the SonicWALL SSL VPN 4000. The Test ![]() LED lights up yellow and may blink for up to a minute while the appliance performs a series of diagnostic tests. When the Test light is no longer lit, the SonicWALL SSL VPN 4000 is ready for configuration.
LED lights up yellow and may blink for up to a minute while the appliance performs a series of diagnostic tests. When the Test light is no longer lit, the SonicWALL SSL VPN 4000 is ready for configuration.
If the Test or Alarm LEDs remain lit or if the Test LED blinks red after the SonicWALL SSL VPN 4000 has booted, restart the SonicWALL SSL VPN 4000. For more troubleshooting information, refer to the SonicWALL SSL VPN Administrator’s Guide.
Continue to Step 3
SonicWALL SSL VPN 4000 Getting Started Guide | Page 5 |