Scenario B: Allowing DMZ -> LAN Connection in SonicOS Enhanced
When users have connected to the SSL VPN, they need to be able to connect to resources on the LAN.
1.In the administration interface, navigate to the Network > Address Objects page.
2.At the bottom of the page, below the Address Objects table, click ![]() .
.
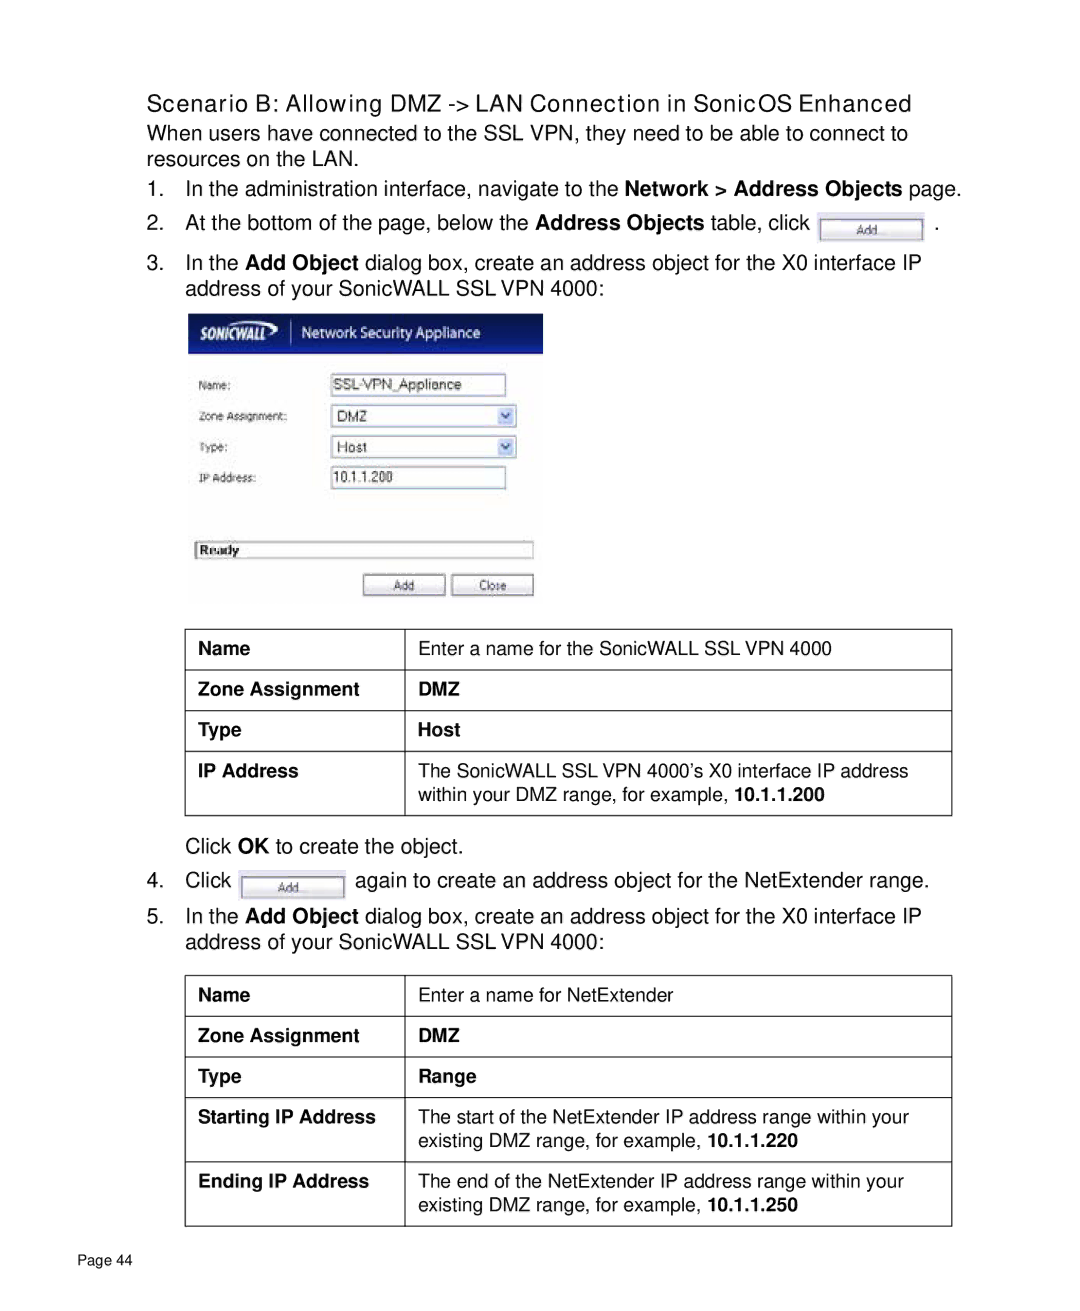
3.In the Add Object dialog box, create an address object for the X0 interface IP address of your SonicWALL SSL VPN 4000:
Name | Enter a name for the SonicWALL SSL VPN 4000 |
|
|
Zone Assignment | DMZ |
|
|
Type | Host |
|
|
IP Address | The SonicWALL SSL VPN 4000’s X0 interface IP address |
| within your DMZ range, for example, 10.1.1.200 |
|
|
Click OK to create the object.
4.Click ![]() again to create an address object for the NetExtender range.
again to create an address object for the NetExtender range.
5.In the Add Object dialog box, create an address object for the X0 interface IP address of your SonicWALL SSL VPN 4000:
Name | Enter a name for NetExtender |
|
|
Zone Assignment | DMZ |
|
|
Type | Range |
|
|
Starting IP Address | The start of the NetExtender IP address range within your |
| existing DMZ range, for example, 10.1.1.220 |
|
|
Ending IP Address | The end of the NetExtender IP address range within your |
| existing DMZ range, for example, 10.1.1.250 |
|
|
Page 44