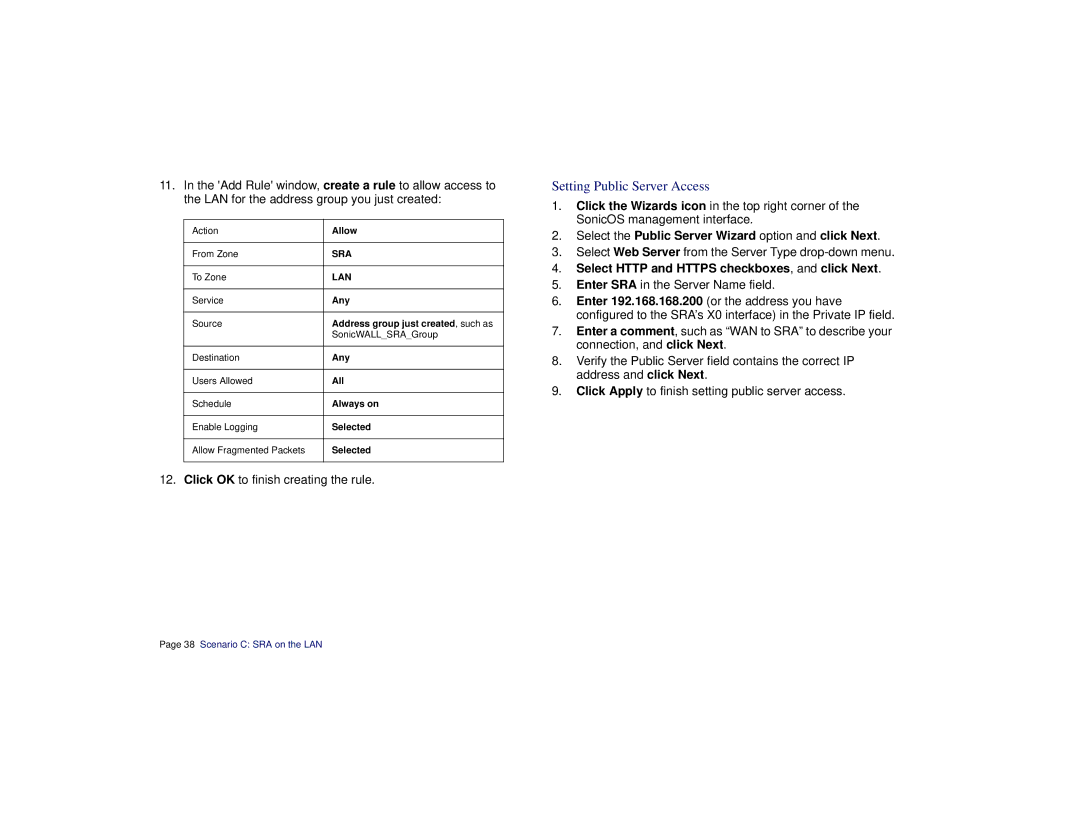
11.In the 'Add Rule' window, create a rule to allow access to the LAN for the address group you just created:
Action | Allow |
|
|
From Zone | SRA |
|
|
To Zone | LAN |
|
|
Service | Any |
|
|
Source | Address group just created, such as |
| SonicWALL_SRA_Group |
|
|
Destination | Any |
|
|
Users Allowed | All |
|
|
Schedule | Always on |
|
|
Enable Logging | Selected |
|
|
Allow Fragmented Packets | Selected |
|
|
12. Click OK to finish creating the rule.
Setting Public Server Access
1.Click the Wizards icon in the top right corner of the SonicOS management interface.
2.Select the Public Server Wizard option and click Next.
3.Select Web Server from the Server Type
4.Select HTTP and HTTPS checkboxes, and click Next.
5.Enter SRA in the Server Name field.
6.Enter 192.168.168.200 (or the address you have configured to the SRA’s X0 interface) in the Private IP field.
7.Enter a comment, such as “WAN to SRA” to describe your connection, and click Next.
8.Verify the Public Server field contains the correct IP address and click Next.
9.Click Apply to finish setting public server access.
Page 38 Scenario C: SRA on the LAN