FRONT PANEL SECTION
Note on installation front panel section:
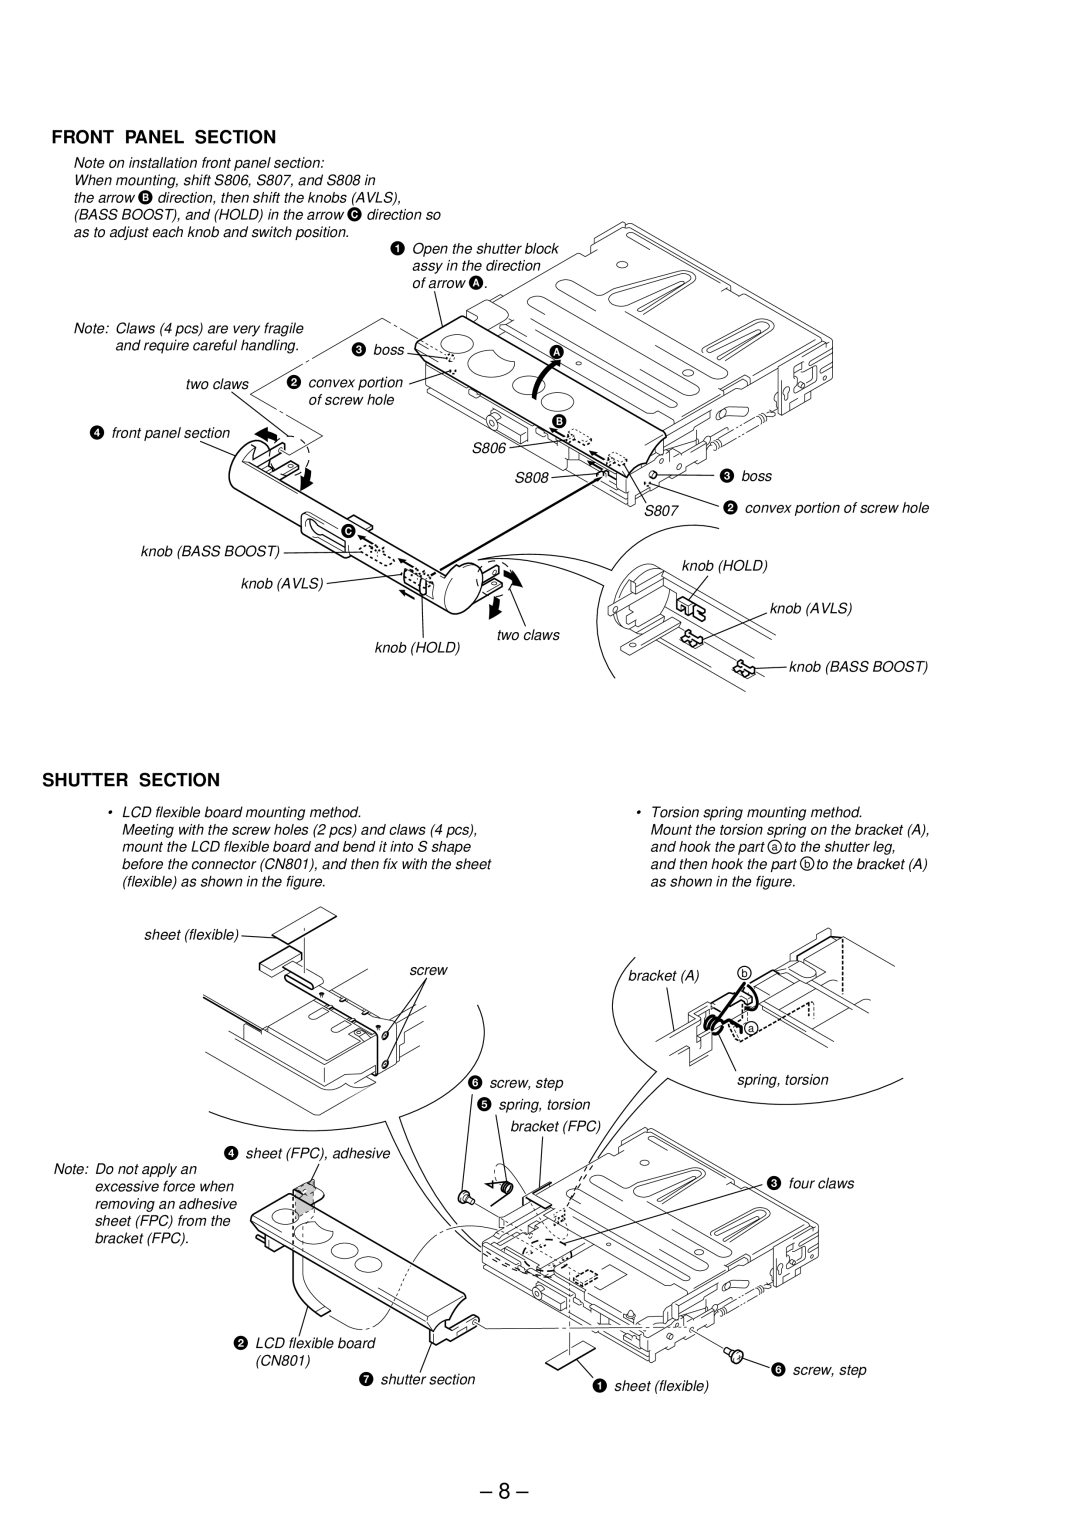
When mounting, shift S806, S807, and S808 in the arrow B direction, then shift the knobs (AVLS), (BASS BOOST), and (HOLD) in the arrow C direction so as to adjust each knob and switch position.
1 Open the shutter block assy in the direction of arrow A.
Note: Claws (4 pcs) are very fragile |
| |
and require careful handling. | 3 boss | |
two claws | 2 convex portion | |
|
| of screw hole |
4 front panel section
C ![]()
knob (BASS BOOST)
knob (AVLS) ![]()
![]()
knob (HOLD)
A
B
S806
S808 | 3 boss |
S807 | 2 convex portion of screw hole |
knob (HOLD)
knob (AVLS)
two claws
![]() knob (BASS BOOST)
knob (BASS BOOST)
SHUTTER SECTION
•LCD flexible board mounting method.
Meeting with the screw holes (2 pcs) and claws (4 pcs), mount the LCD flexible board and bend it into S shape before the connector (CN801), and then fix with the sheet (flexible) as shown in the figure.
sheet (flexible) ![]()
![]()
screw
•Torsion spring mounting method.
Mount the torsion spring on the bracket (A), and hook the part a to the shutter leg, and then hook the part b to the bracket (A) as shown in the figure.
bracket (A) | b |
a
4 sheet (FPC), adhesive
Note: Do not apply an excessive force when removing an adhesive sheet (FPC) from the bracket (FPC).
6 screw, step | spring, torsion |
5spring, torsion bracket (FPC)
3 four claws
2 LCD flexible board |
| |
(CN801) | 6 screw, step | |
7 shutter section | ||
1 sheet (flexible) | ||
|
– 8 –