Hardware Installation |
|
2-3.4 CMOS Clearing (JP5)
After you have turned off your computer, clear the CMOS memory by momentarily shorting pins
Jumper JP5 can be easily identified by its white colored cap.
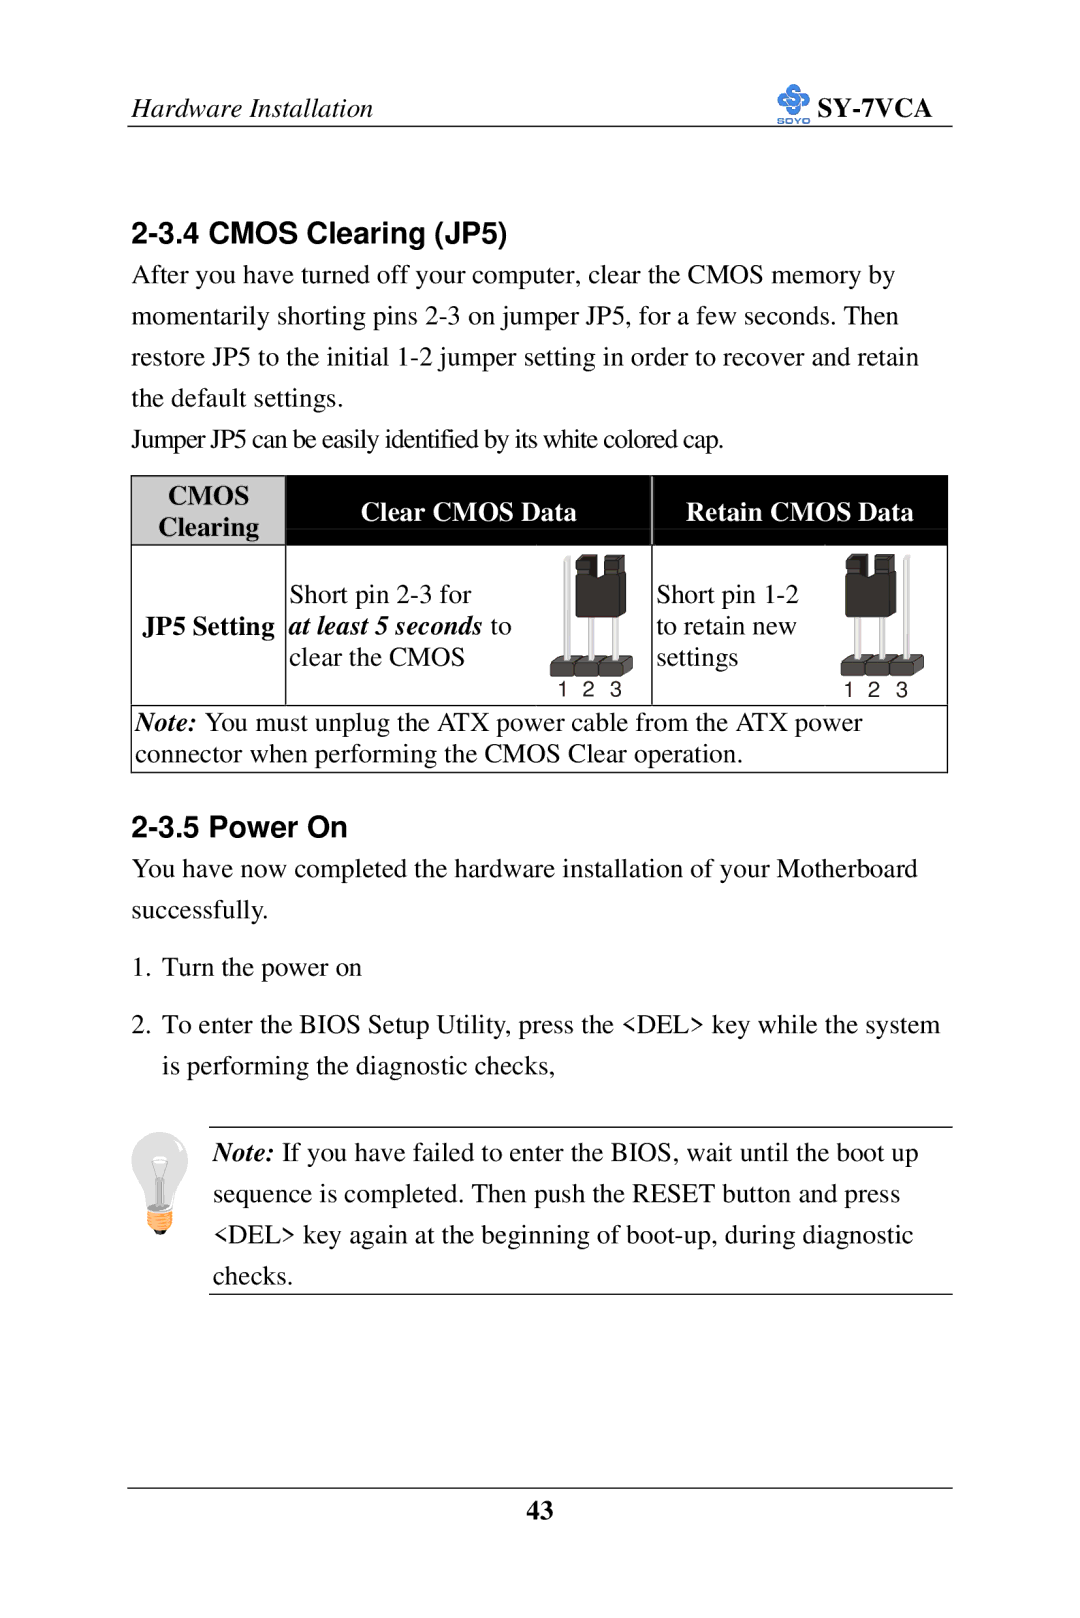
CMOS
Clear CMOS Data Retain CMOS Data
Clearing
JP5 Setting
Short pin
at least 5 seconds to clear the CMOS
1 2 3
Short pin
1 2 3
Note: You must unplug the ATX power cable from the ATX power connector when performing the CMOS Clear operation.
2-3.5 Power On
You have now completed the hardware installation of your Motherboard
successfully.
1.Turn the power on
2.To enter the BIOS Setup Utility, press the <DEL> key while the system is performing the diagnostic checks,
Note: If you have failed to enter the BIOS, wait until the boot up
sequence is completed. Then push the RESET button and press
<DEL> key again at the beginning of
checks.
43