SPECIFICATIONS AND OPERATION
11. Changing the Interface Board
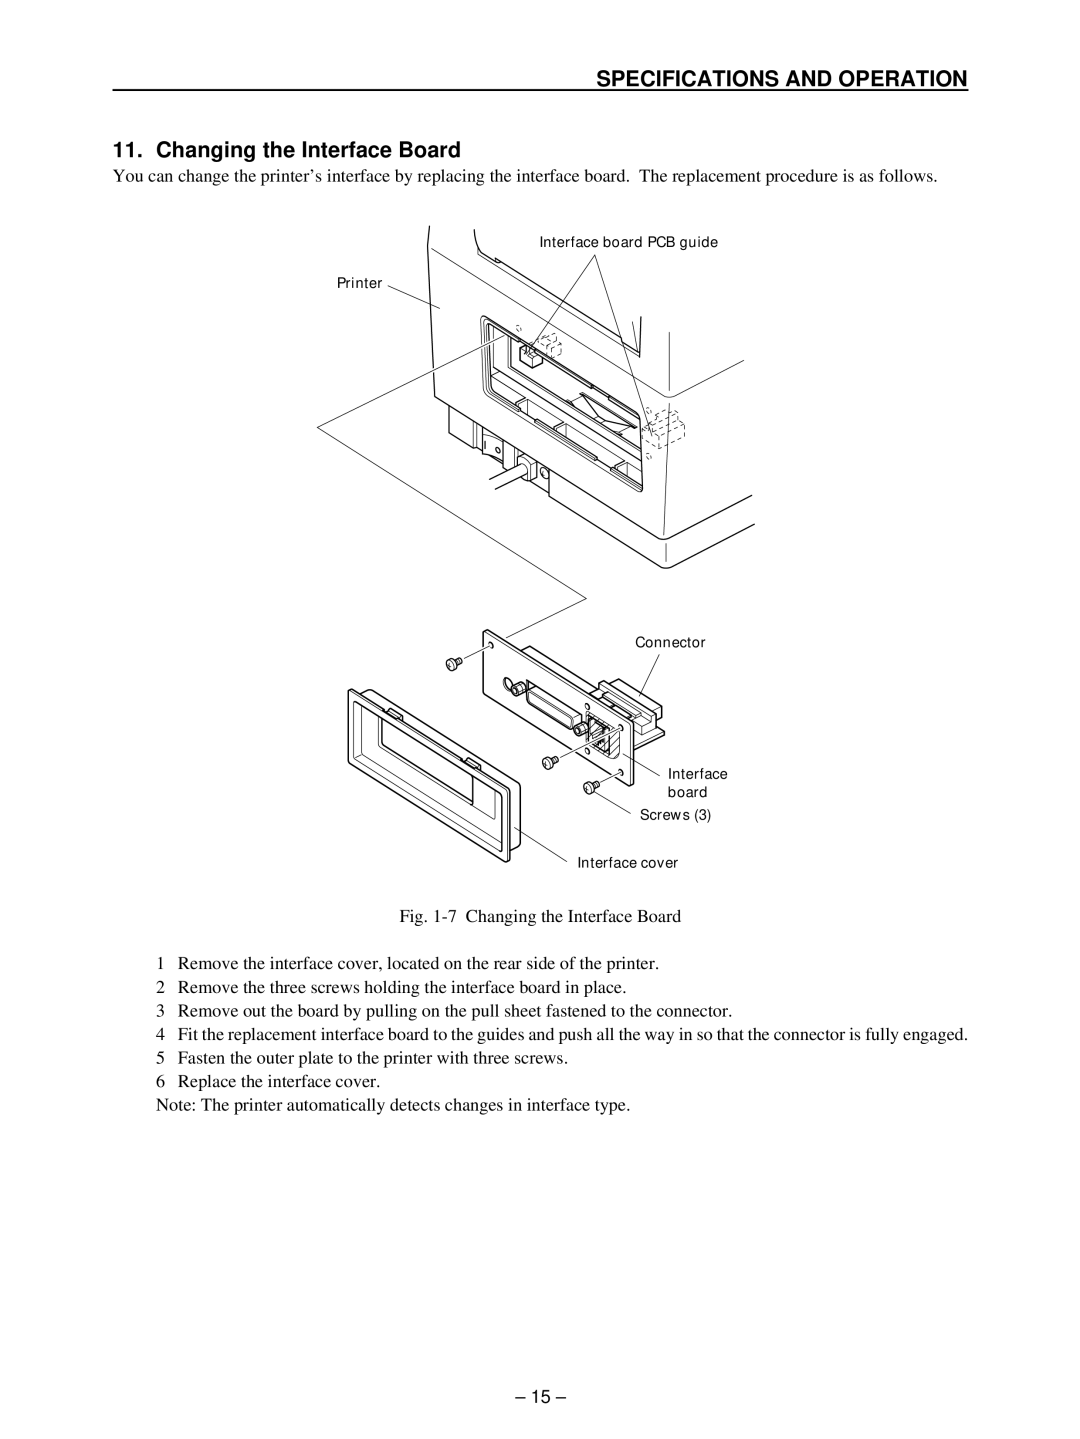
You can change the printer’s interface by replacing the interface board. The replacement procedure is as follows.
Interface board PCB guide
Printer
Connector
Interface board
Screws (3)
Interface cover
Fig. 1-7 Changing the Interface Board
1Remove the interface cover, located on the rear side of the printer.
2Remove the three screws holding the interface board in place.
3Remove out the board by pulling on the pull sheet fastened to the connector.
4Fit the replacement interface board to the guides and push all the way in so that the connector is fully engaged. 5Fasten the outer plate to the printer with three screws.
6Replace the interface cover.
Note: The printer automatically detects changes in interface type.
– 15 –