▼To Apply Power
1.Verify that the HBA is securely installed in the system.
2.Verify that the correct optical cable is attached.
3.Plug in and power on the system.
4.Observe the status of
TABLE
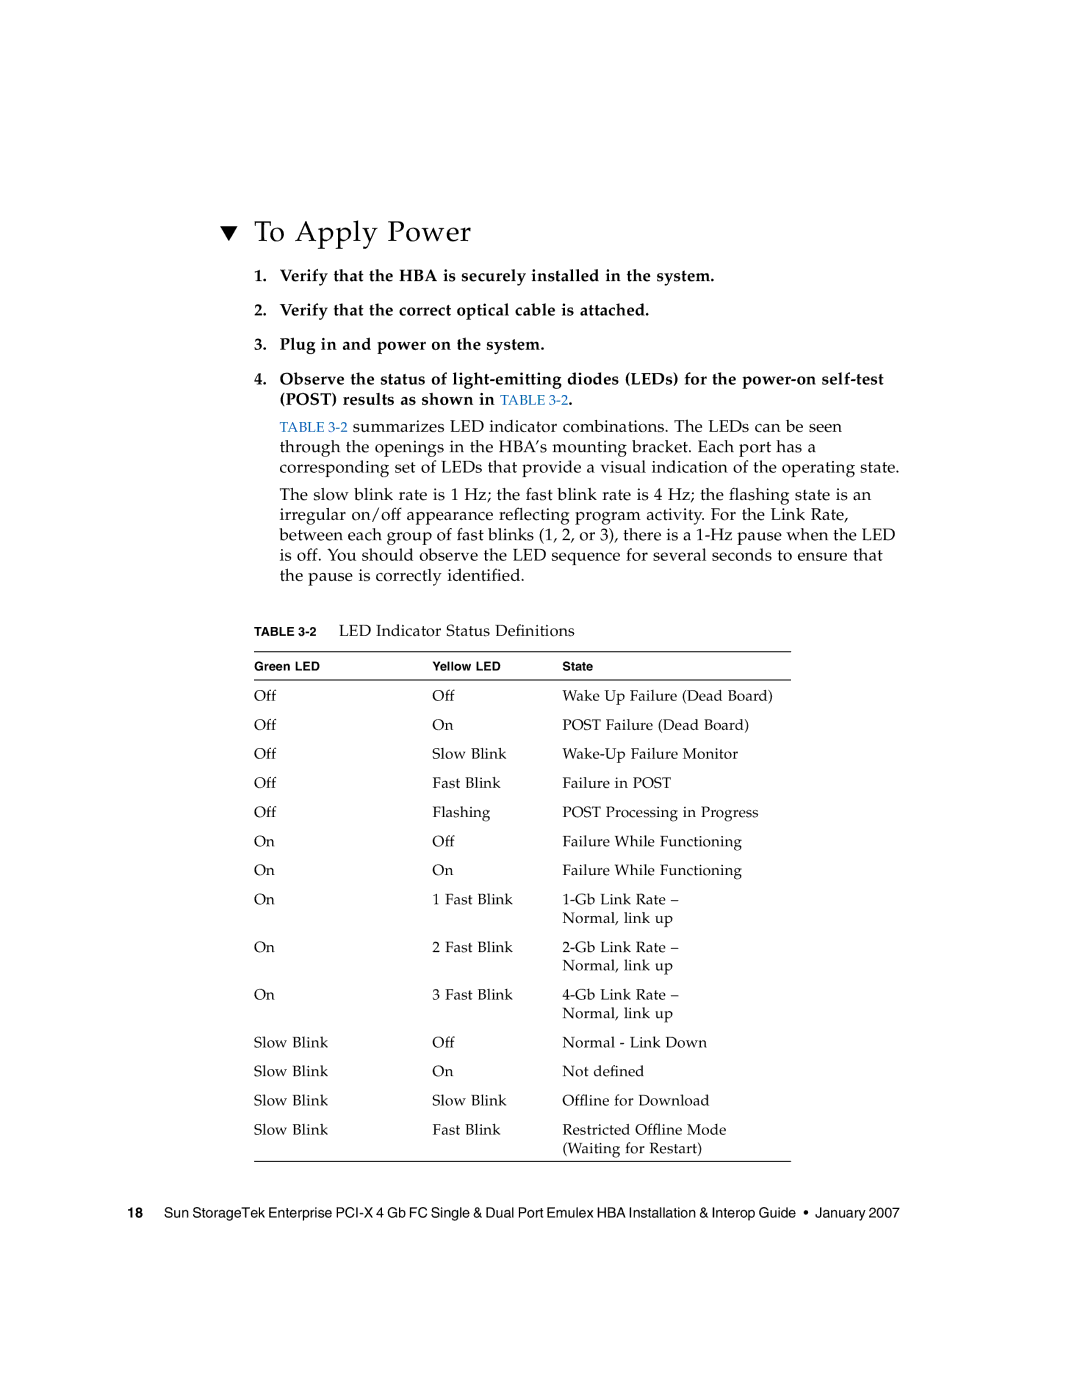
The slow blink rate is 1 Hz; the fast blink rate is 4 Hz; the flashing state is an irregular on/off appearance reflecting program activity. For the Link Rate, between each group of fast blinks (1, 2, or 3), there is a
TABLE 3-2 LED Indicator Status Definitions
Green LED | Yellow LED | State |
|
|
|
Off | Off | Wake Up Failure (Dead Board) |
Off | On | POST Failure (Dead Board) |
Off | Slow Blink | |
Off | Fast Blink | Failure in POST |
Off | Flashing | POST Processing in Progress |
On | Off | Failure While Functioning |
On | On | Failure While Functioning |
On | 1 Fast Blink | |
|
| Normal, link up |
On | 2 Fast Blink | |
|
| Normal, link up |
On | 3 Fast Blink | |
|
| Normal, link up |
Slow Blink | Off | Normal - Link Down |
Slow Blink | On | Not defined |
Slow Blink | Slow Blink | Offline for Download |
Slow Blink | Fast Blink | Restricted Offline Mode |
|
| (Waiting for Restart) |
|
|
|
18 Sun StorageTek Enterprise