Chapter 6: Advanced Chassis Setup
Mounting a SATA Drive in a Drive Carrier
1.Install a drive into the carrier with the printed circuit board side toward the carrier so that the mounting holes align with those in the carrier.
2.Secure the drive to the carrier with four screws, as shown in Figure
Installing/Removing SATA Drives
1.To remove, first push the release button located beside the drive LEDs
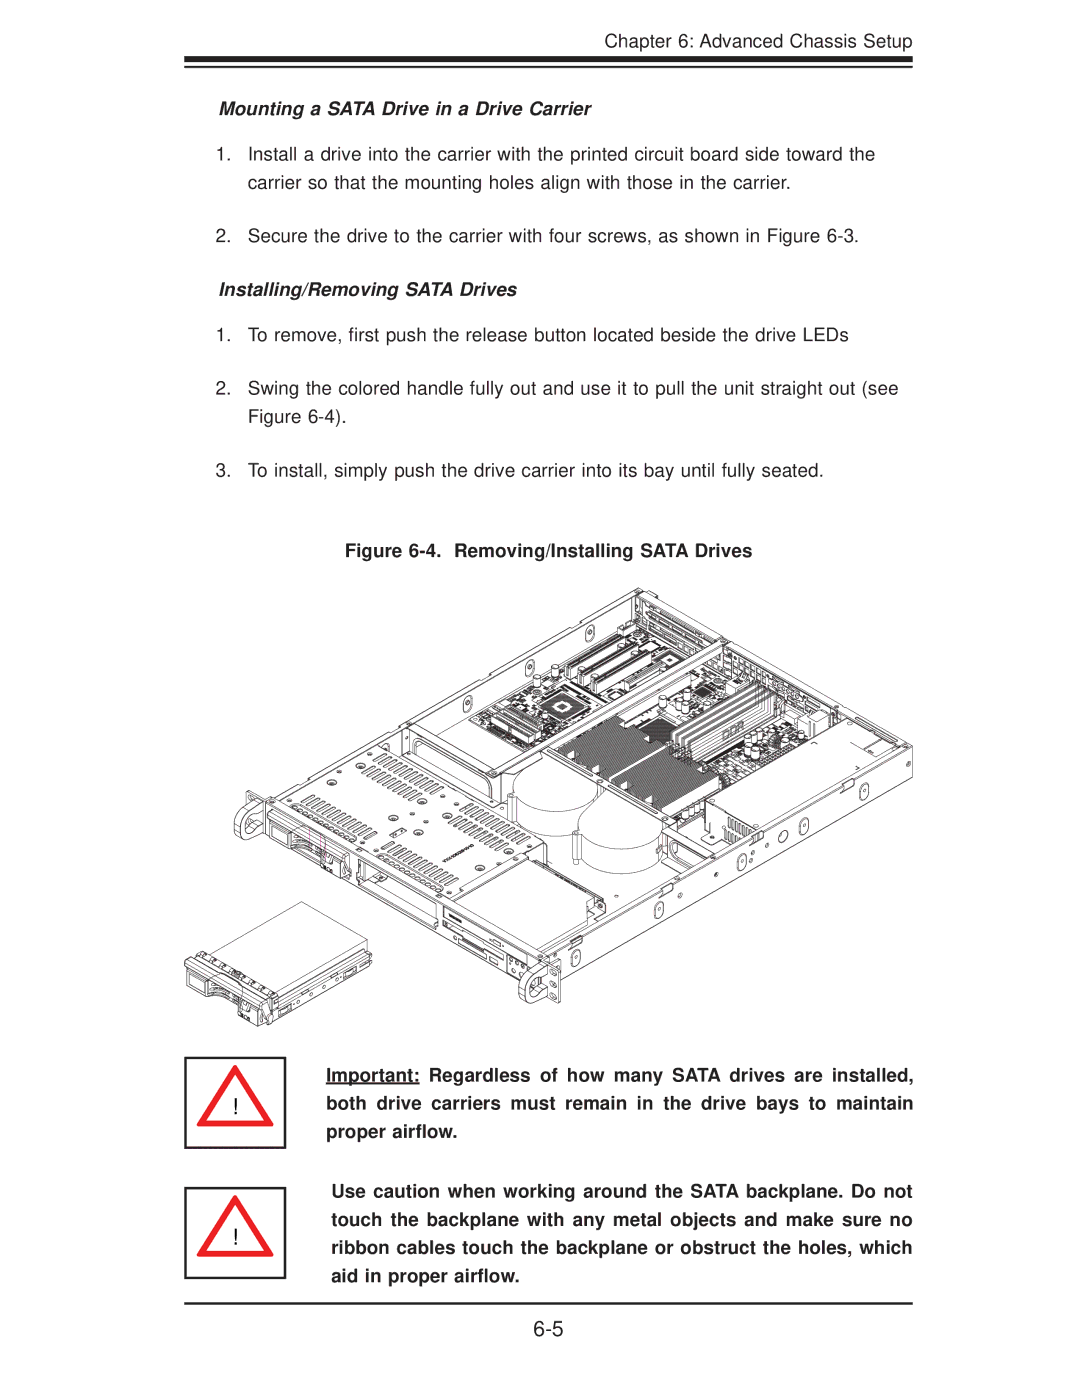
2.Swing the colored handle fully out and use it to pull the unit straight out (see Figure
3.To install, simply push the drive carrier into its bay until fully seated.
Figure 6-4. Removing/Installing SATA Drives
! |
! |
