10 – MiniDisc editing—Erase disc
Selecting a track to be erased on the menu | “Sure?” is displayed. |
11. In the stop mode, select the “ERASE TRK?” option on the EDIT
“Track>***” will be displayed, with *** rep- resenting the last track number.
2Select the track to be erased using the MULTI JOG dial on the front panel, or the MENU
3Press the ENTER key (or the YES key) on the front panel, or the ENT/YES key on the remote control.
After the track is erased, “Complete” is shown on the display.
NOTE
When a track is erased, the tracks are renumbered from the next track.
Erase disc
All the tracks on the disc can be erased in one opera- tion.
1Select the “ERASE DISC?” option on the EDIT
“Sure?” is displayed.
2Press the ENTER key (or the YES key) on the front panel, or the ENT/YES key on the remote control.
After all the tracks on the disc are erased, “Complete” is shown on the display.
Divide tracks
Tracks can be divided into two or more tracks.
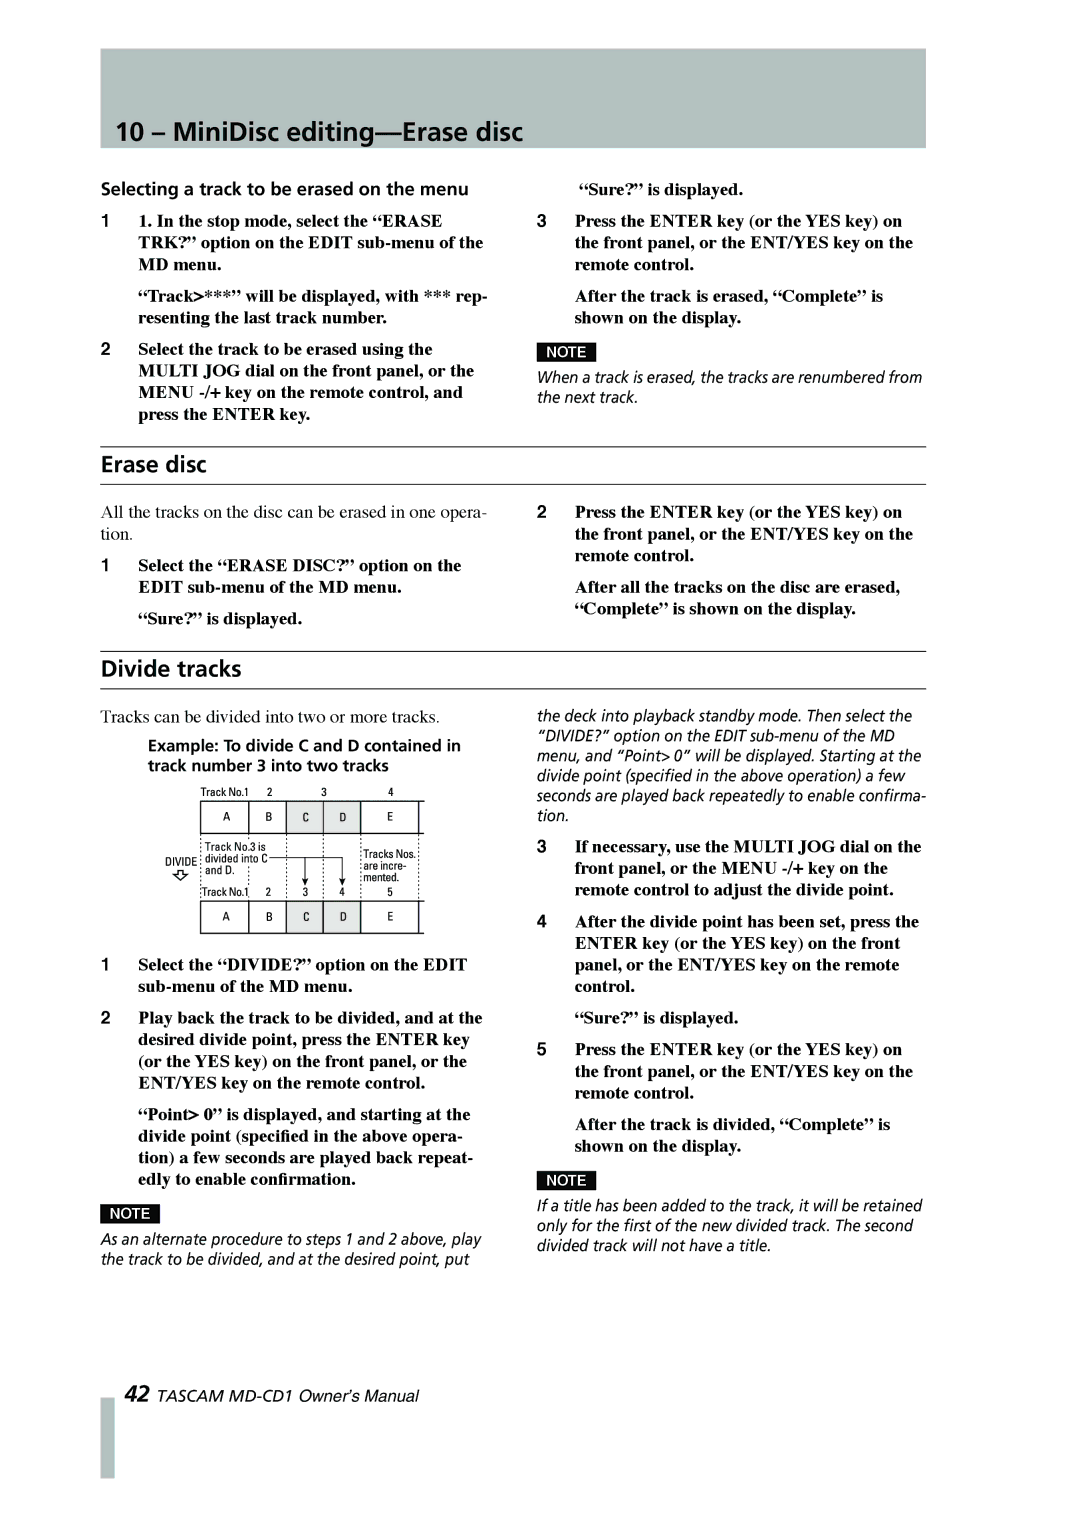
Example: To divide C and D contained in track number 3 into two tracks
the deck into playback standby mode. Then select the “DIVIDE?” option on the EDIT
1Select the “DIVIDE?” option on the EDIT
2Play back the track to be divided, and at the desired divide point, press the ENTER key (or the YES key) on the front panel, or the ENT/YES key on the remote control.
“Point> 0” is displayed, and starting at the divide point (specified in the above opera- tion) a few seconds are played back repeat- edly to enable confirmation.
NOTE
As an alternate procedure to steps 1 and 2 above, play the track to be divided, and at the desired point, put
3If necessary, use the MULTI JOG dial on the front panel, or the MENU
4After the divide point has been set, press the ENTER key (or the YES key) on the front panel, or the ENT/YES key on the remote control.
“Sure?” is displayed.
5Press the ENTER key (or the YES key) on the front panel, or the ENT/YES key on the remote control.
After the track is divided, “Complete” is shown on the display.
NOTE
If a title has been added to the track, it will be retained only for the first of the new divided track. The second divided track will not have a title.
42 TASCAM