Recording 2
C |
| B | ||
|
|
|
|
|
A
ATo stop recording
Press the STOP button (H).
BTo suspend recording temporarily
Press the RECORD button (K) during recording. The unit enters record pause mode.
“REC” and “USB” or “SD” indicator blinks. The red indicator on the RECORD button blinks.
<To resume recording press the RECORD button (K) again.
<When the unit enters record pause mode, file will not be divided. If you want to insert a file division, press the TRACK INCREMENT button before the unit enters record pause mode or after the unit restarts recording.
CManual file division
It is possible to divide the recording into files while recording. While recording, press the TRACK INCREMENT button. The current file number will be incremented by one.
<The TRACK INCREMENT button works when the MANUAL/AUTO REC setting is set to MANUAL.
<This button don’t work during recording from CD.
<When this button is pressed, a blank of about 1 second will be made.
During recording from a CD, when the PLAY/PAUSE button (y/J) is pressed the playback of CD will stop temporarily, but the recording will not stop and the file will not be divided.
Erase
1 3 5 6 7
2 4
Use these steps to select and erase files stored on a USB memory stick or an SD memory card.
Slot the USB memory stick or the SD memory card that contains the file you want to erase.
1In USB or SD mode, press the MENU button.
<To cancel the menu setting mode, leave the unit idle for a minute, or press the STOP button (H).
2Turn the FUNCTION/REC LEVEL/SELECT knob to select “ERASE”.
3Press the PROGRAM/ENTER button.
4Turn the FUNCTION/REC LEVEL/SELECT knob to select the file to erase.
The file name appears on the display.
Partes del giradiscos
| B |
|
| |
A | C |
|
| |
| D |
|
| |
| E |
|
| |
| F |
|
| |
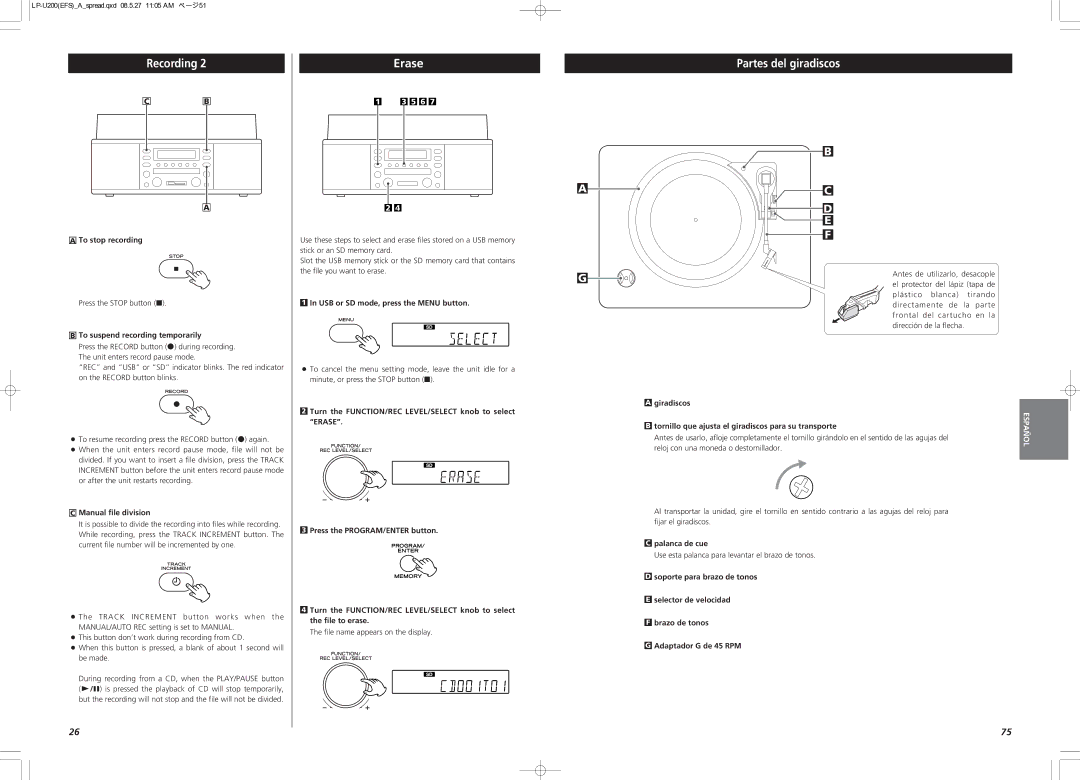
G | Antes de utilizarlo, desacople | |||
el protector del lápiz (tapa de | ||||
| ||||
| plástico | blanca) | tirando | |
| directamente de | la parte | ||
| frontal del cartucho en la | |||
| dirección de la flecha. | |||
A | giradiscos |
|
|
| ESPAÑOL |
B | tornillo que ajusta el giradiscos para su transporte |
Antes de usarlo, afloje completamente el tornillo girándolo en el sentido de las agujas del reloj con una moneda o destornillador.
Al transportar la unidad, gire el tornillo en sentido contrario a las agujas del reloj para fijar el giradiscos.
C palanca de cue
Use esta palanca para levantar el brazo de tonos.
D soporte para brazo de tonos
Eselector de velocidad
Fbrazo de tonos
GAdaptador G de 45 RPM
26 | 75 |