P350 SETUP
This section is a detailed description of the setup for your P350.
Positioning the Firefly™ P350 On the Desktop
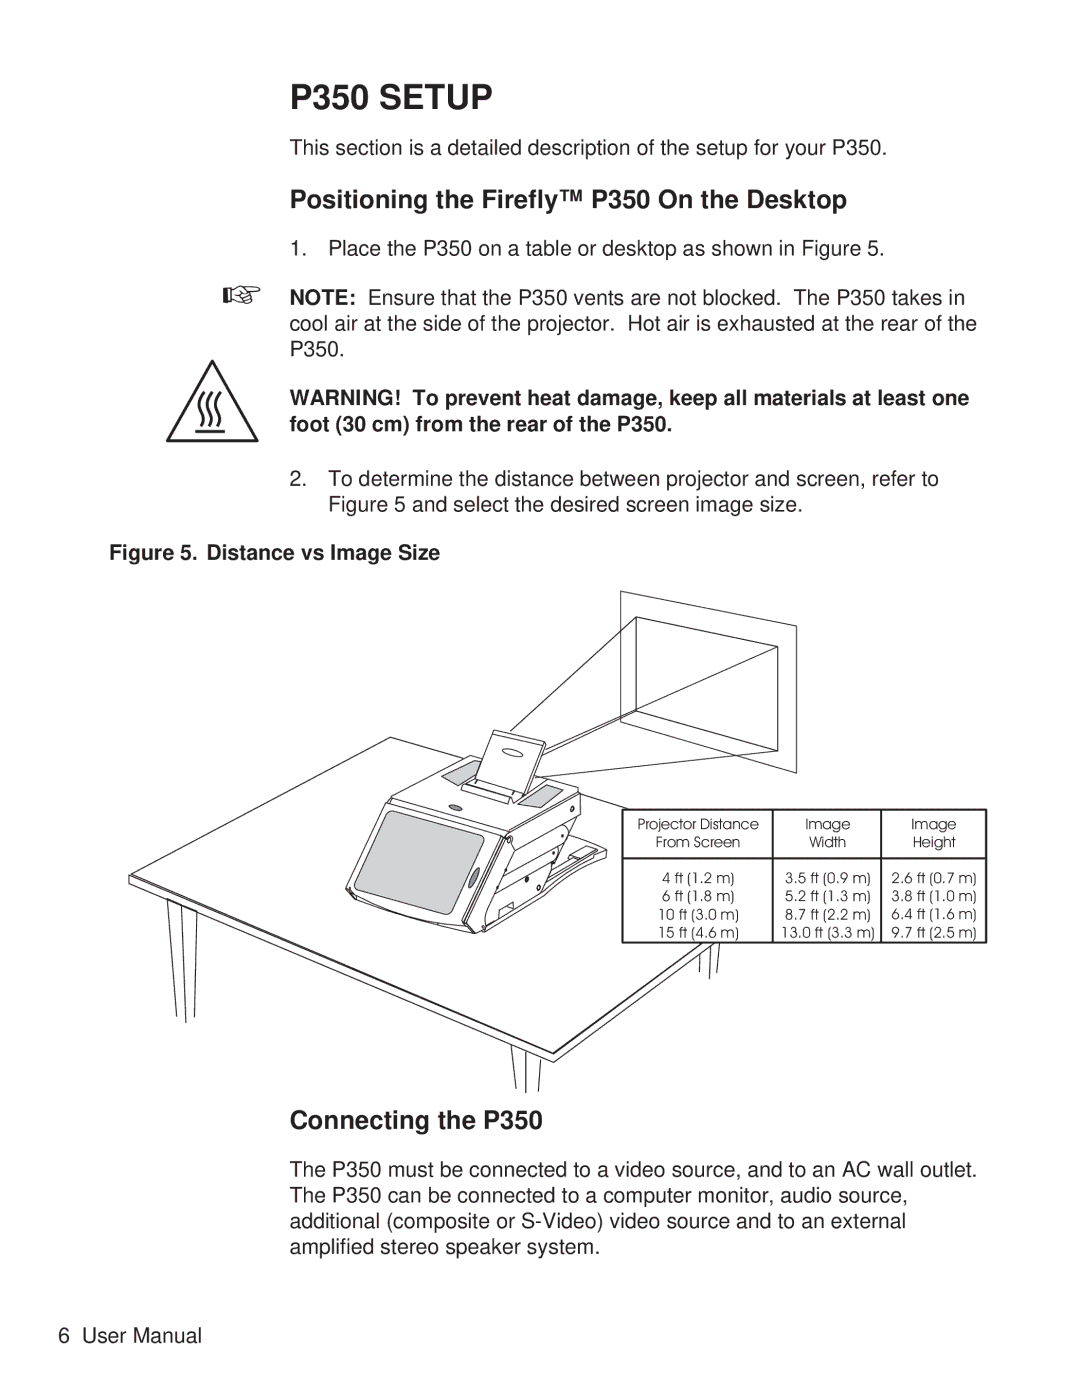
1.Place the P350 on a table or desktop as shown in Figure 5.
☞NOTE: Ensure that the P350 vents are not blocked. The P350 takes in cool air at the side of the projector. Hot air is exhausted at the rear of the P350.
WARNING! To prevent heat damage, keep all materials at least one foot (30 cm) from the rear of the P350.
2.To determine the distance between projector and screen, refer to Figure 5 and select the desired screen image size.
Figure 5. Distance vs Image Size
Projector Distance |
| Image | Image |
From Screen |
| Width | Height |
|
|
|
|
4 ft (1.2 m) | 3.5 | ft (0.9 m) | 2.6 ft (0.7 m) |
6 ft (1.8 m) | 5.2 | ft (1.3 m) | 3.8 ft (1.0 m) |
10 ft (3.0 m) | 8.7 | ft (2.2 m) | 6.4 ft (1.6 m) |
15 ft (4.6 m) | 13.0 | ft (3.3 m) | 9.7 ft (2.5 m) |
Connecting the P350
The P350 must be connected to a video source, and to an AC wall outlet. The P350 can be connected to a computer monitor, audio source, additional (composite or
6 User Manual
