
UDAP, UDAS specifications
Thomas & Betts is a well-respected name in the electrical and industrial products sector, known for its innovation and quality. Among its impressive portfolio, the UDAS and UDAP series of connectors stand out for their reliable performance and advanced features. These connectors are specifically designed to meet the rigorous demands of electrical applications in various industries.The UDAS (Universal Disconnect Appliance Switch) and UDAP (Universal Disconnect Appliance Plug) are engineered for high-capacity applications where safety, efficiency, and ease of use are paramount. One of the main features of these connectors is their ability to deliver increased electrical resistance and durability. They are constructed from high-quality materials that can withstand extreme environmental conditions, making them ideal for outdoor and harsh industrial applications.
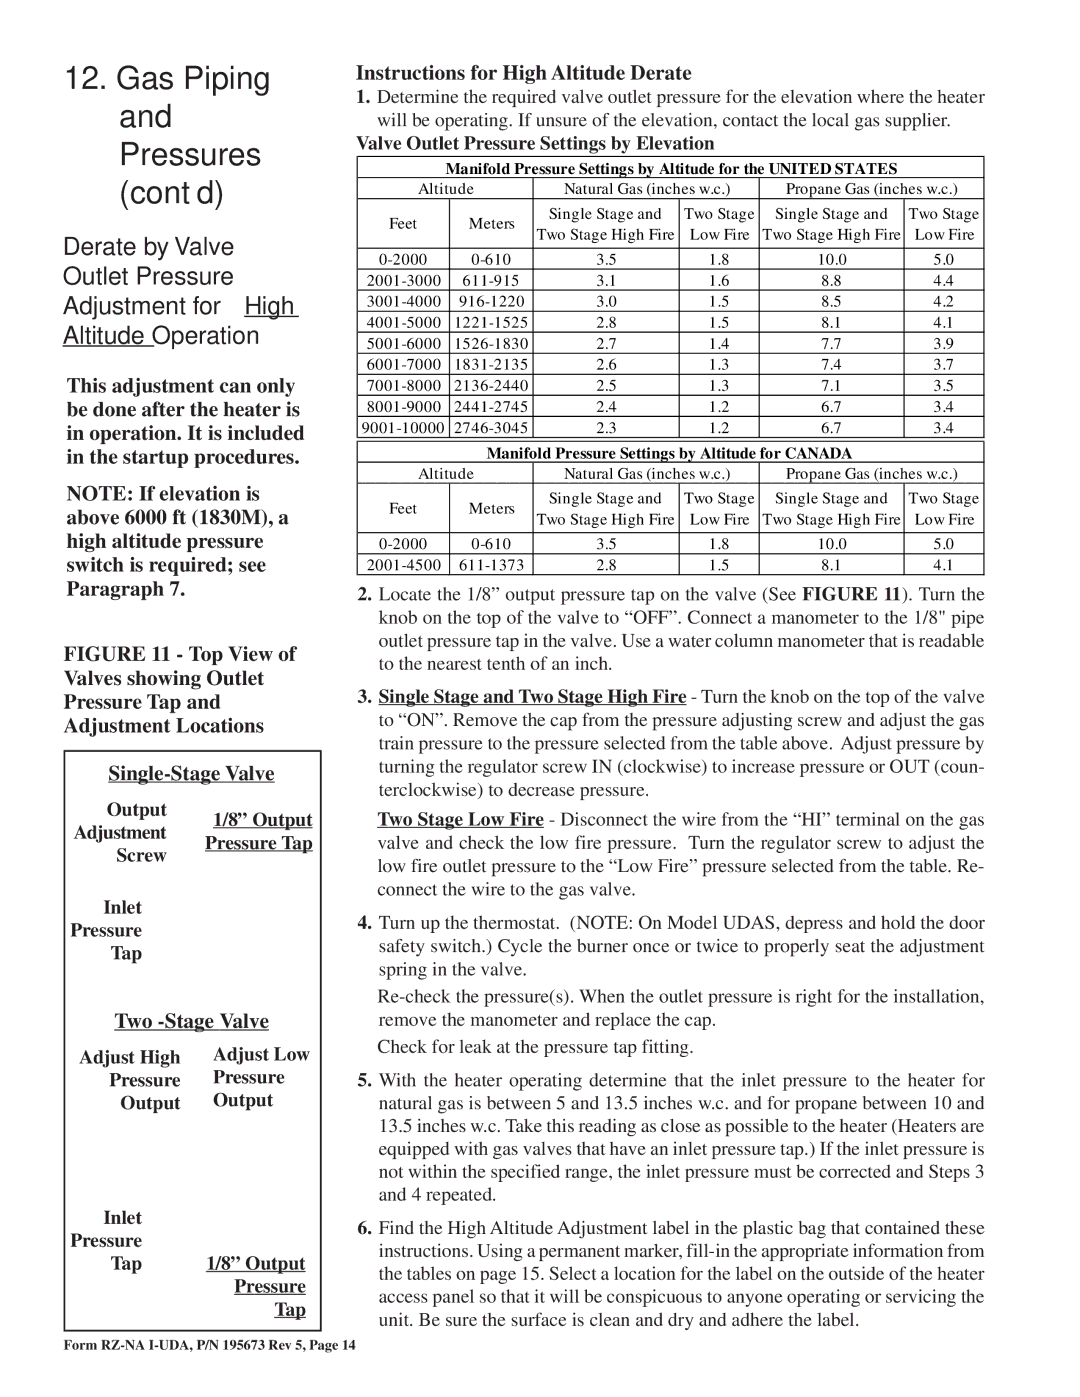
Another key technology employed in the UDAS and UDAP series is the quick-connect mechanism. This innovative design allows users to connect and disconnect circuits swiftly without requiring excessive force or complex tools. This is particularly beneficial in settings where downtime must be minimized and efficiency is crucial. Additionally, the connectors are designed to provide a secure, locking fit to ensure consistent electrical contact, thereby enhancing operational safety.
The UDAS and UDAP connectors are manufactured to comply with several industry standards, ensuring that they meet or exceed the requirements for electrical safety and performance. Their user-centric design features help in reducing installation time and costs, making them a preferred choice among contractors and engineers.
Furthermore, these connectors are versatile, compatible with a wide range of electrical systems, and can be employed in applications such as HVAC, lighting, and power distribution. They also come in various sizes and configurations to accommodate diverse specifications, improving customization options for different projects.
In summary, the Thomas & Betts UDAS and UDAP series stands out for their robust design, quick-connect technology, and versatility across various industrial applications. Their durability and compliance with safety standards make them an excellent choice for professionals seeking reliable connectivity solutions in demanding environments. Investing in these connectors ensures optimal performance and safety in electrical installations, showcasing Thomas & Betts' commitment to excellence in electrical components.