WHEN REPLACING EEPROM (MEMORY) IC
CONFIRMATION OF CHECK SUM, POWER ON TOTAL HOURS AND MICON VERSION
Initial total of MEMORY IC, POWER ON total hours and MICON VERSIONcan be checked on the screen. Total hours are displayed in 16 system of notation.
NOTE: If you set a factory initialization, the total hours is reset to "0".
Please refer to "CONFIRMATION OF INITIAL DATA" when SUM DATA is not corresponding.
1.Turn on the POWER, and set to the ALL mode.
2.Set the VOLUME to minimum.
3.Press both VOL. DOWN button on the set and Channel button (8) on the remote control for more than 2 seconds.
4.After the confirmation of each check sum, turn off the power.
NOTE:The each item value might be different according to each set.
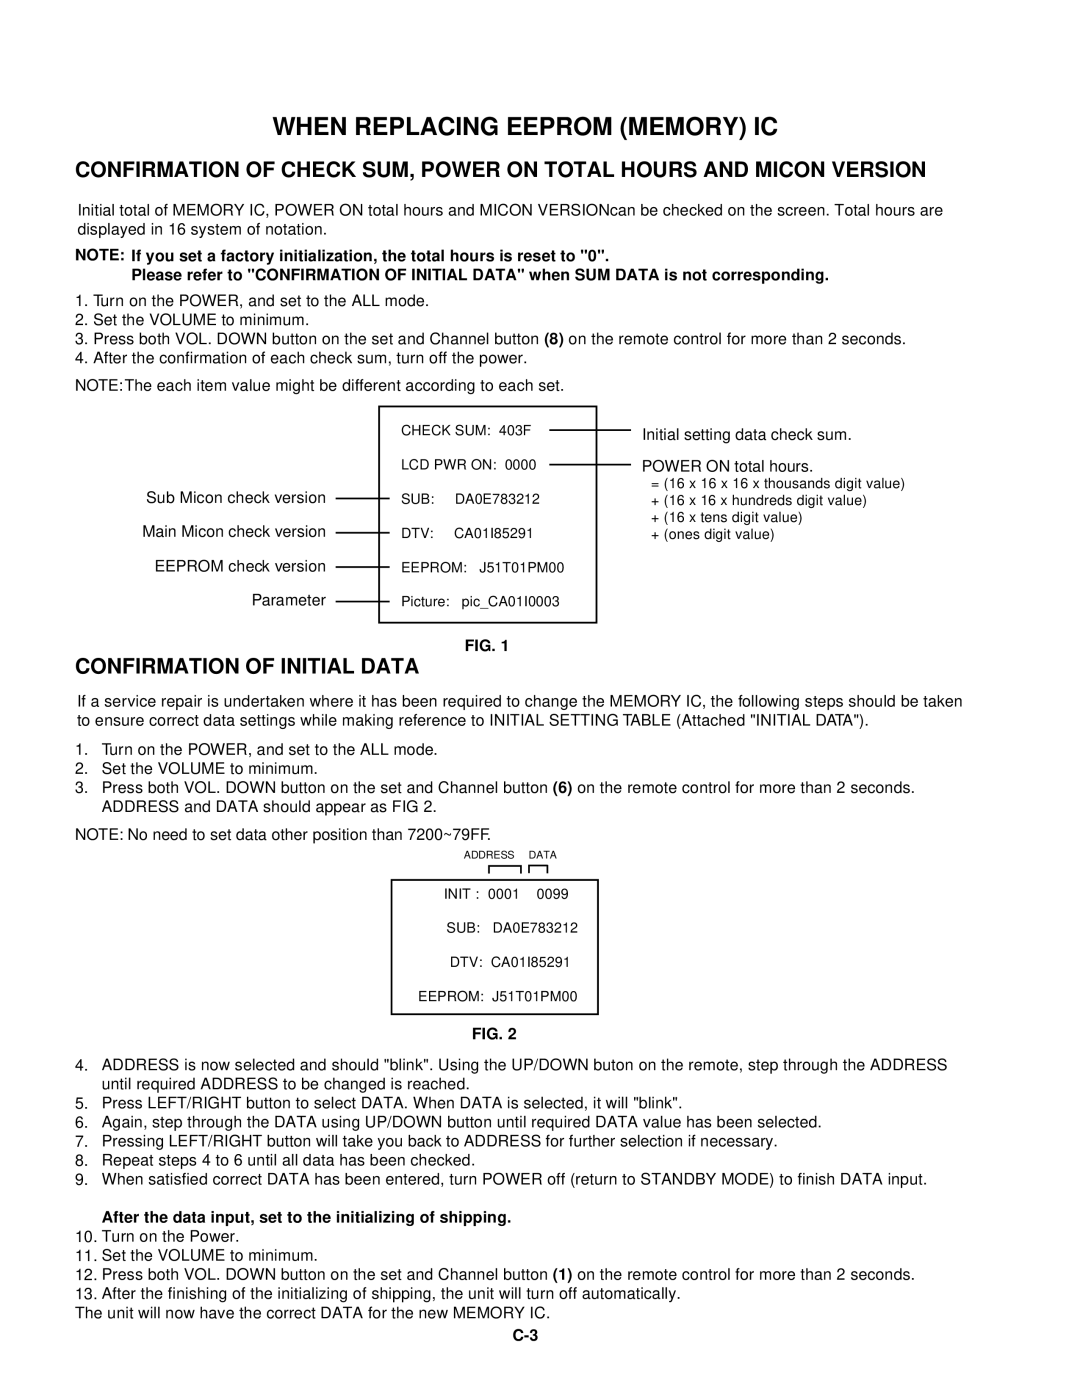
Sub Micon check version
Main Micon check version
EEPROM check version
Parameter
CHECK SUM: 403F
LCD PWR ON: 0000
SUB: DA0E783212
DTV: CA01I85291
EEPROM: J51T01PM00
Picture: pic_CA01I0003
FIG. 1
Initial setting data check sum.
POWER ON total hours.
=(16 x 16 x 16 x thousands digit value)
+(16 x 16 x hundreds digit value)
+(16 x tens digit value)
+(ones digit value)
CONFIRMATION OF INITIAL DATA
If a service repair is undertaken where it has been required to change the MEMORY IC, the following steps should be taken to ensure correct data settings while making reference to INITIAL SETTING TABLE (Attached "INITIAL DATA").
1.Turn on the POWER, and set to the ALL mode.
2.Set the VOLUME to minimum.
3.Press both VOL. DOWN button on the set and Channel button (6) on the remote control for more than 2 seconds. ADDRESS and DATA should appear as FIG 2.
NOTE: No need to set data other position than 7200~79FF.
ADDRESS DATA
INIT : 0001 0099
SUB: DA0E783212
DTV: CA01I85291
EEPROM: J51T01PM00
FIG. 2
4.ADDRESS is now selected and should "blink". Using the UP/DOWN buton on the remote, step through the ADDRESS until required ADDRESS to be changed is reached.
5.Press LEFT/RIGHT button to select DATA. When DATA is selected, it will "blink".
6.Again, step through the DATA using UP/DOWN button until required DATA value has been selected.
7.Pressing LEFT/RIGHT button will take you back to ADDRESS for further selection if necessary.
8.Repeat steps 4 to 6 until all data has been checked.
9.When satisfied correct DATA has been entered, turn POWER off (return to STANDBY MODE) to finish DATA input.
After the data input, set to the initializing of shipping.
10.Turn on the Power.
11.Set the VOLUME to minimum.
12.Press both VOL. DOWN button on the set and Channel button (1) on the remote control for more than 2 seconds.
13.After the finishing of the initializing of shipping, the unit will turn off automatically.
The unit will now have the correct DATA for the new MEMORY IC.