Embedded DVR User Guide
Sensor
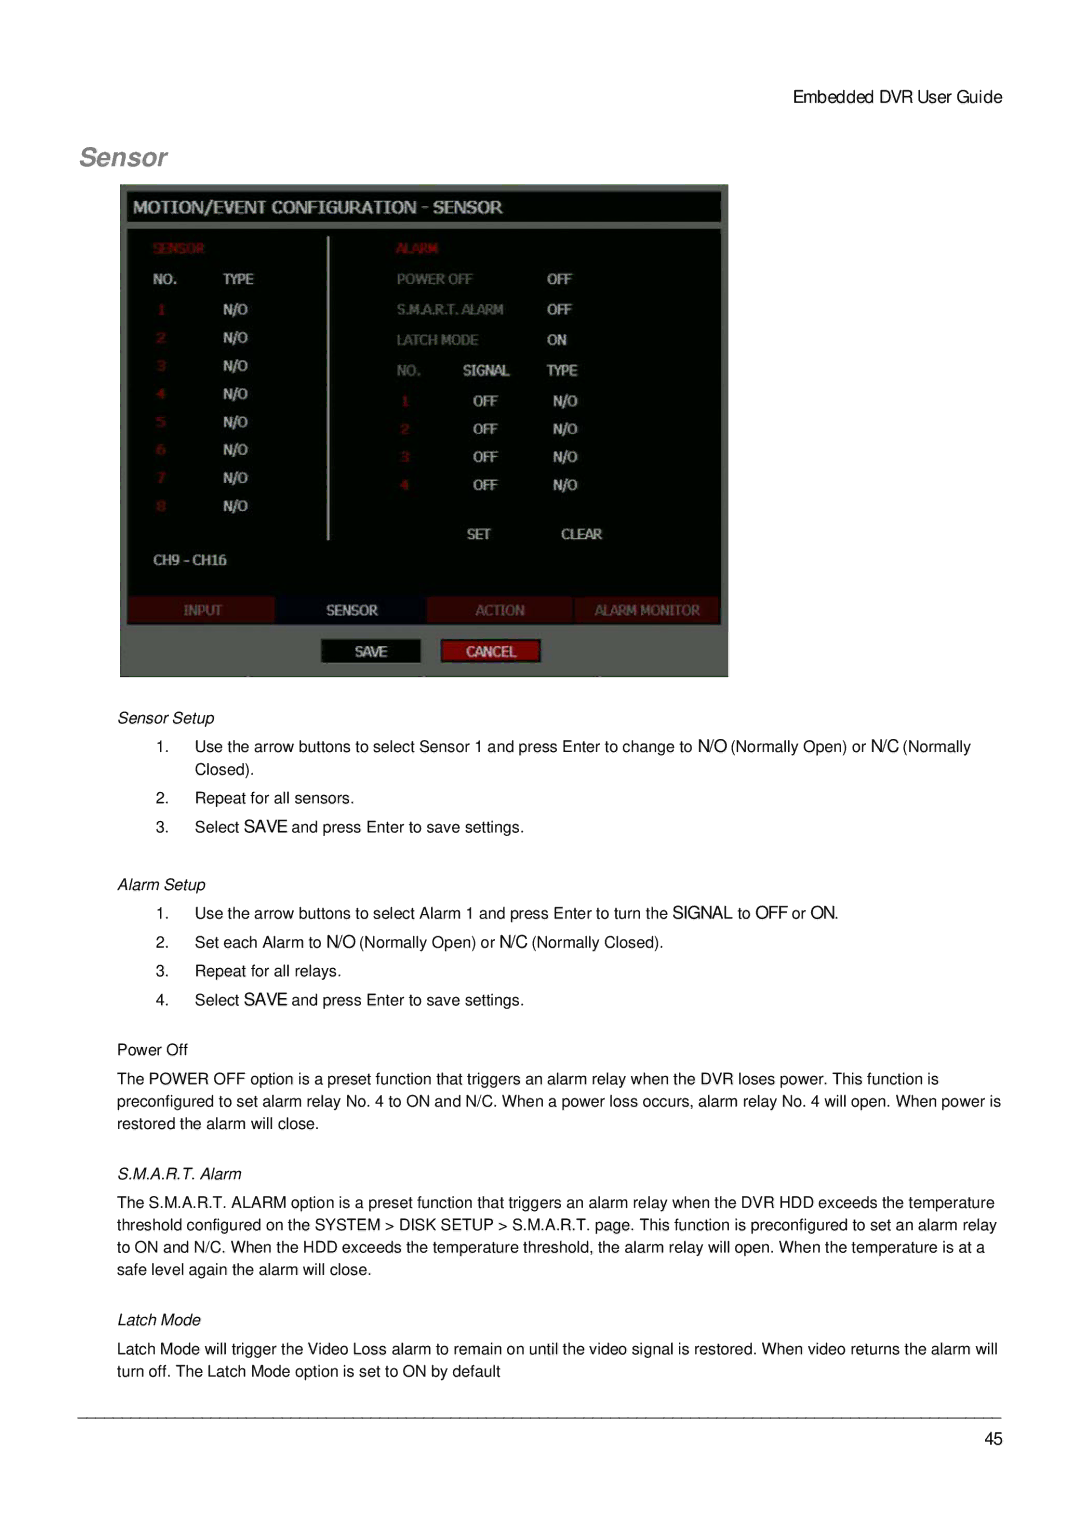
Sensor Setup
1.Use the arrow buttons to select Sensor 1 and press Enter to change to N/O (Normally Open) or N/C (Normally Closed).
2.Repeat for all sensors.
3.Select SAVE and press Enter to save settings.
Alarm Setup
1.Use the arrow buttons to select Alarm 1 and press Enter to turn the SIGNAL to OFF or ON.
2.Set each Alarm to N/O (Normally Open) or N/C (Normally Closed).
3.Repeat for all relays.
4.Select SAVE and press Enter to save settings.
Power Off
The POWER OFF option is a preset function that triggers an alarm relay when the DVR loses power. This function is preconfigured to set alarm relay No. 4 to ON and N/C. When a power loss occurs, alarm relay No. 4 will open. When power is restored the alarm will close.
S.M.A.R.T. Alarm
The S.M.A.R.T. ALARM option is a preset function that triggers an alarm relay when the DVR HDD exceeds the temperature threshold configured on the SYSTEM > DISK SETUP > S.M.A.R.T. page. This function is preconfigured to set an alarm relay to ON and N/C. When the HDD exceeds the temperature threshold, the alarm relay will open. When the temperature is at a safe level again the alarm will close.
Latch Mode
Latch Mode will trigger the Video Loss alarm to remain on until the video signal is restored. When video returns the alarm will turn off. The Latch Mode option is set to ON by default
________________________________________________________________________________________________________
45