15. CLEANING THE PRIT HEAD
15. CLEANING THE PRINT HEAD
15. CLEANING THE PRINT HEAD
WARNING!
Care must be taken not to injure your fingers with the receipt cutter during installing, removing or cleaning it.
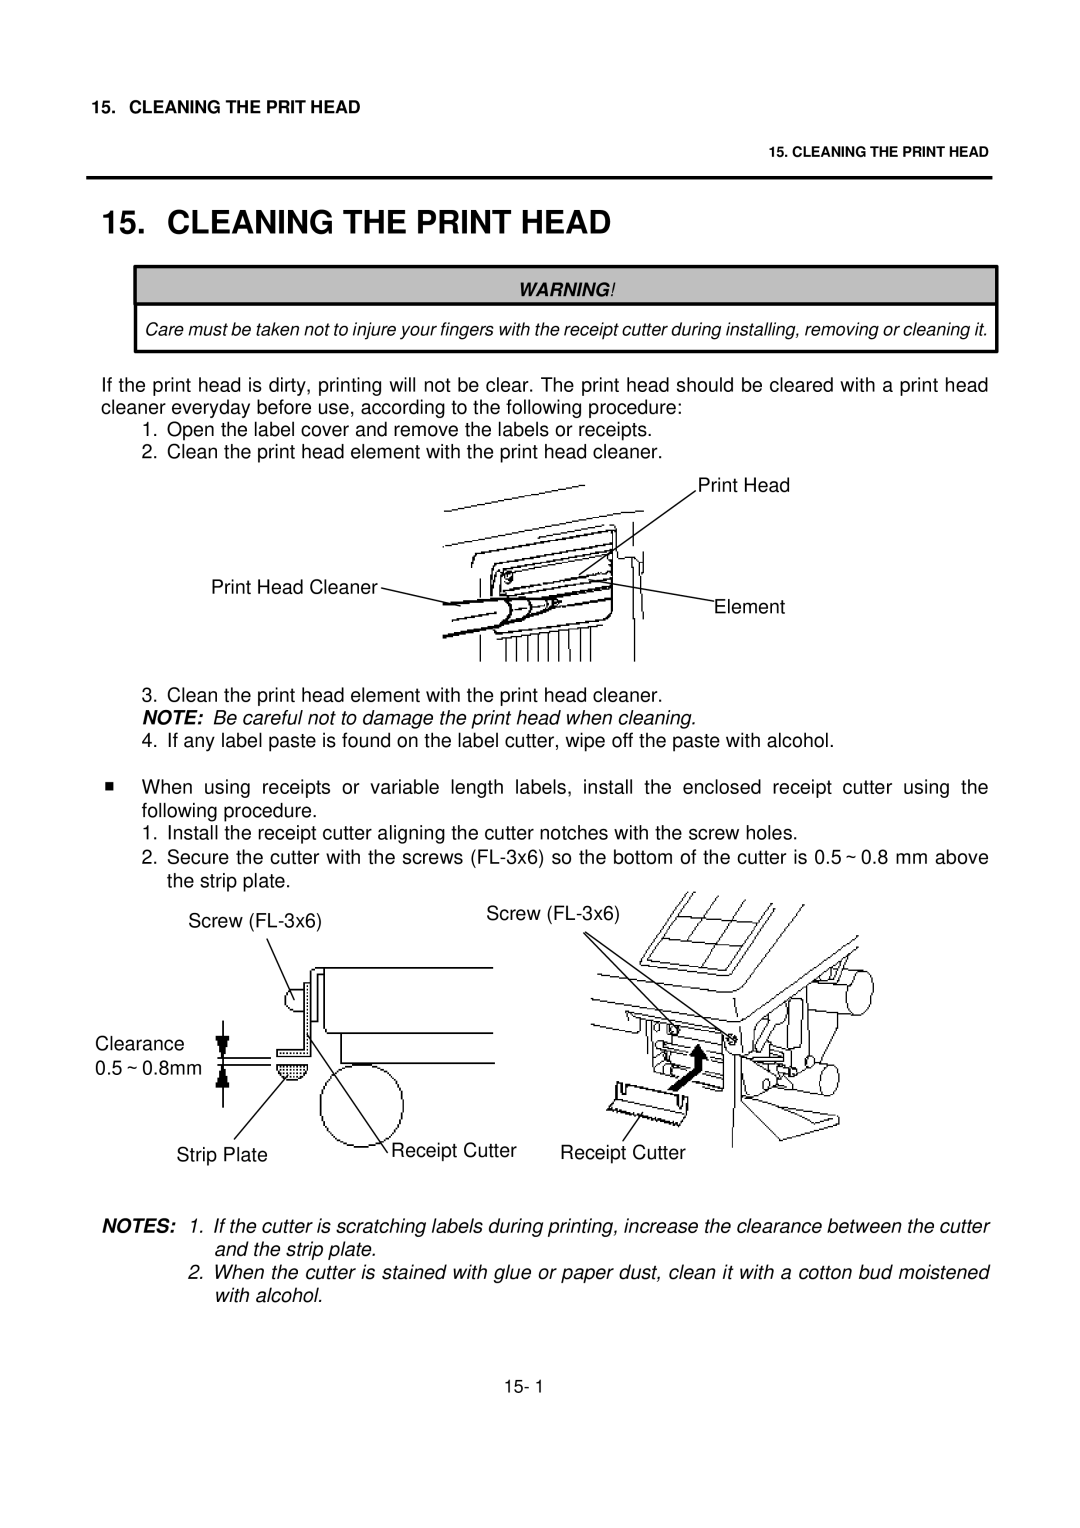
If the print head is dirty, printing will not be clear. The print head should be cleared with a print head cleaner everyday before use, according to the following procedure:
1.Open the label cover and remove the labels or receipts.
2.Clean the print head element with the print head cleaner.
Print Head
Print Head Cleaner
Element
3.Clean the print head element with the print head cleaner. NOTE: Be careful not to damage the print head when cleaning.
4.If any label paste is found on the label cutter, wipe off the paste with alcohol.
■When using receipts or variable length labels, install the enclosed receipt cutter using the following procedure.
1.Install the receipt cutter aligning the cutter notches with the screw holes.
2.Secure the cutter with the screws
Screw | Screw |
|
Clearance 0.5~0.8mm
Strip Plate | Receipt Cutter | Receipt Cutter |
NOTES: 1. If the cutter is scratching labels during printing, increase the clearance between the cutter and the strip plate.
2.When the cutter is stained with glue or paper dust, clean it with a cotton bud moistened with alcohol.
15- 1
