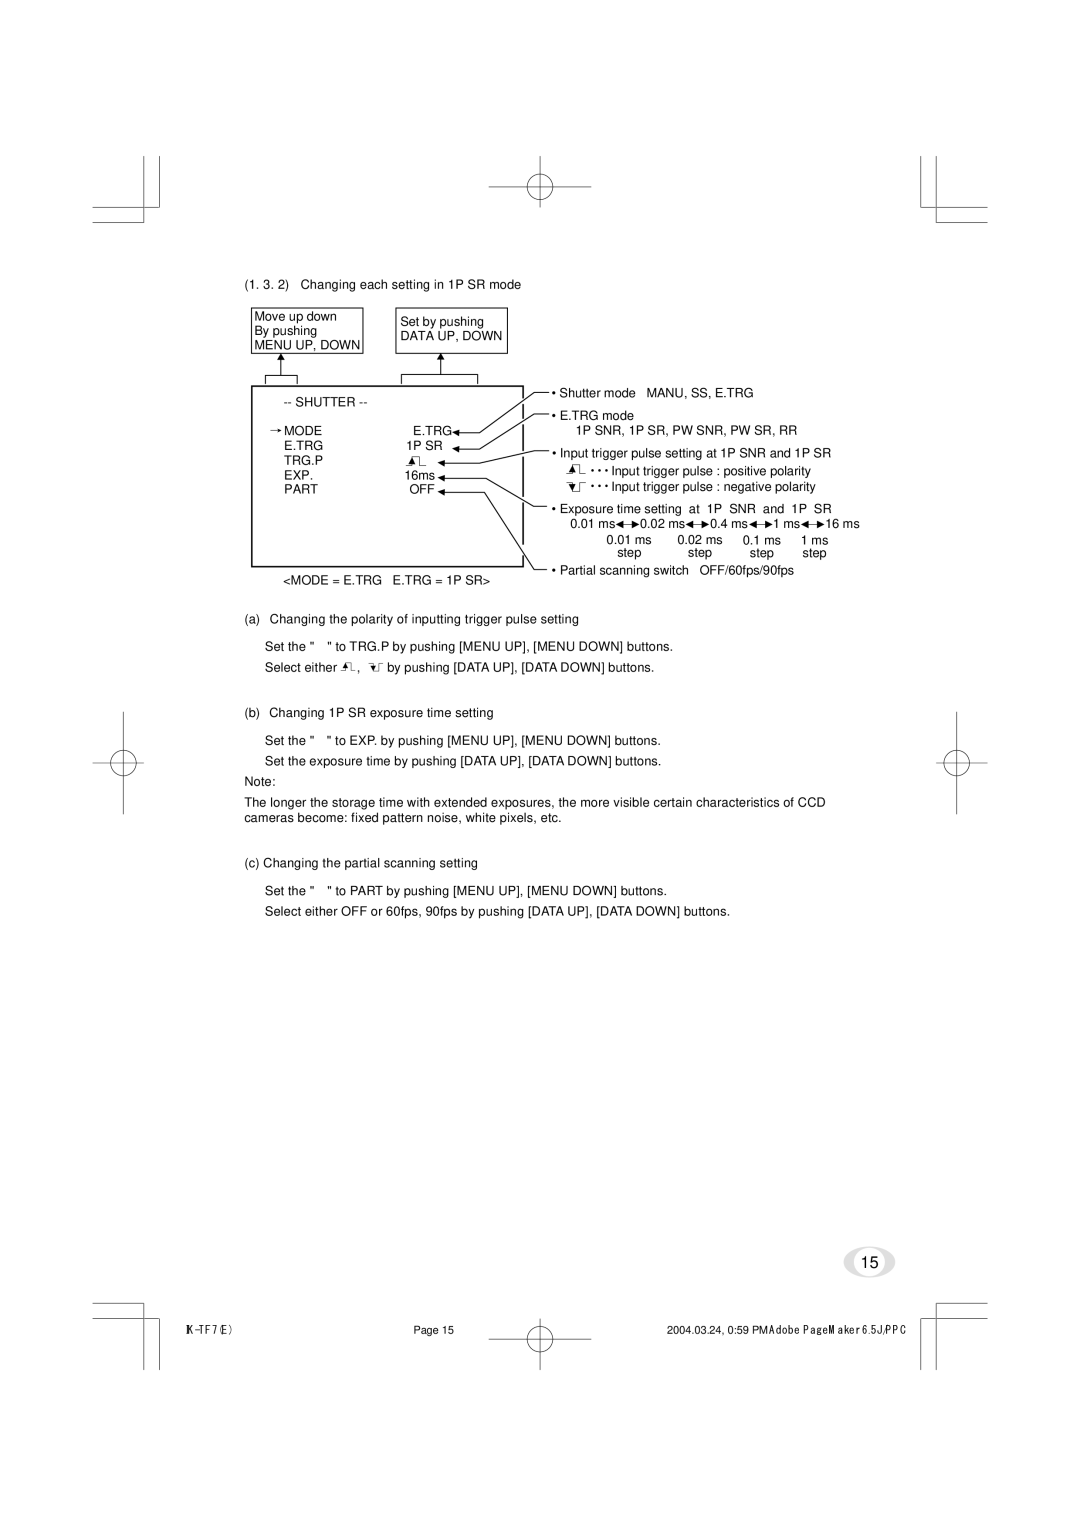
(1. 3. 2) Changing each setting in 1P SR mode
Move up down |
| Set by pushing | ||||||
By pushing |
| |||||||
| DATA UP, DOWN | |||||||
MENU UP, DOWN |
| |||||||
|
|
|
|
| ||||
|
|
|
|
|
|
|
|
|
|
|
|
|
|
|
|
|
|
|
|
|
|
|
|
|
|
|
|
|
|
| |
MODE | E.TRG | |||
E.TRG | 1P SR | |||
TRG.P |
|
|
|
|
|
|
|
| |
EXP. | 16ms | |||
PART | OFF | |||
<MODE = E.TRG E.TRG = 1P SR>
•Shutter mode MANU, SS, E.TRG
•E.TRG mode
1P SNR, 1P SR, PW SNR, PW SR, RR
•Input trigger pulse setting at 1P SNR and 1P SR
![]()
![]()
![]()
![]()
![]() Input trigger pulse : positive polarity
Input trigger pulse : positive polarity
![]()
![]()
![]()
![]()
![]() Input trigger pulse : negative polarity
Input trigger pulse : negative polarity
•Exposure time setting at 1P SNR and 1P SR
0.01ms![]()
![]() 0.02 ms
0.02 ms![]()
![]() 0.4 ms
0.4 ms![]()
![]() 1 ms
1 ms![]()
![]() 16 ms
16 ms
0.01 ms | 0.02 ms | 0.1 ms | 1 ms |
step | step | step | step |
• Partial scanning switch OFF/60fps/90fps
(a) Changing the polarity of inputting trigger pulse setting
1Set the "→ " to TRG.P by pushing [MENU UP], [MENU DOWN] buttons.
2Select either ![]()
![]() ,
, ![]()
![]() by pushing [DATA UP], [DATA DOWN] buttons.
by pushing [DATA UP], [DATA DOWN] buttons.
(b)Changing 1P SR exposure time setting
1Set the "→ " to EXP. by pushing [MENU UP], [MENU DOWN] buttons.
2Set the exposure time by pushing [DATA UP], [DATA DOWN] buttons.
Note:
The longer the storage time with extended exposures, the more visible certain characteristics of CCD cameras become: fixed pattern noise, white pixels, etc.
(c) Changing the partial scanning setting
1Set the "→ " to PART by pushing [MENU UP], [MENU DOWN] buttons.
2Select either OFF or 60fps, 90fps by pushing [DATA UP], [DATA DOWN] buttons.
15
Page 15 | 2004.03.24, 0:59 PMAdobe PageMaker 6.5J/PPC |