Network Configuration for Windows XP:
The following is an example of how to configure the Windows XP TCP/IP network settings:
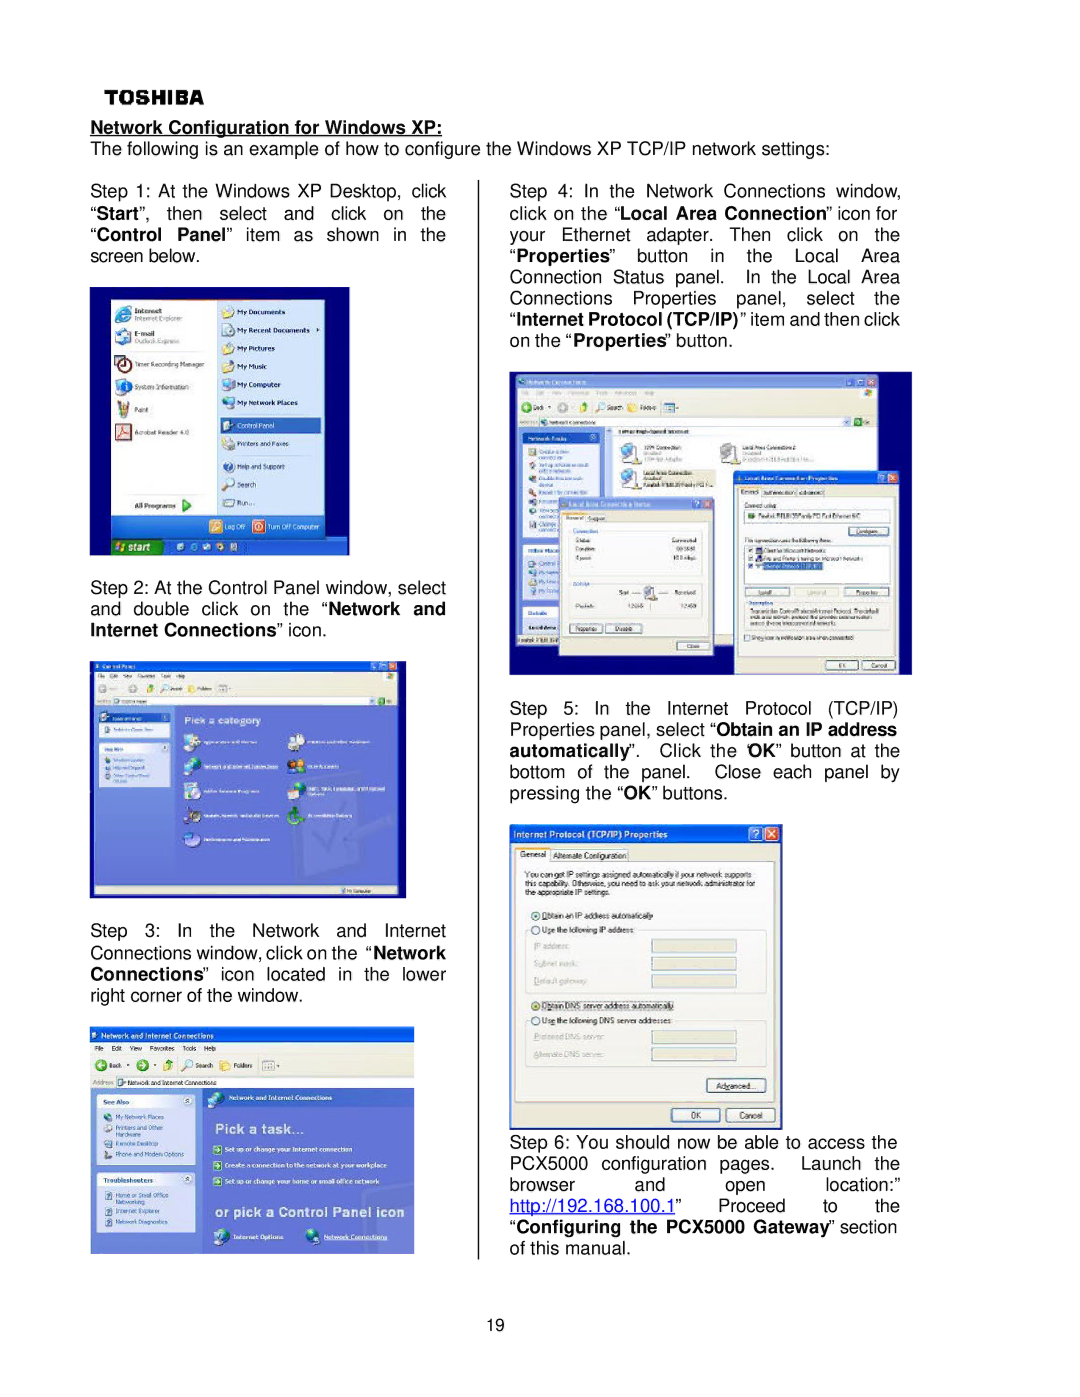
Step 1: At the Windows XP Desktop, click “Start”, then select and click on the “Control Panel” item as shown in the screen below.
Step 2: At the Control Panel window, select and double click on the “Network and Internet Connections” icon.
Step 3: In the Network and Internet Connections window, click on the “Network Connections” icon located in the lower right corner of the window.
Step 4: In the Network Connections window, click on the “Local Area Connection” icon for your Ethernet adapter. Then click on the “Properties” button in the Local Area Connection Status panel. In the Local Area Connections Properties panel, select the “Internet Protocol (TCP/IP)” item and then click on the “Properties” button.
Step 5: In the Internet Protocol (TCP/IP) Properties panel, select “Obtain an IP address automatically”. Click the “OK” button at the bottom of the panel. Close each panel by pressing the “OK” buttons.
Step 6: You should now be able to access the PCX5000 configuration pages. Launch the
browser and open location:”
http://192.168.100.1” Proceed to the “Configuring the PCX5000 Gateway” section of this manual.
19