Macintosh OS X AirPort Settings
If you are using the AirPort wireless connection, first verify the PCX5000 wireless link is turned on. Refer to the “PCX5000 Wireless Configuration” page in this manual.
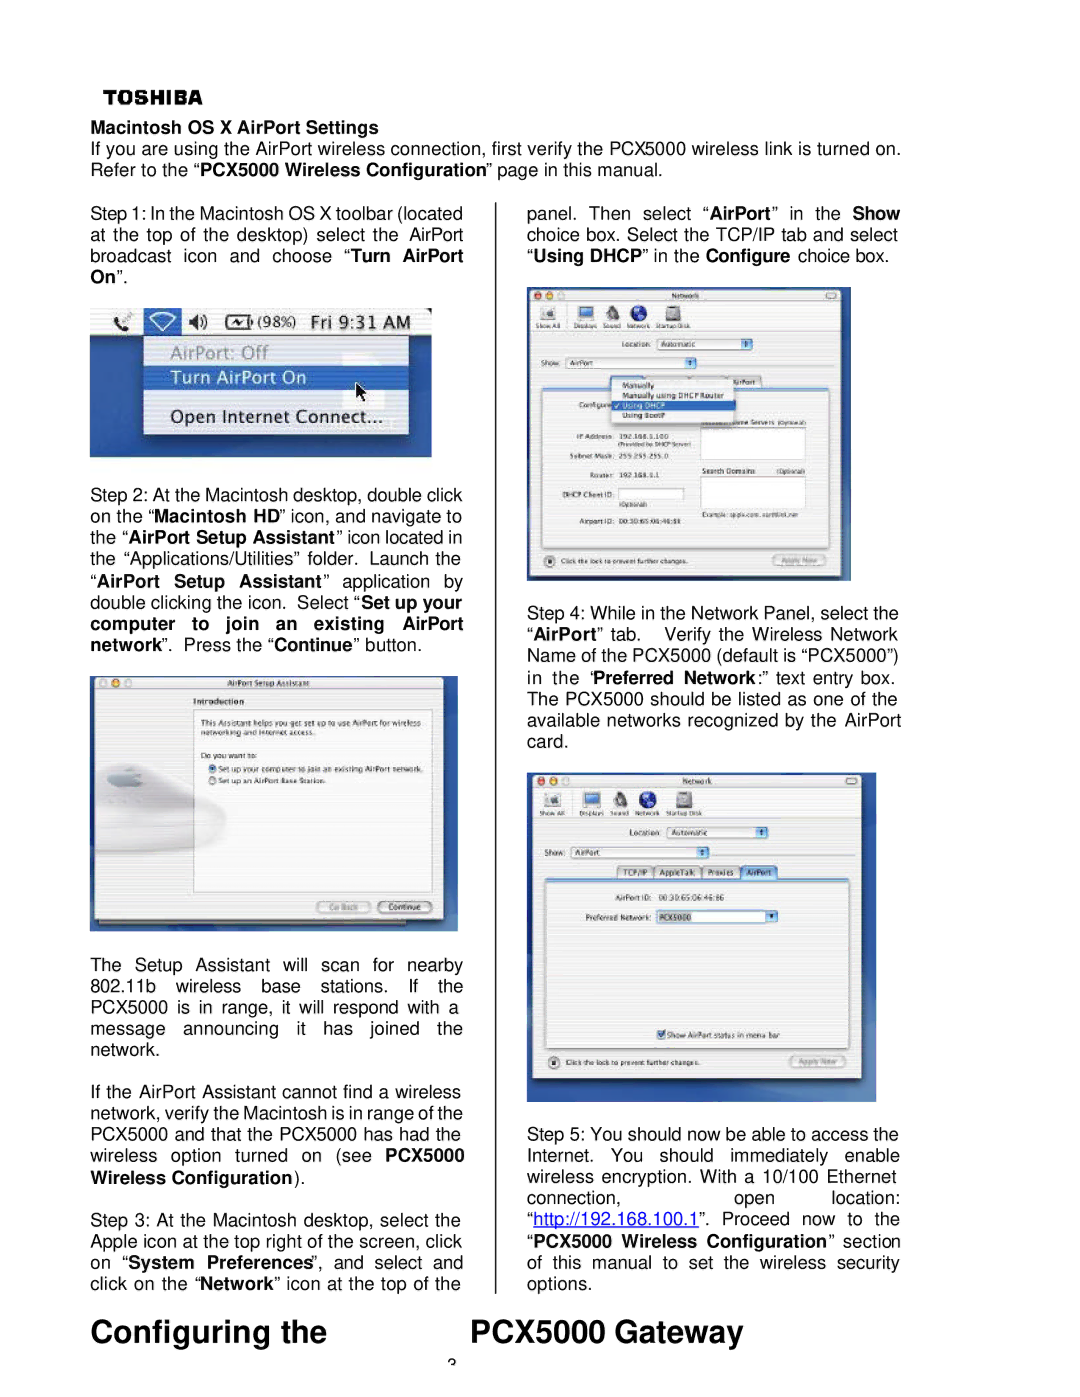
Step 1: In the Macintosh OS X toolbar (located at the top of the desktop) select the AirPort broadcast icon and choose “Turn AirPort On”.
Step 2: At the Macintosh desktop, double click on the “Macintosh HD” icon, and navigate to the “AirPort Setup Assistant” icon located in the “Applications/Utilities” folder. Launch the “AirPort Setup Assistant” application by double clicking the icon. Select “Set up your computer to join an existing AirPort network”. Press the “Continue” button.
The Setup Assistant will scan for nearby 802.11b wireless base stations. If the PCX5000 is in range, it will respond with a message announcing it has joined the network.
If the AirPort Assistant cannot find a wireless network, verify the Macintosh is in range of the PCX5000 and that the PCX5000 has had the wireless option turned on (see PCX5000 Wireless Configuration).
Step 3: At the Macintosh desktop, select the Apple icon at the top right of the screen, click on “System Preferences”, and select and click on the “Network” icon at the top of the
panel. Then select “AirPort” in the Show choice box. Select the TCP/IP tab and select “Using DHCP” in the Configure choice box.
Step 4: While in the Network Panel, select the “AirPort” tab. Verify the Wireless Network Name of the PCX5000 (default is “PCX5000”) in the “Preferred Network:” text entry box. The PCX5000 should be listed as one of the available networks recognized by the AirPort card.
Step 5: You should now be able to access the Internet. You should immediately enable wireless encryption. With a 10/100 Ethernet
connection,open location: “http://192.168.100.1”. Proceed now to the “PCX5000 Wireless Configuration” section of this manual to set the wireless security options.
Configuring the | PCX5000 Gateway |
| 3 |