TCONT802AS32DA TOUCH SCREEN AND TCONT803AS32DA TOUCH SCREEN WITH DEHUMIDIFICATION
Mounting the Comfort Control
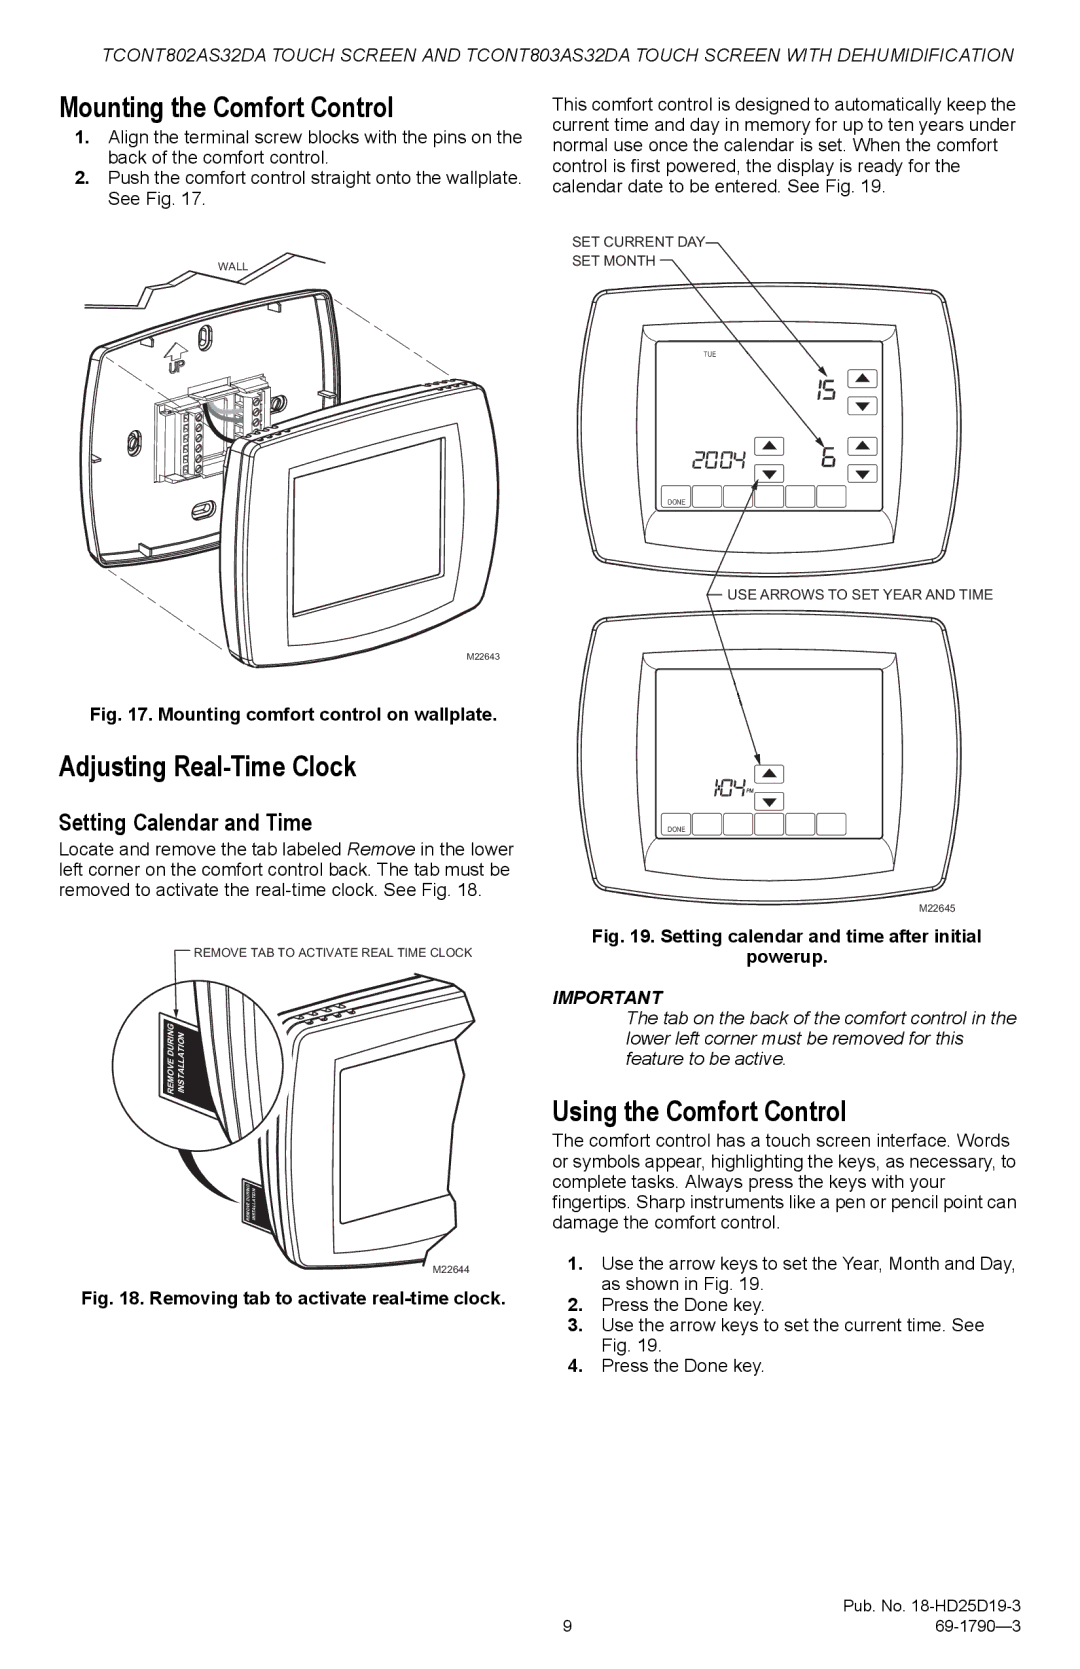
1.Align the terminal screw blocks with the pins on the back of the comfort control.
2.Push the comfort control straight onto the wallplate. See Fig. 17.
WALL
DURINGINSTALLATION
REMOVE
M22643
Fig. 17. Mounting comfort control on wallplate.
Adjusting Real-Time Clock
Setting Calendar and Time
Locate and remove the tab labeled Remove in the lower left corner on the comfort control back. The tab must be removed to activate the
This comfort control is designed to automatically keep the current time and day in memory for up to ten years under normal use once the calendar is set. When the comfort control is first powered, the display is ready for the calendar date to be entered. See Fig. 19.
SET CURRENT DAY
SET MONTH
MON | TUE | WEDD | THU | FRII | SAT | SUN |
DONE
USE ARROWS TO SET YEAR AND TIME
MON | WED | THU | FRI | SAT | SUN |
| OK TO PICK MULTIPLE DAYS | SCREEN LOCKED |
| ||
| CHANGE FILTERR UV LAMP HUMIDIFIER PAD |
|
| ||
DONE
M22645
REMOVE TAB TO ACTIVATE REAL TIME CLOCK
DURINGINSTALLATION
REMOVE
DURINGINSTALLATION
REMOVE
![]() M22644
M22644
Fig. 18. Removing tab to activate real-time clock.
Fig. 19. Setting calendar and time after initial
powerup.
IMPORTANT
The tab on the back of the comfort control in the lower left corner must be removed for this feature to be active.
Using the Comfort Control
The comfort control has a touch screen interface. Words or symbols appear, highlighting the keys, as necessary, to complete tasks. Always press the keys with your fingertips. Sharp instruments like a pen or pencil point can damage the comfort control.
1.Use the arrow keys to set the Year, Month and Day, as shown in Fig. 19.
2.Press the Done key.
3.Use the arrow keys to set the current time. See Fig. 19.
4.Press the Done key.
| Pub. No. |
9 |