13. Network (SNMP Settings)
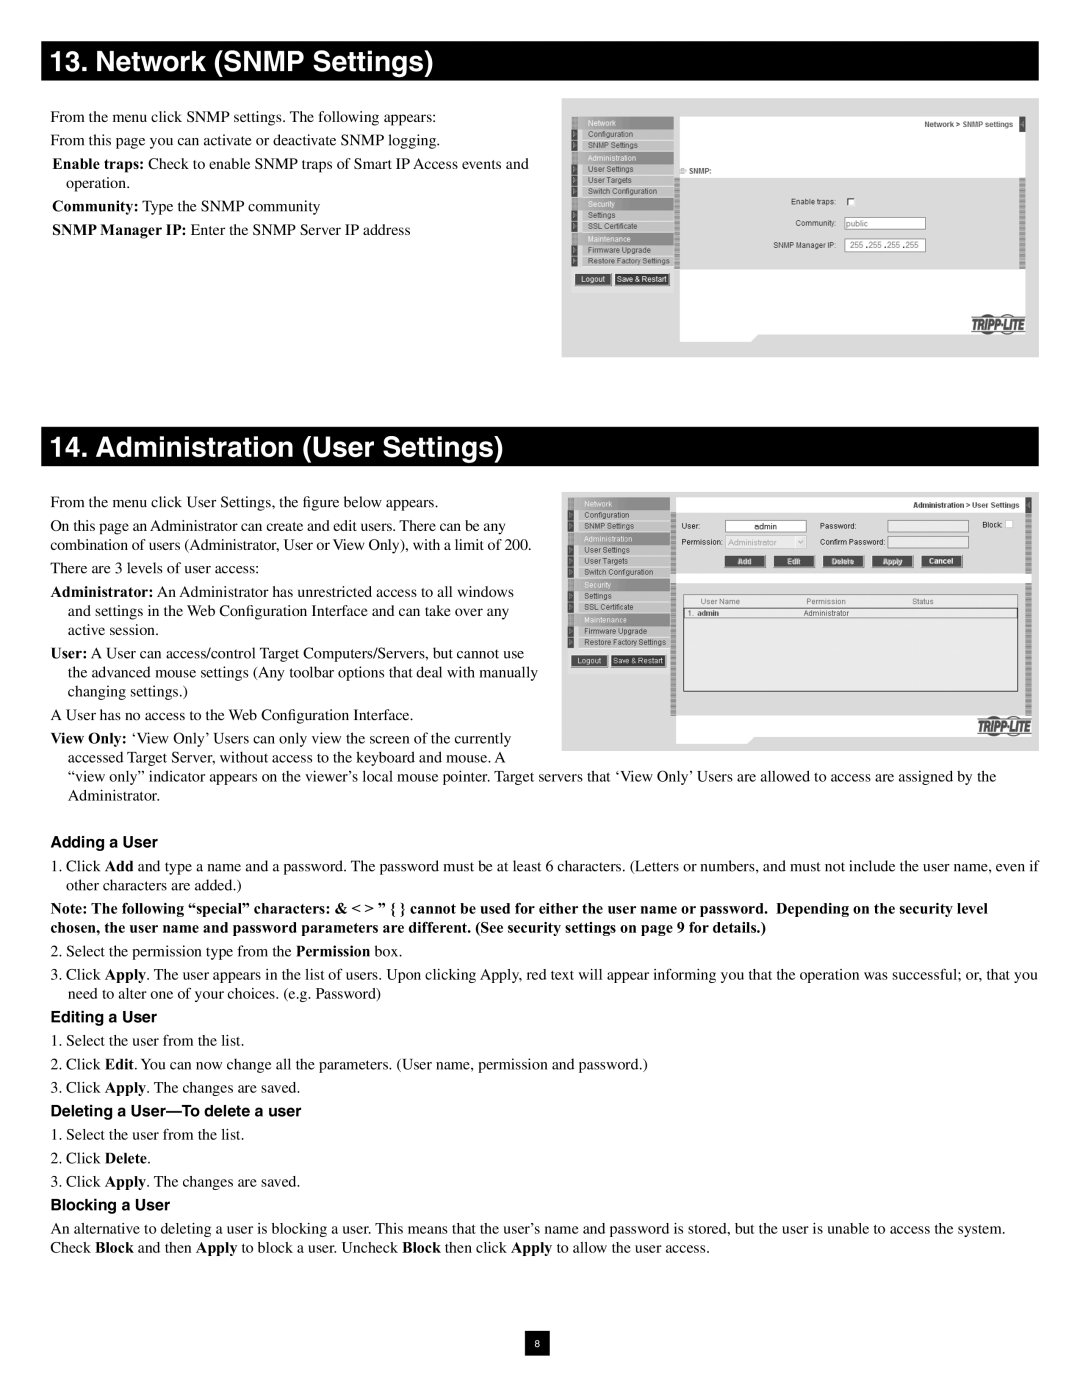
From the menu click SNMP settings. The following appears:
From this page you can activate or deactivate SNMP logging.
Enable traps: Check to enable SNMP traps of Smart IP Access events and operation.
Community: Type the SNMP community
SNMP Manager IP: Enter the SNMP Server IP address
14. Administration (User Settings)
From the menu click User Settings, the figure below appears.
On this page an Administrator can create and edit users. There can be any combination of users (Administrator, User or View Only), with a limit of 200.
There are 3 levels of user access:
Administrator: An Administrator has unrestricted access to all windows and settings in the Web Configuration Interface and can take over any active session.
User: A User can access/control Target Computers/Servers, but cannot use the advanced mouse settings (Any toolbar options that deal with manually changing settings.)
A User has no access to the Web Configuration Interface.
View Only: ‘View Only’ Users can only view the screen of the currently accessed Target Server, without access to the keyboard and mouse. A
“view only” indicator appears on the viewer’s local mouse pointer. Target servers that ‘View Only’ Users are allowed to access are assigned by the Administrator.
Adding a User
1.Click Add and type a name and a password. The password must be at least 6 characters. (Letters or numbers, and must not include the user name, even if other characters are added.)
Note: The following “special” characters: & < > ” { } cannot be used for either the user name or password. Depending on the security level chosen, the user name and password parameters are different. (See security settings on page 9 for details.)
2.Select the permission type from the Permission box.
3.Click Apply. The user appears in the list of users. Upon clicking Apply, red text will appear informing you that the operation was successful; or, that you need to alter one of your choices. (e.g. Password)
Editing a User
1.Select the user from the list.
2.Click Edit. You can now change all the parameters. (User name, permission and password.)
3.Click Apply. The changes are saved.
Deleting a
1.Select the user from the list.
2.Click Delete.
3.Click Apply. The changes are saved.
Blocking a User
An alternative to deleting a user is blocking a user. This means that the user’s name and password is stored, but the user is unable to access the system. Check Block and then Apply to block a user. Uncheck Block then click Apply to allow the user access.
8