3.5Replacing the SATA backplane
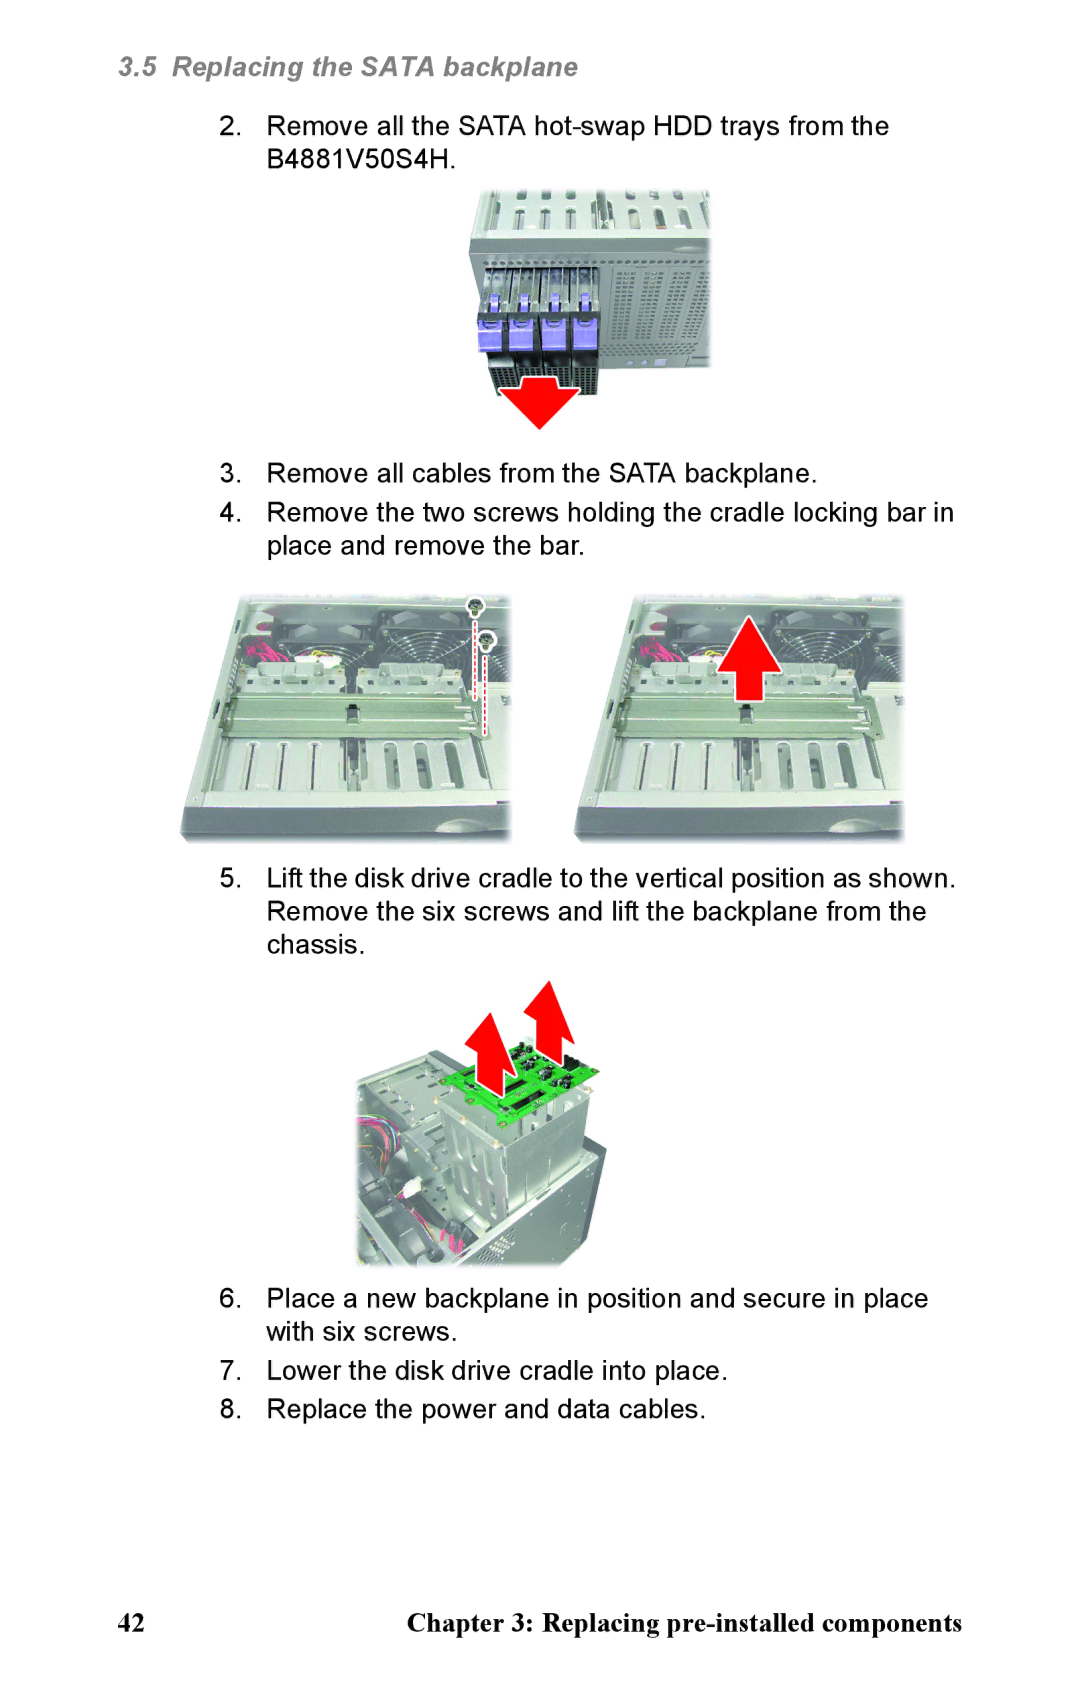
2.Remove all the SATA
3.Remove all cables from the SATA backplane.
4.Remove the two screws holding the cradle locking bar in place and remove the bar.
5.Lift the disk drive cradle to the vertical position as shown. Remove the six screws and lift the backplane from the chassis.
6.Place a new backplane in position and secure in place with six screws.
7.Lower the disk drive cradle into place.
8.Replace the power and data cables.
42 | Chapter 3: Replacing |