{
*'
I
5
a .
:
i
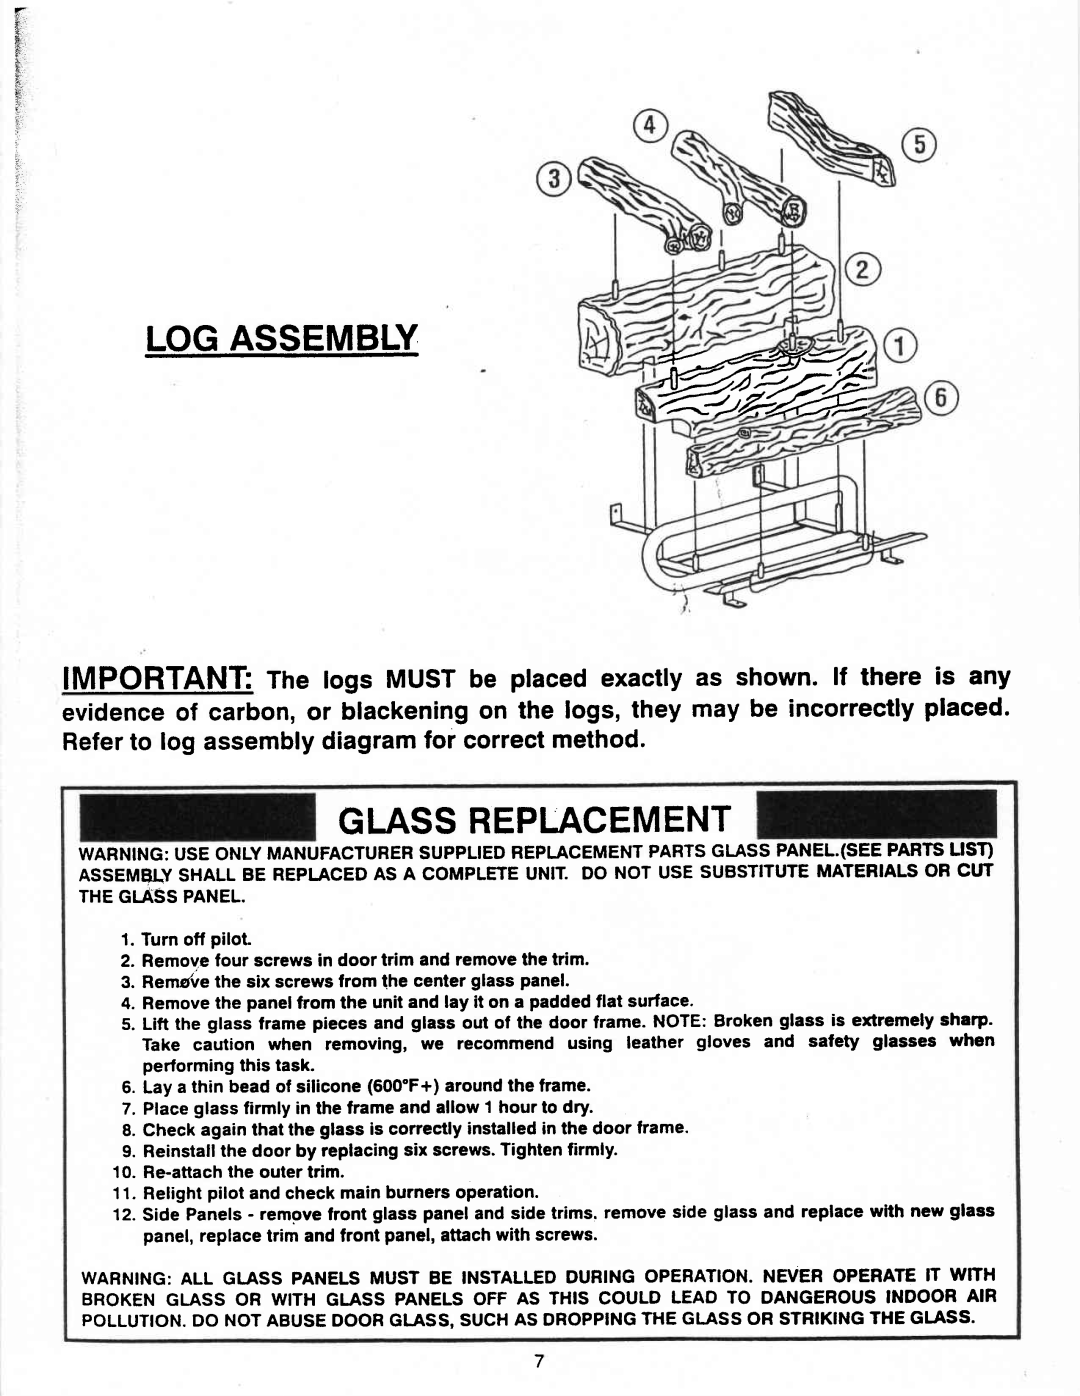
LOGASSEMBLY
IMPORTANI fne logs MUSTbe placedexactlyas shown.lf there is any
evidenceof carbon,or blackeningon the logs, they may be incorrectlyplaced. Referto log assemblydiagramfor correctmethod.
GLASSREPI-ACEMENT
WARNING:USEONLYMANUFACTURERSUPPLIEDREPLACEMENTPARTSGLASSPANEL.(SEEPARTSLIST) ASSEMBLYSHALLBE
THEGI.ASSPANEL.
1.Turn off pilot
2.Remove four screws in door trim and remove the trim.
3.Remdve the six screws lrom the center glass panel.
4.Remove the panel from the unit and lay it on a padded flat surface.
5.Lift the glass frame pieces and glass out of the door frame. NOTE: Broken glass is extremely sharp- Take caution when removing, we recommend using leather gloves and salety glasses when performing this task.
6.Lay a thin bead of silicone (600"F+) around the frame.
7.Place glass firmly in the frame and allow t hour to dry.
8.Check again that the glass is correctly installed in the door frame'
9.Reinstallthe door by replacing six screws. Tighten firmly.
10.
11. Relightpilot and check main burners operation.
12.Side Panels - remove front glass panet and side trims. remove side glass and replace with new glass panel, replace trim and front panel, attach wilh screws.
WARNTNG:ALL GI.ASS PANELS MUST BE INSTALLEDDURING OPERATION. NEVER OPERATE lT WITH BROKEN GLASS OR WITH G1ASS PANELS OFF AS THIS COULD LEAD TO DANGEROUSINDOOR AIR POLLUTIONDO. NOTABUSEDOORGLASS,SUCHAS DROPPINGTHE
7