
Vision 15ET/CineWideTM, Vision 15ET, Vision 15 specifications
The Vidikron Vision 15ET/CineWideTM, along with the Vision 15 and Vision 15ET models, represents a significant advancement in the realm of high-end home theater projection systems. Designed for cinema enthusiasts and home theater aficionados, these projectors provide an unparalleled viewing experience characterized by stunning visuals and a rich array of features.At the core of the Vidikron Vision 15ET/CineWideTM is its advanced DLP technology, which delivers exceptional brightness and contrast. This ensures vibrant colors and deep blacks, which are essential for creating a cinematic atmosphere at home. The inclusion of CineWideTM technology further enhances this experience by employing a custom-designed lens that expands the image's width, reducing the presence of letterbox bars. This feature is particularly appreciated in widescreen content, providing a more immersive viewing experience.
Another notable feature of the Vision 15ET/CineWideTM is its high-resolution capability. With support for 1080p and capable of handling various video formats, the projector is versatile enough to accommodate a range of media sources, from Blu-ray players to gaming consoles. The projector’s aggressive pixel-shifting technology allows for effective upscaling of lower-resolution sources, ensuring that every detail is rendered with clarity.
The Vision 15 model stands out due to its user-friendly interface and installation flexibility. With multiple inputs including HDMI, component, and composite connections, it can seamlessly integrate with existing AV systems. Additionally, its lens shift and zoom capabilities provide installers with greater flexibility, allowing for optimal placement in any home theater environment.
Another advantage of the Vidikron projectors is their robust build quality. These models are designed to withstand the rigors of daily use while providing consistent performance over the years. Their cooling systems are also engineered to operate quietly, maintaining the immersiveness of the viewing experience without distracting noise.
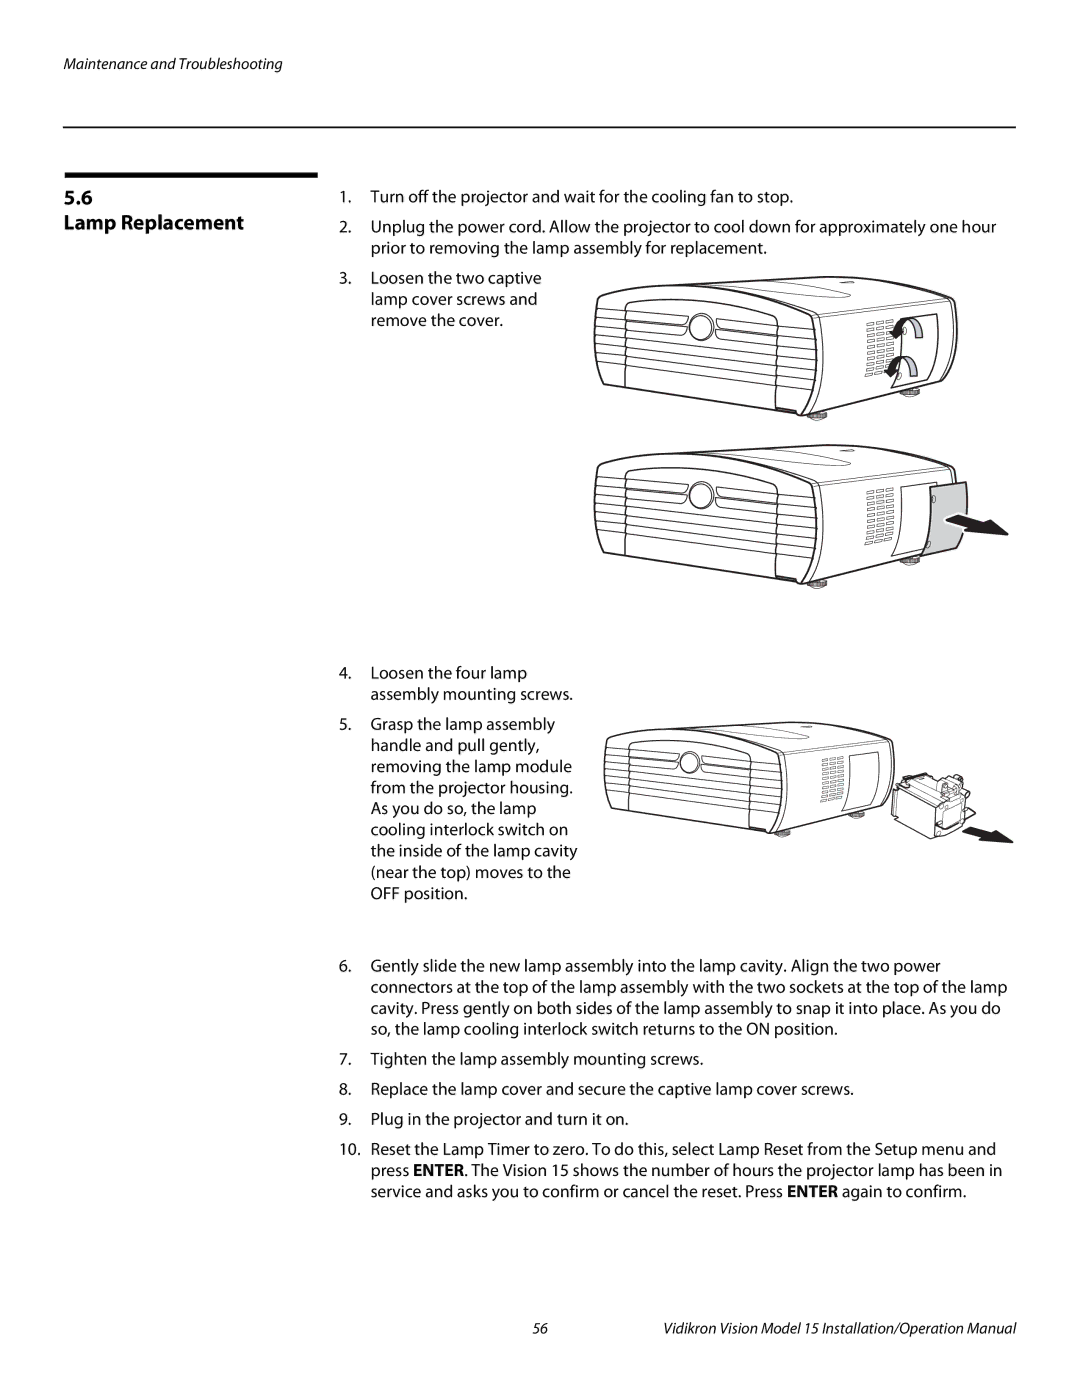
Overall, the Vidikron Vision 15ET/CineWideTM, along with the Vision 15 and Vision 15ET projectors, offer an elite level of performance and versatility. With their advanced technologies, exceptional image quality, and user-centric design, they stand out as top choices for those looking to transform their home viewing experience into a true cinematic adventure. Whether for movie nights, gaming, or superb sports viewing, these projectors are engineered to impress.