5056-XXX
Adjustments
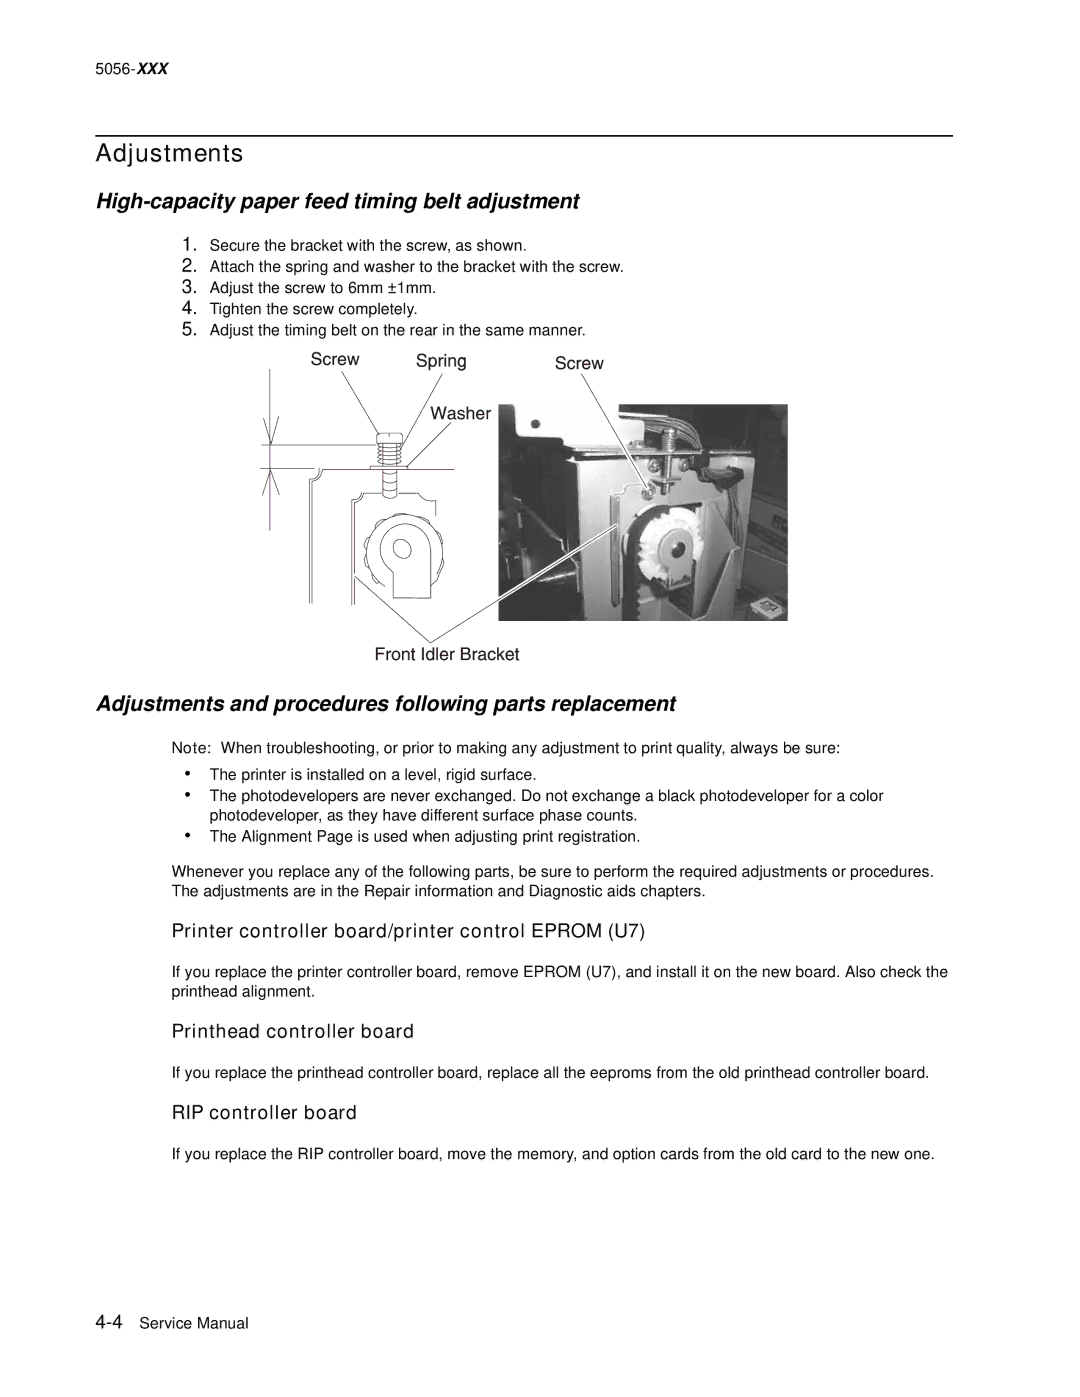
High-capacity paper feed timing belt adjustment
1.Secure the bracket with the screw, as shown.
2.Attach the spring and washer to the bracket with the screw.
3.Adjust the screw to 6mm ±1mm.
4.Tighten the screw completely.
5.Adjust the timing belt on the rear in the same manner.
Adjustments and procedures following parts replacement
Note: When troubleshooting, or prior to making any adjustment to print quality, always be sure:
•The printer is installed on a level, rigid surface.
•The photodevelopers are never exchanged. Do not exchange a black photodeveloper for a color photodeveloper, as they have different surface phase counts.
•The Alignment Page is used when adjusting print registration.
Whenever you replace any of the following parts, be sure to perform the required adjustments or procedures. The adjustments are in the Repair information and Diagnostic aids chapters.
Printer controller board/printer control EPROM (U7)
If you replace the printer controller board, remove EPROM (U7), and install it on the new board. Also check the printhead alignment.
Printhead controller board
If you replace the printhead controller board, replace all the eeproms from the old printhead controller board.
RIP controller board
If you replace the RIP controller board, move the memory, and option cards from the old card to the new one.