5056-XXX
Power supply 2 removal
1.Unplug the power cord from the printer.
2.Open the top unit, and remove the RIP cover, RIP board, RIP box, and electronic box.
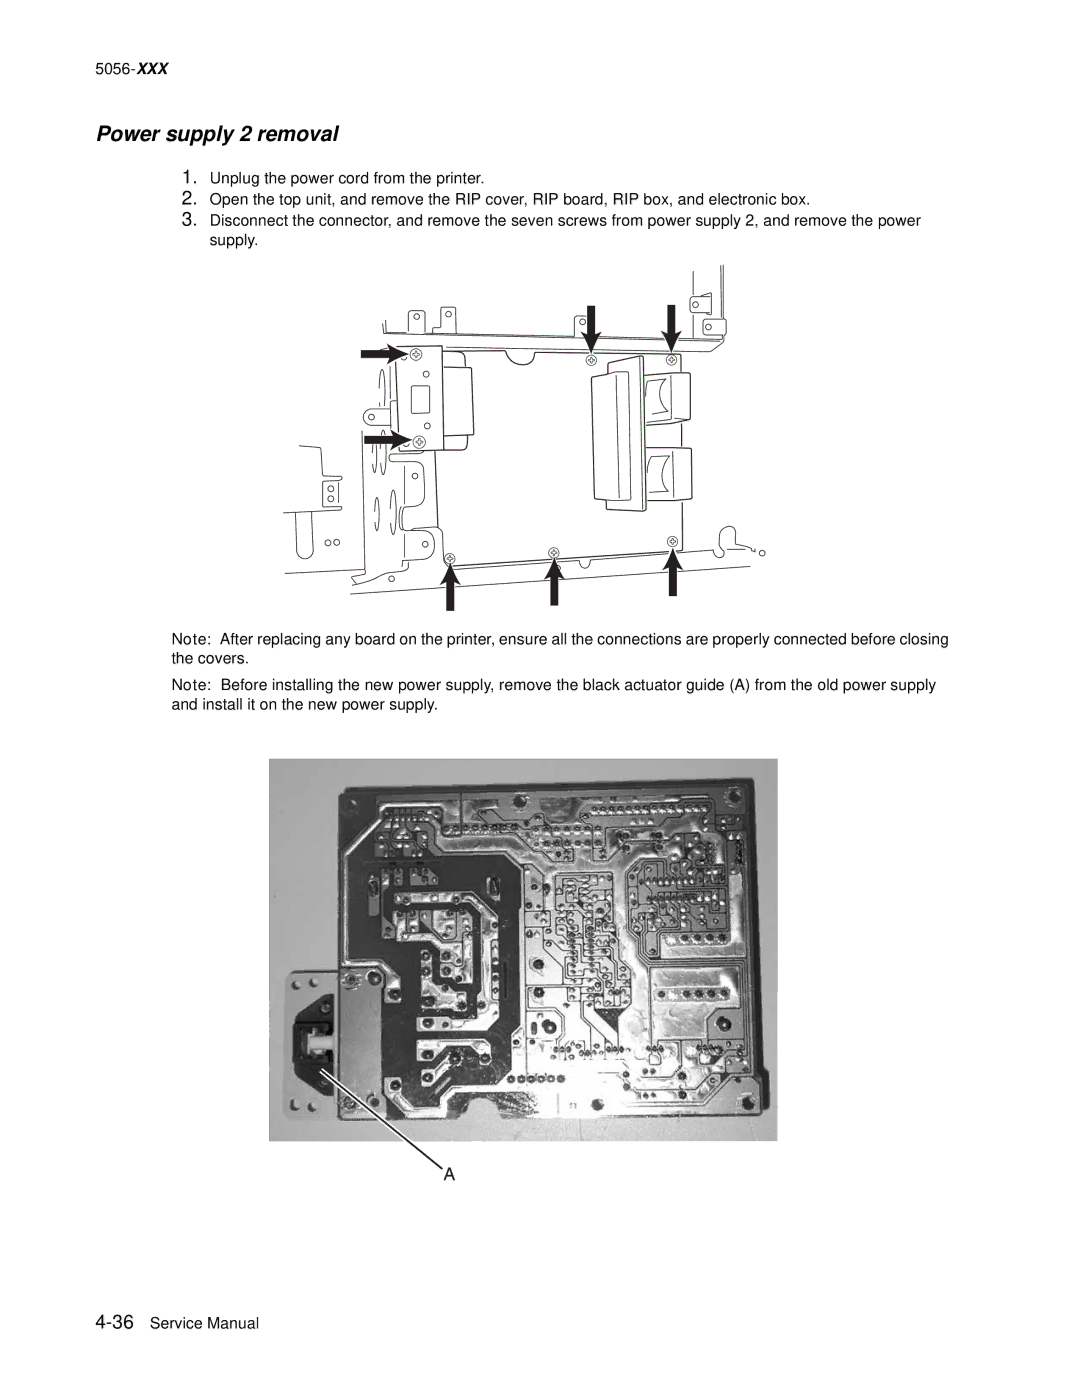
3.Disconnect the connector, and remove the seven screws from power supply 2, and remove the power supply.
Note: After replacing any board on the printer, ensure all the connections are properly connected before closing the covers.
Note: Before installing the new power supply, remove the black actuator guide (A) from the old power supply and install it on the new power supply.
