5056-XXX
Removals
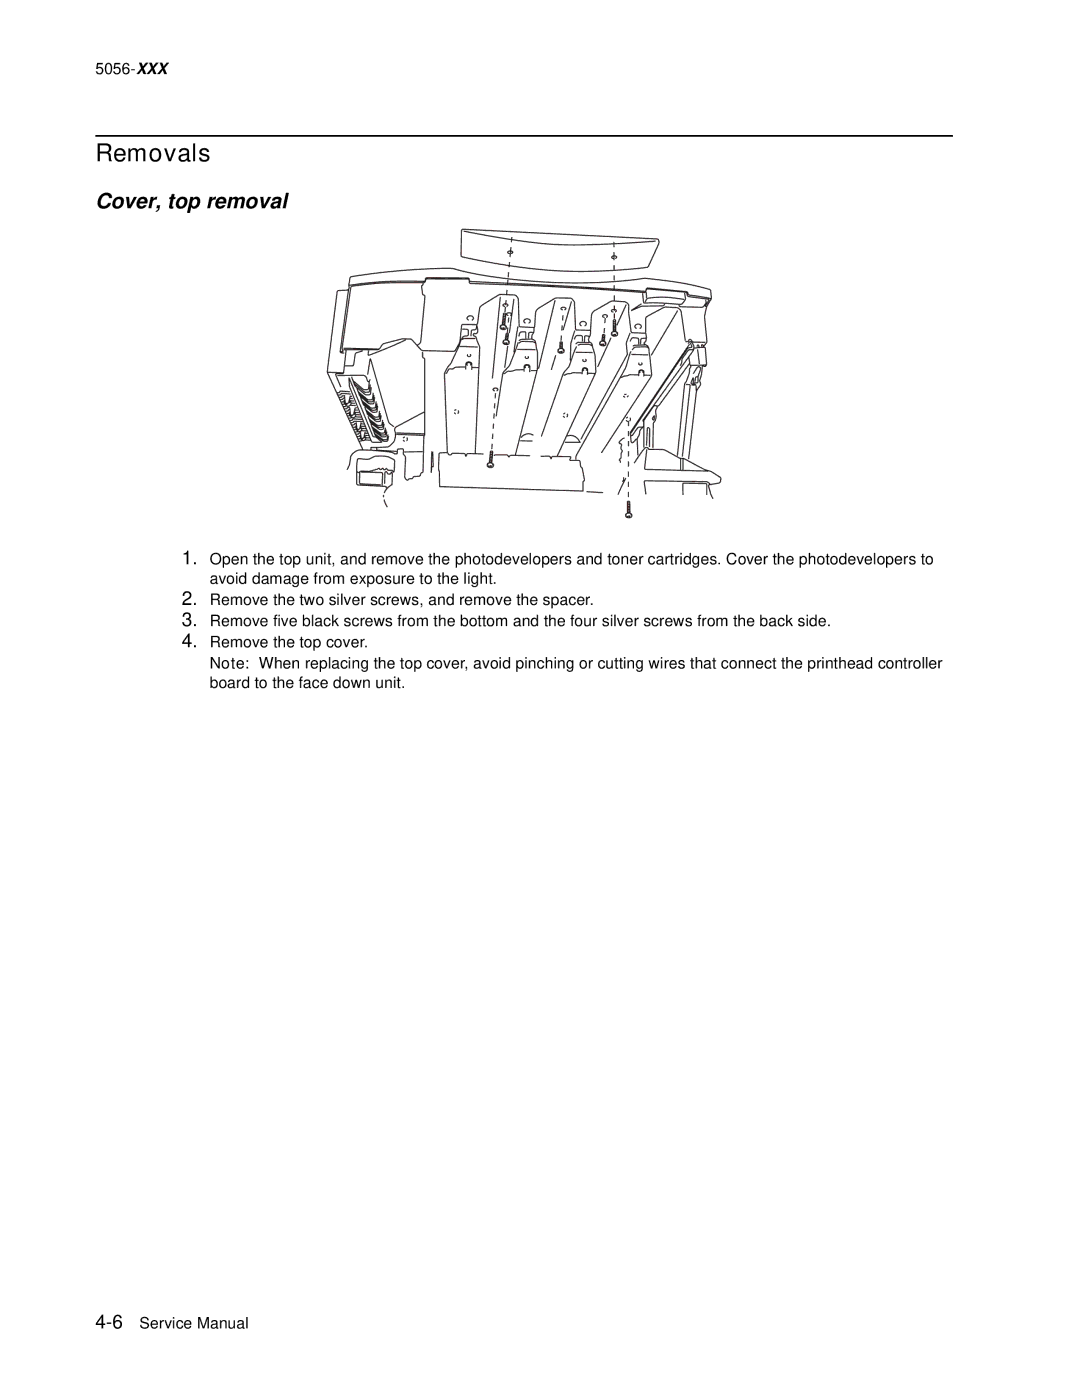
Cover, top removal
1.Open the top unit, and remove the photodevelopers and toner cartridges. Cover the photodevelopers to avoid damage from exposure to the light.
2.Remove the two silver screws, and remove the spacer.
3.Remove five black screws from the bottom and the four silver screws from the back side.
4.Remove the top cover.
Note: When replacing the top cover, avoid pinching or cutting wires that connect the printhead controller board to the face down unit.