5056-XXX
Front door / operator panel removal
Warning: If the operator panel and the RIP board are being replaced at the same time, replace the parts in the order described in steps a through d below to avoid damage to the machine.
a.Replace the RIP card (this must be the first part replaced).
b.Restart the printer. Let the machine finish the startup cycle, which takes several minutes. The machine is silent when startup is complete.
c.Install the new operator panel.
d.Restart the printer and let the startup cycle complete.
If the above procedure fails, contact the technical support center for further instructions.
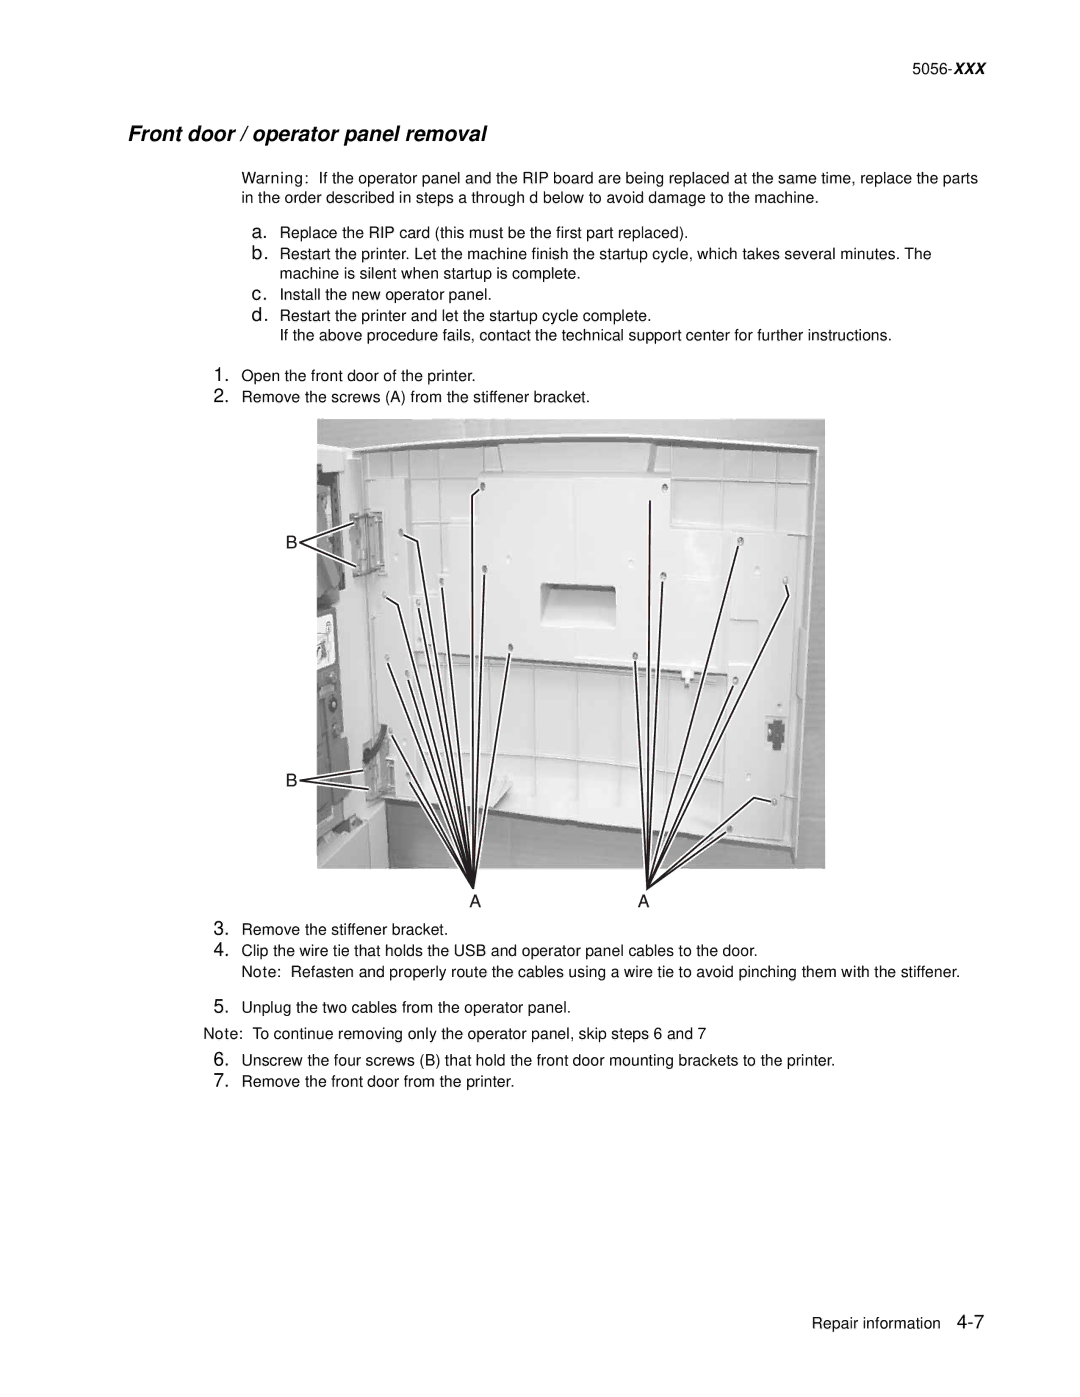
1.Open the front door of the printer.
2.Remove the screws (A) from the stiffener bracket.
3.Remove the stiffener bracket.
4.Clip the wire tie that holds the USB and operator panel cables to the door.
Note: Refasten and properly route the cables using a wire tie to avoid pinching them with the stiffener.
5.Unplug the two cables from the operator panel.
Note: To continue removing only the operator panel, skip steps 6 and 7
6.Unscrew the four screws (B) that hold the front door mounting brackets to the printer.
7.Remove the front door from the printer.
Repair information