5056-XXX
Density sensor removal/Separation fingers removal/Sensor cleaner removal
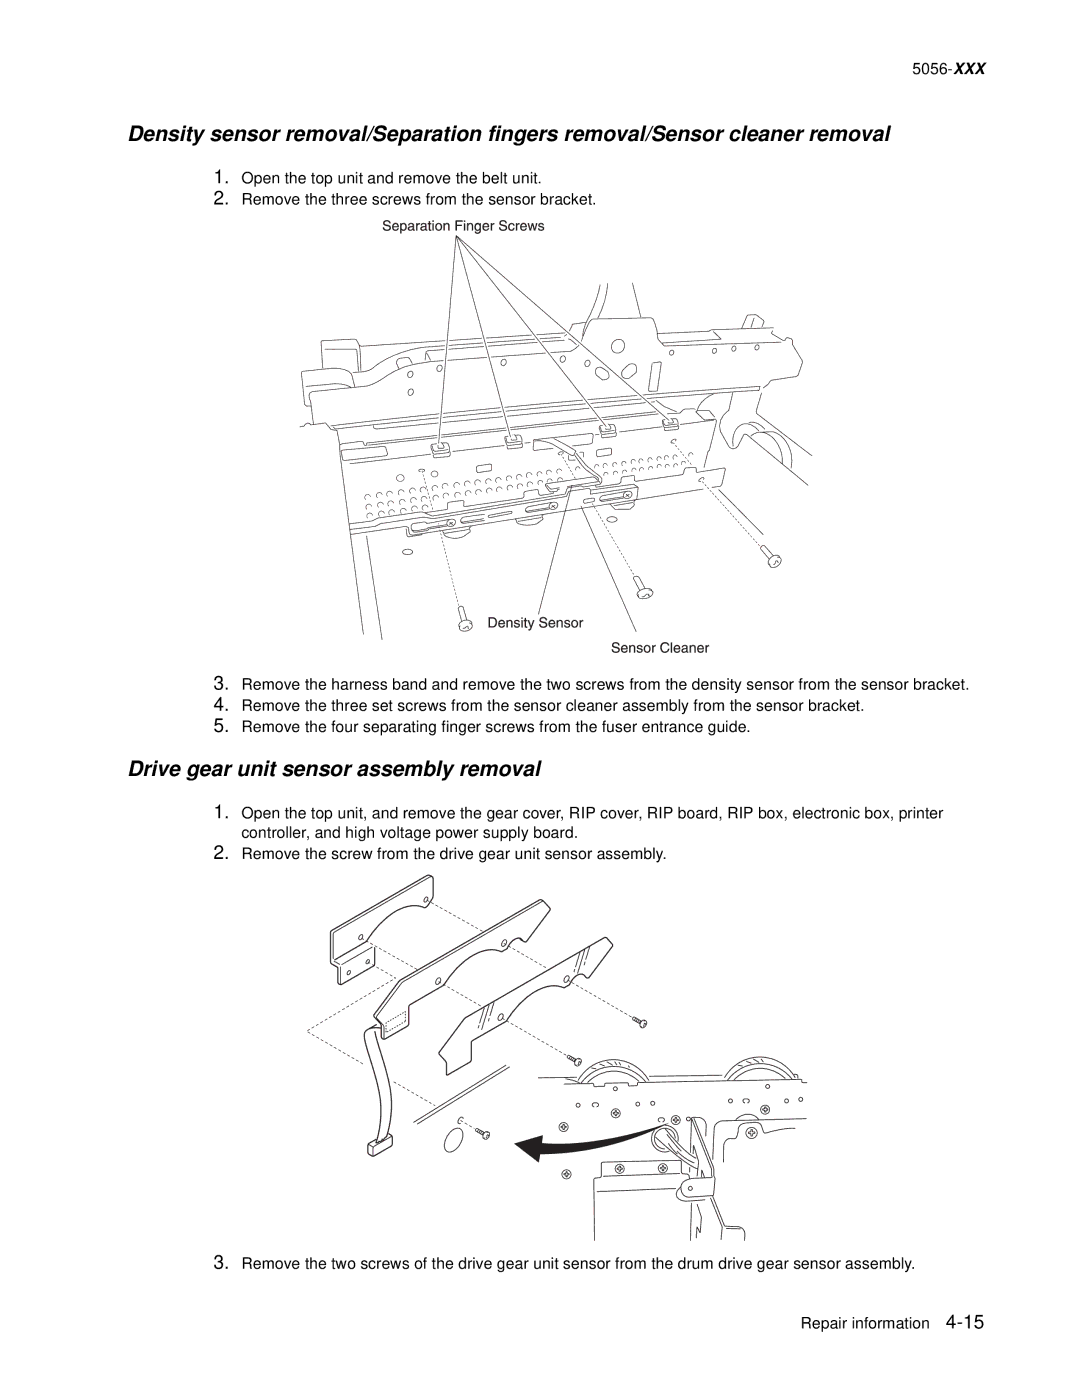
1.Open the top unit and remove the belt unit.
2.Remove the three screws from the sensor bracket.
3.Remove the harness band and remove the two screws from the density sensor from the sensor bracket.
4.Remove the three set screws from the sensor cleaner assembly from the sensor bracket.
5.Remove the four separating finger screws from the fuser entrance guide.
Drive gear unit sensor assembly removal
1.Open the top unit, and remove the gear cover, RIP cover, RIP board, RIP box, electronic box, printer controller, and high voltage power supply board.
2.Remove the screw from the drive gear unit sensor assembly.
3.Remove the two screws of the drive gear unit sensor from the drum drive gear sensor assembly.
Repair information