SCANNING FROM WINDOWS 98, ME, 2000, OR XP 33
SETTING THE SCAN AREA
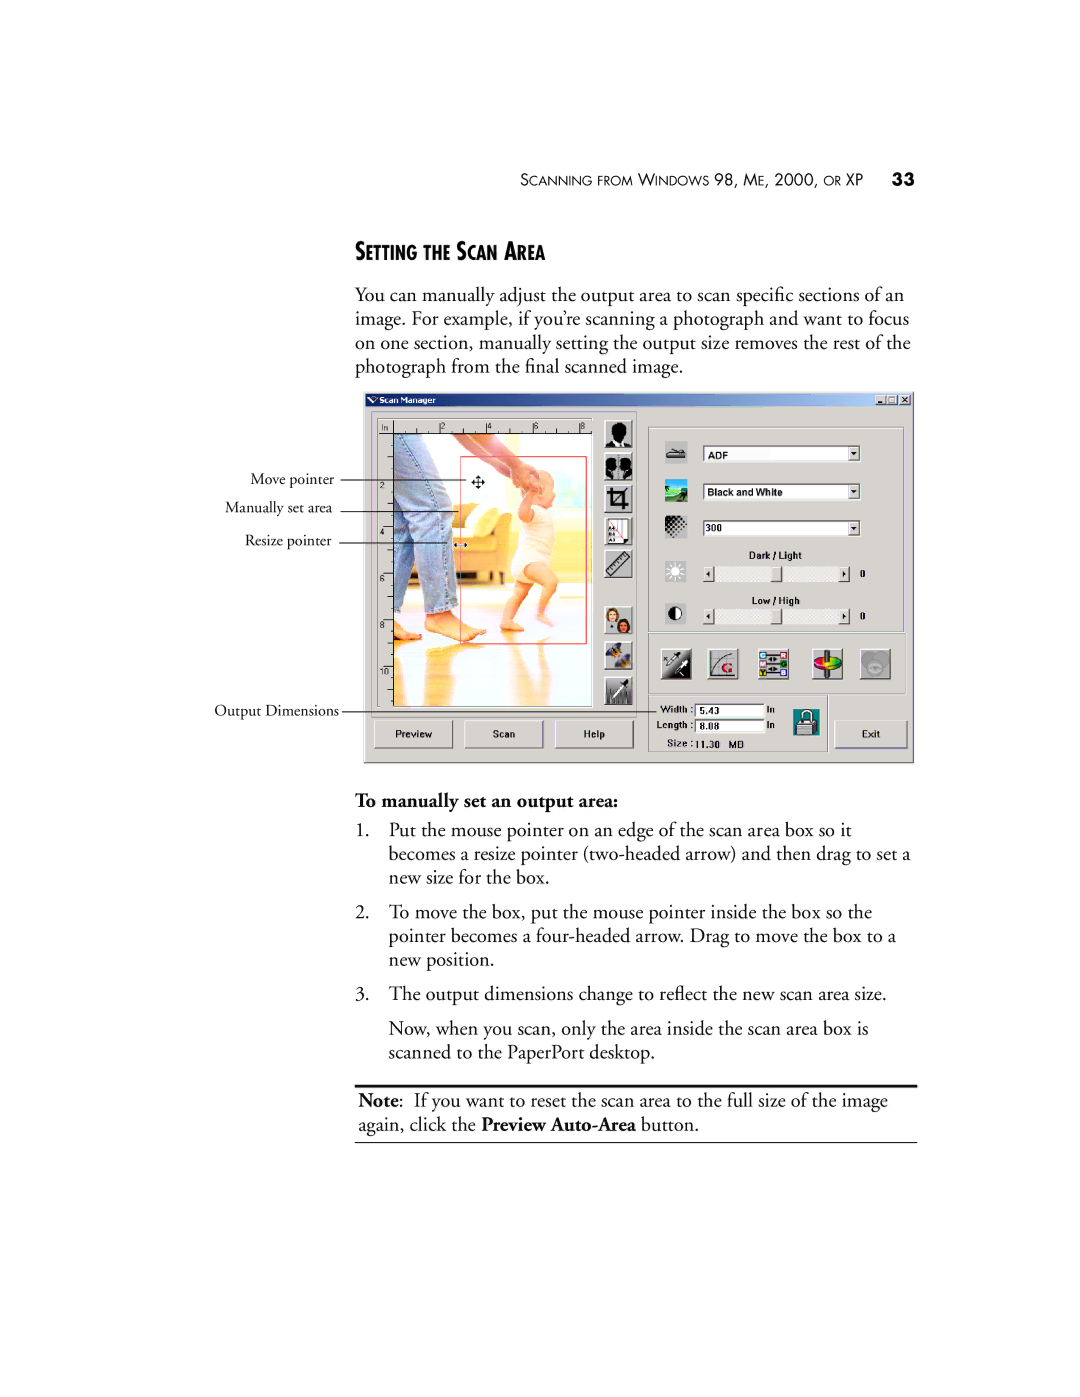
You can manually adjust the output area to scan specific sections of an image. For example, if you’re scanning a photograph and want to focus on one section, manually setting the output size removes the rest of the photograph from the final scanned image.
Move pointer
Manually set area
Resize pointer
Output Dimensions
To manually set an output area:
1.Put the mouse pointer on an edge of the scan area box so it becomes a resize pointer
2.To move the box, put the mouse pointer inside the box so the pointer becomes a
3.The output dimensions change to reflect the new scan area size.
Now, when you scan, only the area inside the scan area box is scanned to the PaperPort desktop.
Note: If you want to reset the scan area to the full size of the image again, click the Preview