MAINTENANCE
Removing The Sear Station® Burner |
|
|
| |
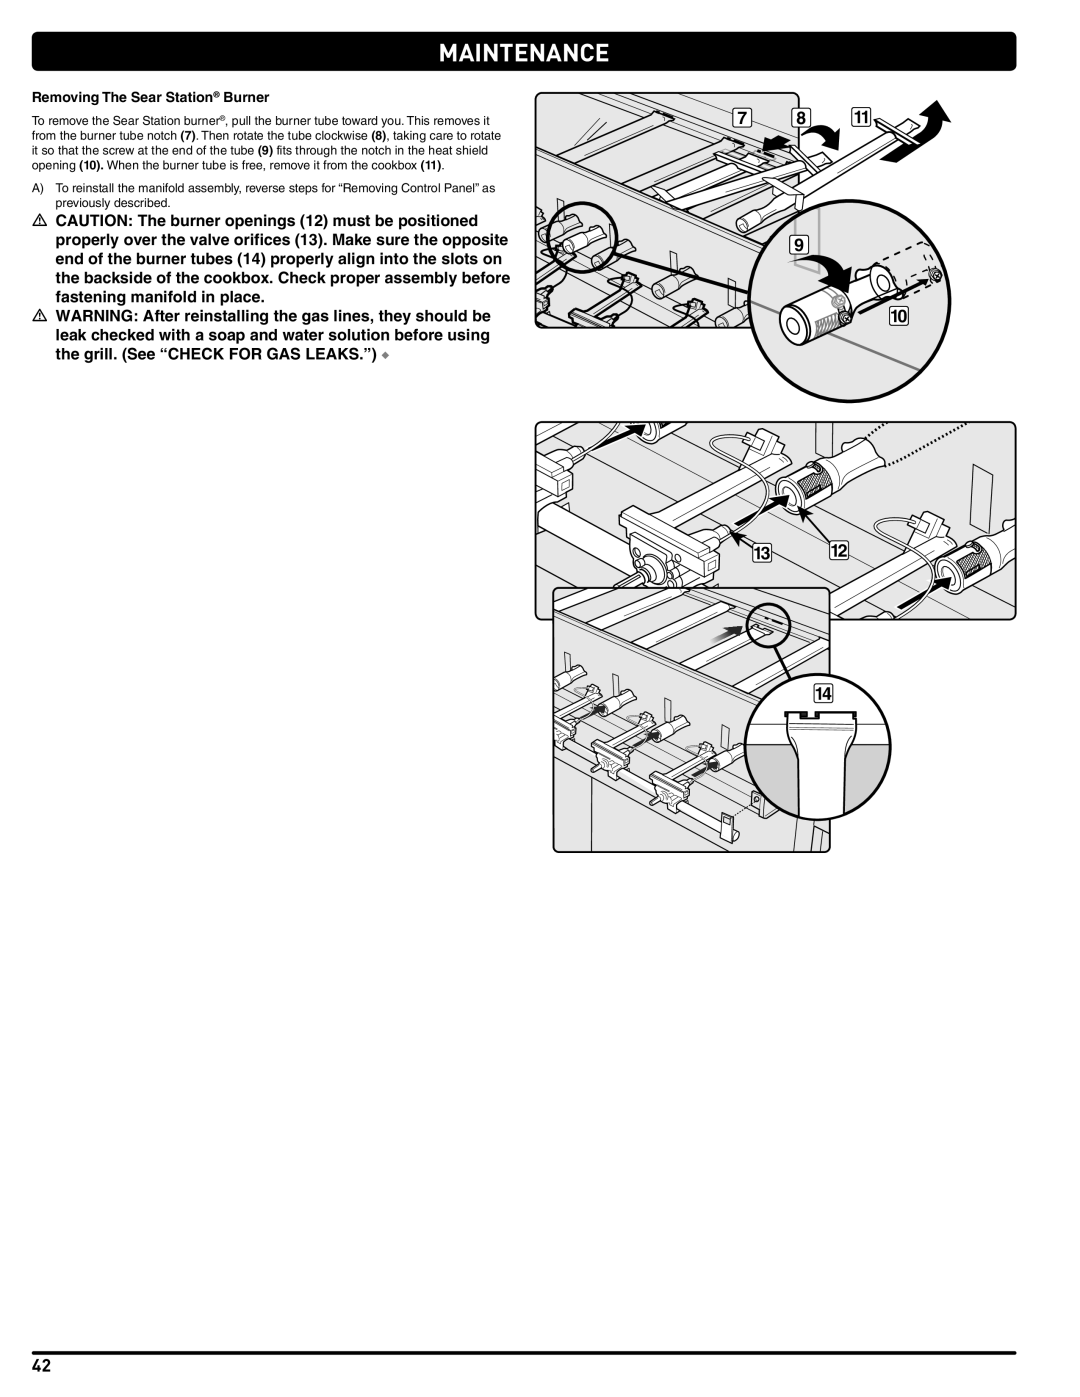
To remove the Sear Station burner®, pull the burner tube toward you.. This removes it | 71 | 82 | 115 | |
from the burner tube notch (7).. Then rotate the tube clockwise (8), taking care to rotate |
|
|
| |
it so that the screw at the end of the tube (9) fits through the notch in the heat shield |
|
|
| |
opening (10). When the burner tube is free, remove it from the cookbox (11).. |
|
|
| |
A) | To reinstall the manifold assembly, reverse steps for “Removing Control Panel” as |
|
|
|
| previously described.. |
|
|
|
m CAUTION: The burner openings (12) must be positioned |
|
|
| |
| properly over the valve orifices (13). Make sure the opposite |
| 39 |
|
| end of the burner tubes (14) properly align into the slots on |
|
|
|
| the backside of the cookbox. Check proper assembly before |
|
|
|
| fastening manifold in place. |
|
| 104 |
m WARNING: After reinstalling the gas lines, they should be |
|
| ||
| leak checked with a soap and water solution before using |
|
|
|
| the grill. (See “CHECK FOR GAS LEAKS.”) ◆ |
|
|
|
132 12
143
42
