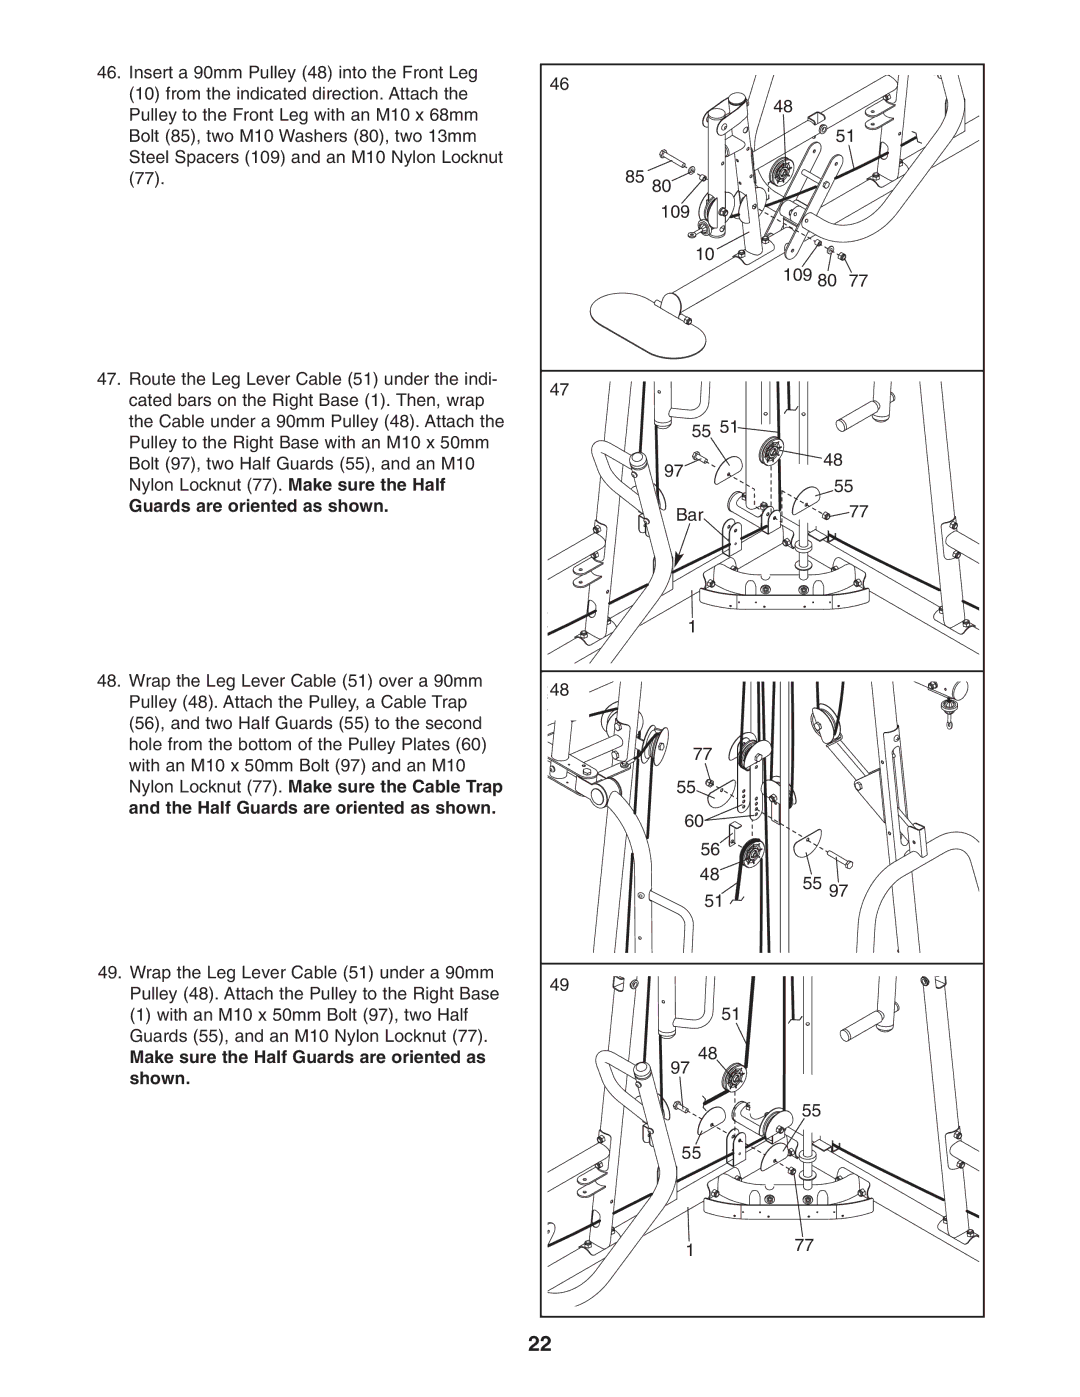
46. Insert a 90mm Pulley (48) into the Front Leg | 46 |
|
| |
(10) from the indicated direction. Attach the |
|
| ||
| 48 |
| ||
Pulley to the Front Leg with an M10 x 68mm |
|
| ||
|
|
| ||
Bolt (85), two M10 Washers (80), two 13mm |
| 51 | ||
Steel Spacers (109) and an M10 Nylon Locknut | 85 80 |
|
| |
(77). |
|
| ||
| 109 |
|
| |
| 10 |
|
| |
|
| 109 80 | 77 | |
47. Route the Leg Lever Cable (51) under the indi- | 47 |
|
| |
cated bars on the Right Base (1). Then, wrap |
|
| ||
|
|
| ||
the Cable under a 90mm Pulley (48). Attach the | 55 51 |
|
| |
Pulley to the Right Base with an M10 x 50mm |
|
| ||
| 48 |
| ||
Bolt (97), two Half Guards (55), and an M10 | 97 |
| ||
Nylon Locknut (77). Make sure the Half | 55 | |||
| ||||
Guards are oriented as shown. | Bar |
| 77 | |
|
| |||
| 1 |
|
| |
48. Wrap the Leg Lever Cable (51) over a 90mm | 48 |
|
| |
Pulley (48). Attach the Pulley, a Cable Trap |
|
| ||
|
|
| ||
(56), and two Half Guards (55) to the second |
|
|
| |
hole from the bottom of the Pulley Plates (60) | 77 |
|
| |
with an M10 x 50mm Bolt (97) and an M10 |
|
| ||
|
|
| ||
Nylon Locknut (77). Make sure the Cable Trap | 55 |
|
| |
and the Half Guards are oriented as shown. | 60 |
|
| |
|
|
| ||
| 56 |
|
| |
| 48 | 55 97 |
| |
| 51 |
| ||
|
|
| ||
49. Wrap the Leg Lever Cable (51) under a 90mm | 49 |
|
| |
Pulley (48). Attach the Pulley to the Right Base |
|
| ||
|
|
| ||
(1) with an M10 x 50mm Bolt (97), two Half | 51 |
|
| |
Guards (55), and an M10 Nylon Locknut (77). | 48 |
|
| |
Make sure the Half Guards are oriented as |
|
| ||
shown. | 97 |
|
| |
|
|
| ||
|
| 55 |
| |
| 55 |
|
| |
| 1 | 77 |
| |
| 22 |
|
| |