USING YOUR OVEN
3. PRESS | YOU SEE | 7. After the | ||
|
|
|
| YOU SEE |
| DELAY |
|
| |
|
|
|
| |
| START |
|
|
|
| TIME |
|
| CLEAN |
|
|
| START | TIME |
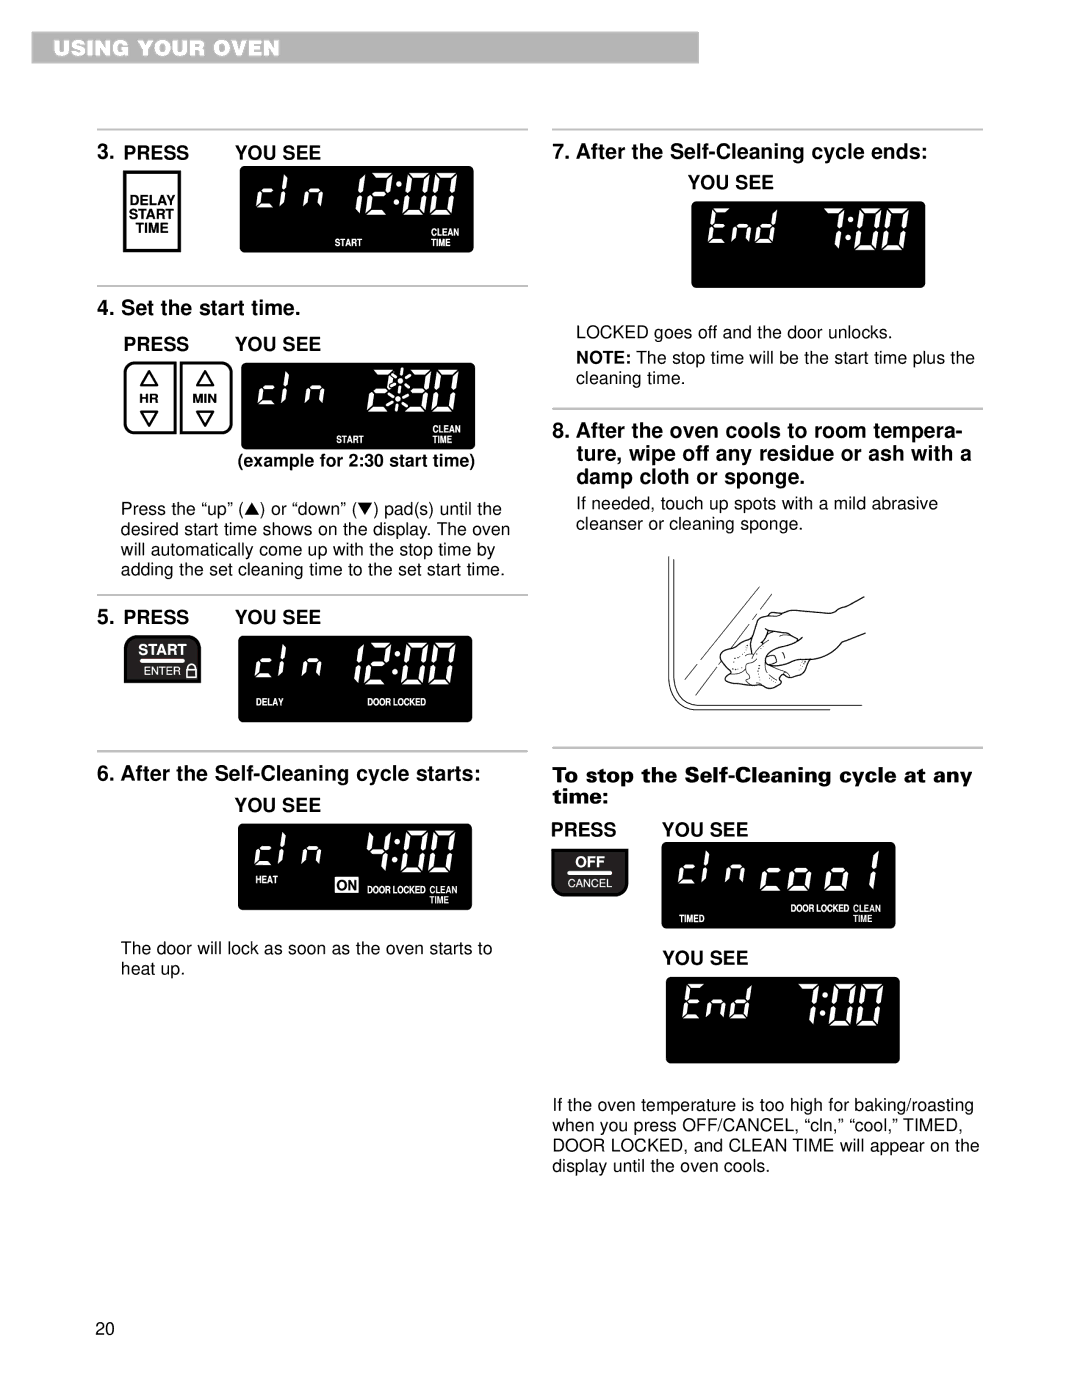
4. Set the start time.
PRESS | YOU SEE |
HR | MIN |
CLEAN
STARTTIME
(example for 2:30 start time)
Press the “up” (s) or “down” (t) pad(s) until the desired start time shows on the display. The oven will automatically come up with the stop time by adding the set cleaning time to the set start time.
5. PRESS | YOU SEE |
START
ENTER ![]()
DELAY | DOOR LOCKED |
LOCKED goes off and the door unlocks.
NOTE: The stop time will be the start time plus the cleaning time.
8.After the oven cools to room tempera- ture, wipe off any residue or ash with a damp cloth or sponge.
If needed, touch up spots with a mild abrasive cleanser or cleaning sponge.
6.After the Self-Cleaning cycle starts:
YOU SEE
HEAT
DOOR LOCKED CLEAN
TIME
The door will lock as soon as the oven starts to heat up.
To stop the Self-Cleaning cycle at any time:
PRESS | YOU SEE |
OFF
CANCEL
| DOOR LOCKED CLEAN |
TIMED | TIME |
YOU SEE
If the oven temperature is too high for baking/roasting when you press OFF/CANCEL, “cln,” “cool,” TIMED, DOOR LOCKED, and CLEAN TIME will appear on the display until the oven cools.
20
